Bullet Journal Key: How To Create The Perfect One For You

As part of the Bullet Journaling for beginners, today we’re talking about another essential spread – the Bullet Journal key.
If you’re new to Bullet Journaling, one of the first things you’ll need to do is create a bujo key. Essentially, your key will be a system of symbols and abbreviations that you use to quickly jot down your daily tasks and events.
In this post, I’ll guide you through the process of creating a bullet journal key and give you some inspiration for different symbols to use. So let’s jump right in and get started!
When you start a Bullet Journal, the first thing you should decide on is how to set up your key because this is a place for you to decipher the Bullet Journal’s secret language – rapid logging.
Don’t worry if any of this is not very clear to you; this post will explain it all!
And be sure to scroll until the end to get some more resources on starting a Bullet Journal, as well as free printables!
What Is A Bullet Journal Key
If you look at a Bullet Journal spread, you might notice that there are special symbols used next to each entry. This secret code is actually a part of rapid logging – a Bullet Journal language.
All information in a Bullet Journal is written in bullets – short sentences paired with symbols that allow us to easily categorize them visually. Your key is a reference guide for these symbols.
The key will help you to:
- Classify your entries
- Stay organized
- Save time and effort
- View your day/week/month at a glance
- Make your entries look nicer and cleaner
Moreover, like all the elements of a Bullet Journal, you can easily customize your key to your own personal needs.
A Bullet Journal key consists of two simple elements: signifiers, and colours.
Signifiers are used to categorize items into tasks, events, and notes. They can also be used to prioritize or mark an item as complete.
Colors are used to categorize items into different groups, as well as draw attention to important items.
Like with everything in Bullet Journaling, you can always make it your own and pick for yourself what symbols you want to use and if you want to use colors at all!
As a beginner, these two elements will give you a good foundation for rapid logging in your Bullet Journal. But if there are additional symbols or signifiers that you’d like to include in your key, feel free to customize it.
Just remember that the key should be a tool to help you make your Bullet Journal system easier and more efficient, not a source of frustration or procrastination.
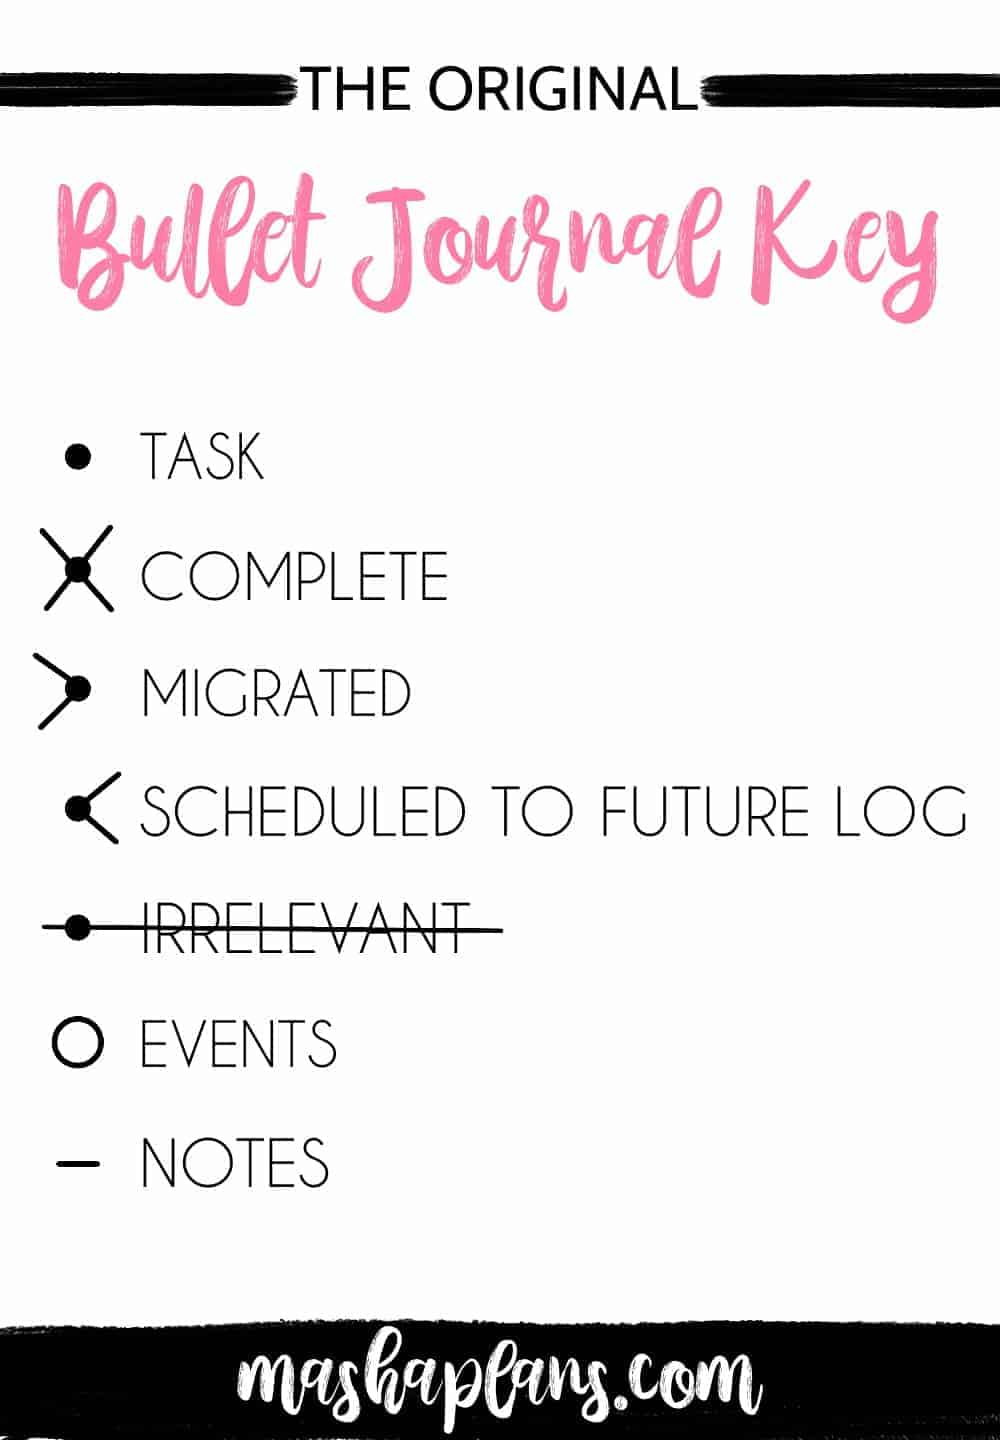
Original Bullet Journal Key
According to the classic Bullet Journal format, all information is divided into tasks, events, and notes. Each of these has its own signifier.
The Bullet Journal key is the place where you write down what signifiers you use and what they mean. It’s practically a code to crack the meaning of your notes.
Tasks are everything that needs to be done and can be indicated with a bullet.
Events are anything you need to attend or remember and can be indicated with a circle.
Notes are additional pieces of information that don’t fall in the tasks or events categories, such as ideas, questions, or reminders. These can be marked with a dash.
Finally, priorities can also be indicated with an exclamation mark.
The key is designed such that it allows you to quickly and easily read the signifiers of your tasks, events, and notes so you can stay organized with your Bullet Journal!
The signifiers also reflect how you are doing with the project: completed, migrated, scheduled, or irrelevant.
> migrated task from the next day
< migrated task to future log
X completed task
Irrelevant task
You can see below an example of the original key setup.
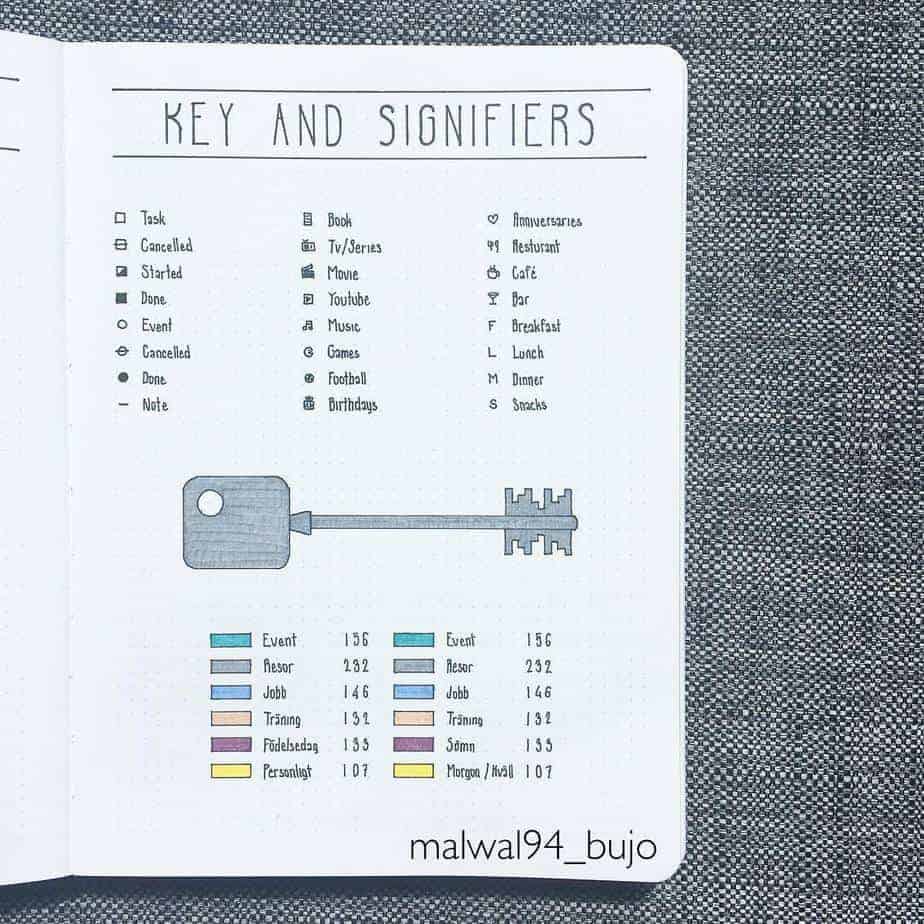
More Bullet Journal Key Signifiers
Bullet Journal is famous for being completely customizable. This is true for your key as well. We all have different needs, so if you need to add some extra division for your notes – add whatever you need.
You probably need a different set of symbols for school than you do for work, so use the original system as a general direction, and feel free to think of your own key.
Here are some of the symbols you might want to add:
– ‘!’ – Breakthrough, a major development in your task;
– ‘$’ – Money-related tasks;
– ‘%’ – Percentage of completion;
– ‘&’ – Collaboration with other people;
– ‘*’ – Important or urgent tasks;
One recommendation, though – less is more, so don’t try to use too many signifiers. They must be simple to remember and straight to the point.
You can also check my image below for extra ideas:

The possibilities are endless, so get creative and make your key as unique as you want it to be. That’s the beauty of Bullet Journaling; customize it to fit your individual needs!
Bullet Journal Key Hacks
To help make sure that your key spread is serving its purpose correctly and providing the most support, I’ve rounded up a few clever hacks to optimize your keys page!
Keep reading to find out how these tweaks can transform difficult situations into cool solutions. With only a few simple changes, they’ll make it easier than ever before stay productive – no matter what life throws at you!
Make It Easily Accessible
You can write down your key at any place in your Bullet Journal, but it’s always best to do it at the beginning. Why?
You will be referencing your key a lot, especially if you’re new to Bullet journaling or if you’re adding some new signifiers this time. So it’ll be more convenient if you make this page easily accessible.
Make it one of the first pages in your Bullet Journal, or maybe add a little flag to the key spread so you can easily find it.
I find that pages that I reference a lot are easier to look back at if they are created on the left side.
It might be a personal preference, but I thought I’d share in case that would work for you as well.
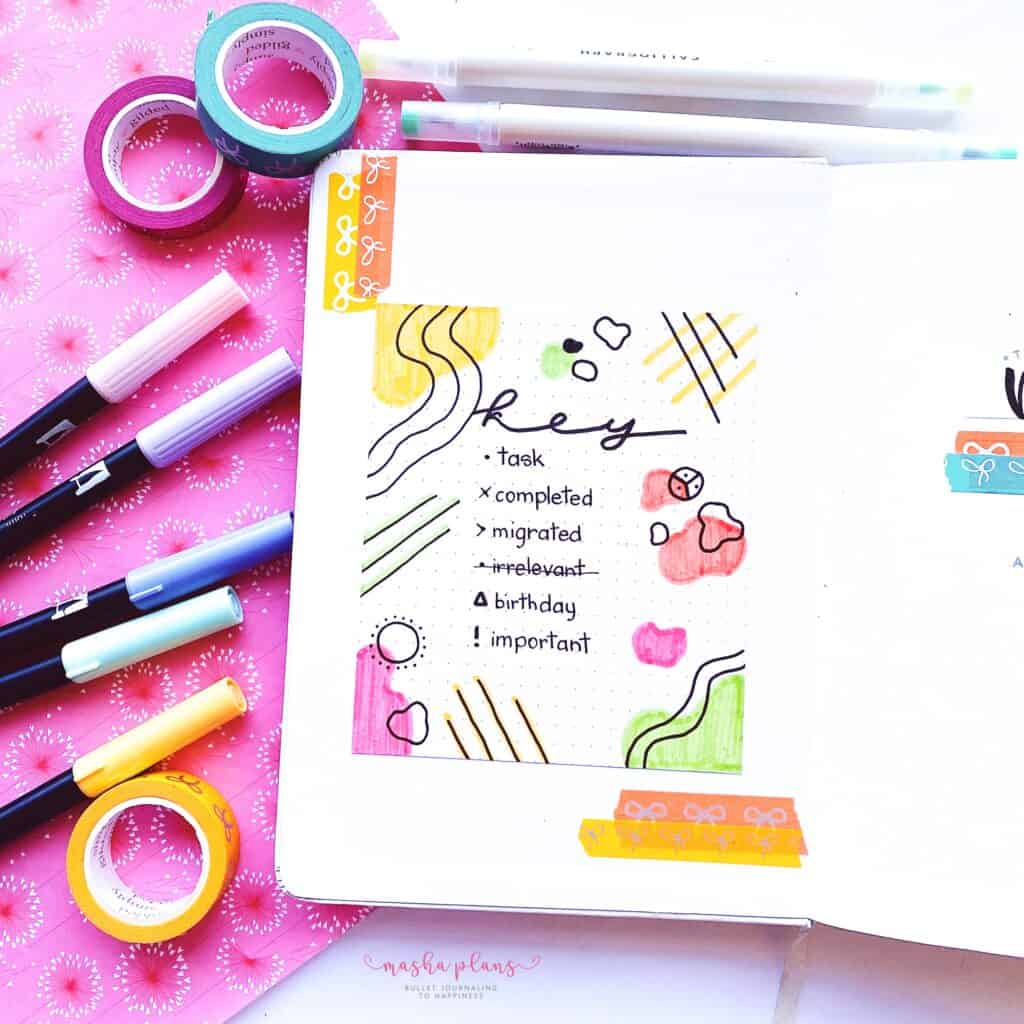
Color Code Key
A lot of people in the Bullet Journal community color-code their journals. Color-coding is assigning special colors to certain things, and this allows you to get a better understanding of the information at a glance. It helps you clarify your entries and makes it easier to visually understand your notes.

You can create colors for different types of tasks, like chores, something urgent, something time-consuming, something important.
Or, you can divide your colors by different areas of your life:
- Home: home improvements, bills, home maintenance
- Family: doctor’s appointments, school events, extra classes
- Personal: hobbies, meetups, health
- Friends: birthdays, meetups, gifts, dinner parties
- Work: deadlines, projects, business trips
- Personal Development: side projects, online courses, books
- Finances: payday, bills, savings
In this key, the colors are assigned to different types of activities. You can think of what kind of things you usually do and start that way.
I also really love the handwriting here; so straight and beautiful.
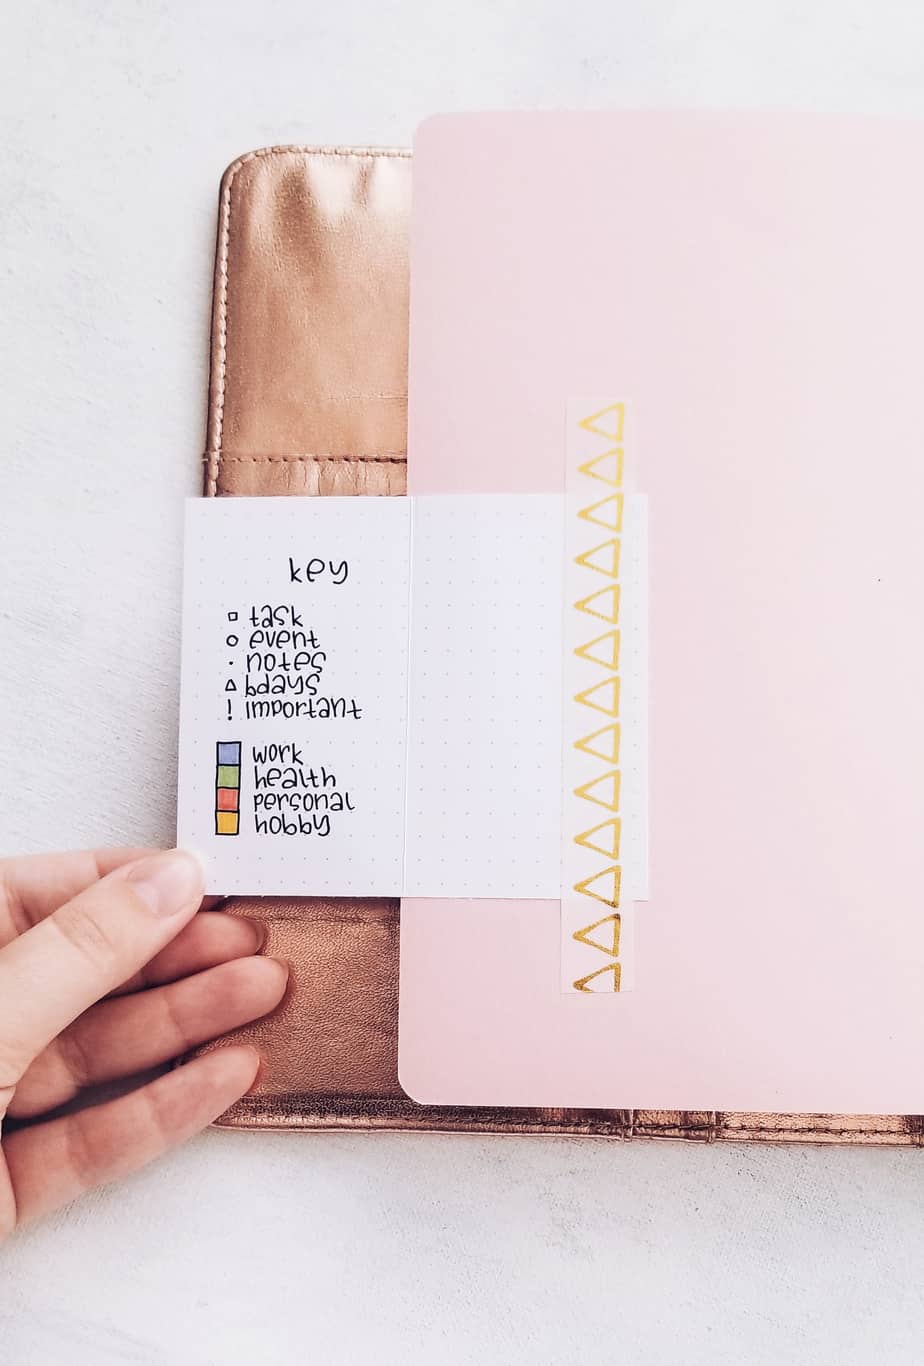
Washi Tape Your Key
Your signifiers are the key to your entries, but I know you often forget what signifiers mean, especially if it’s your first Bullet Journal or if you use a color code. It just takes a while to get used to them all – I sure struggled when I started.
While you can actually just flip through to your first page every time, there is one more option – to use washi tape and add a key to the cover of your journal. That way if you need it you can just flip it out and keep it in front of you while you’re taking notes.
I love this technique because that way, if you don’t need a key anymore, you can just take it out.
Add Key To Your Monthly Log
Another trick you might want to use is to add your key to the side of your monthly log. It’ll be a great help, especially if you use color coding.
Repeating the same colors from your key every month will help you memorize all those better, and it’s easier to find your key in your monthly spread if needed instead of flipping through the whole journal.
Don’t Overcomplicate It
A very important thing to remember is to not overcomplicate your signifiers. Remember, the goal of the signifiers is to simplify your entries.
If you have a million different icons for each kind of task, you’ll get lost in remembering them all, and creating entries will become more confusing than simple.
My Bullet Journal Key
I’ve tried a lot of different things with my code – I used many signifiers, I had color coding. But in the end, I realized that the fewer signifiers I have, the better it works for me.
The fewer signifiers really simplify the note-taking process and allow me to concentrate more on the tasks.
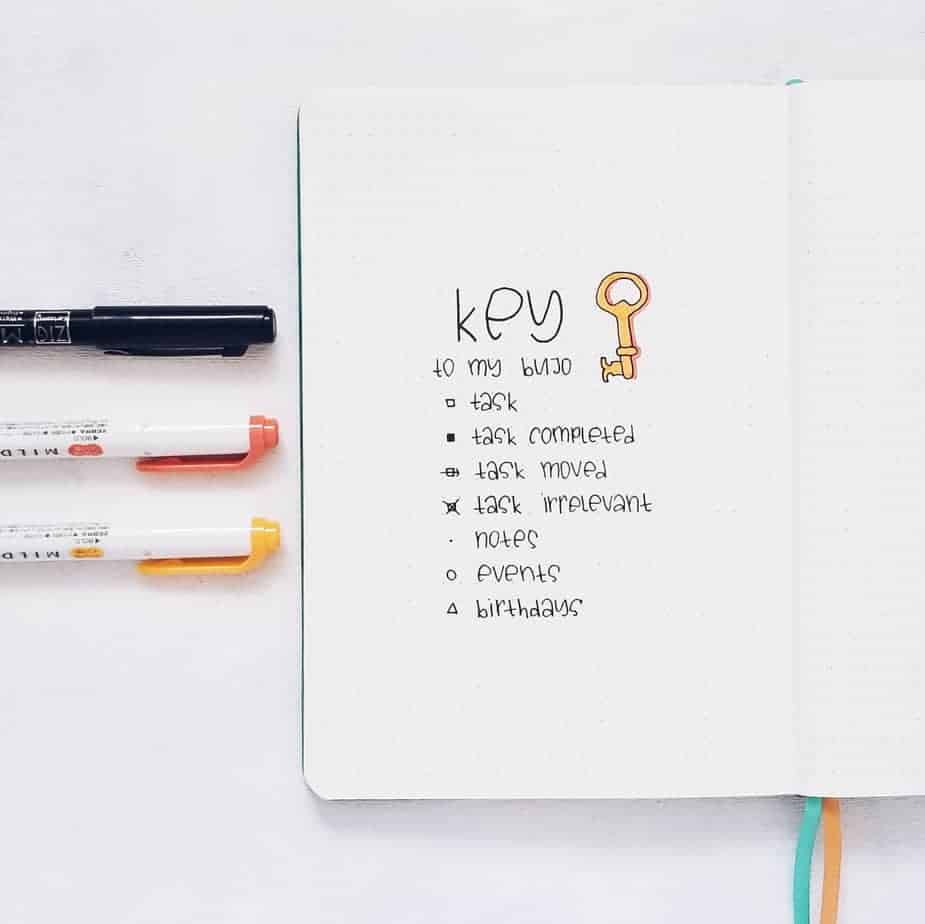
I use little squares for my tasks, which I color when the task is completed. I cross them out for being irrelevant and add a little arrow if I just move them to another day.
For notes, I use just a dot, and for events, a circle. If it’s something very important, I might use an exclamation mark, but I wouldn’t say it’s a part of my everyday key.
And finally, I have a special symbol for birthdays – a triangle. This is really something I’m using mostly in my future log, though, because I love to see from one glance what birthdays I should be prepared for soon.
This post may contain affiliate links. They will be of no extra expense for you, but I receive a small credit. Please see my Disclosure for more details. Thank you for supporting Masha Plans!
Stationery Recommendations
Of course, you’ll need some supplies to create a Bullet Journal key. SO let me recommend some of my favorites before we sit down to create your key spread.
You can definitely use any supplies you have, but if you’re looking for recommendations, here are some of my favorites:
- Sakura Pigma Micron – a good fineliner is the basis of any Bullet Journal page, and these fineliners are some of the best.
- Crayola Super Tips – these markers come at a good price and have so many different colors.
- Tombow Fude Brush Pen – these are wonderful brush pens that will allow you to create beautiful brush lettering headers.


How To Create a Bullet Journal Key
A key helps you to organize your journal, and it makes it really easy for you to quickly find what you need.
When you sit down to create your Bullet Journal key, I really recommend you to take some time and think a bit about it.
Here is how you approach this process.
1. Think About What You Need
Take a minute to reflect on your everyday life. What do you need to log in to your journal? Are you a student and need to write down lots of school-related things? Or a mom who needs to divide her schedule between her kids?
This will help you see your symbols’ needs.
2. Choose Your Signifiers
You can make your own signifiers or use the ones already created by other Bullet Journals users. I would recommend starting with the basic symbols and working from there.
Don’t make your list of symbols too complicated in design – remember it’s something you should be able to quickly jot in your BuJo.
Just be sure that you decide on the meaning of each symbol before using it in your journal!
3. Create a Color Key (Optional)
If you want to have an easier time when flipping through pages in your journal, color coding will come in handy!
Find colors that go together and assign them meaning like “events”, “to-do tasks”, “ideas”, etc.
4. Organize Your Signifiers In The Key
Finally, write them down on an easily accessible page. The easiest way it’s just to write a Key on the top of the page and write down your signifiers and their meaning below.
If you’re also using color coding, you might want to do it in two columns.
I have two tips for you here:
- Create your spread in pencil first. This will allow you to center everything better and avoid mistakes.
- Leave some space for any modifications. As you go you might find yourself in need of some other signifiers, so leave space to write them down here later.
5. Update The Key Occasionally
Don’t forget to update your key once in a while. Maybe you track more things now that need extra signifiers or maybe you want to change the color coding scheme.
Don’t be afraid of making changes – it will make using your BuJo way easier!
Free Bullet Journal Printables
As usual, I do my best to create a ton of freebies for you to start Bullet Journaling right away. Already in the Resources Vault you can find a printable key spread!
If you don’t have access yet, you can always sign up in the form below.
Once you confirm your subscription, you’ll get the password to get 50+ free Bullet Journal printables, stickers, and worksheets to use right away.
If you’ve never used printables before, be sure to check my post How To Use Printables In Your Bullet Journal.
It’s pretty basic, and you can find all the supplies you need in my post Supplies For Using Bullet Journal Printables.
More Resources
If you’re looking for more resources for starting a Bullet Journal and learning about the basic pages, you’re in the right place.
Here are some posts to check next:
- Ultimate Guide To Bullet Journal for Beginners
- Bullet Journal Index
- Bullet Journaling Terms Every Beginner Should Know
Hope this post was interesting; if you find it so, please share! If you enjoy my content and want to show your appreciation, please consider supporting me with a cup of coffee.
And remember: Keep Bullet Journaling, and Don’t Be A Blob!


