Owl Paper Planner Review: Bullet Journal & Planner Hybrid

Finding the perfect tool to organize your thoughts, goals, and tasks can feel like a never-ending search. There are countless options out there, but what if you could combine the creativity and flexibility of a Bullet Journal with the structure and efficiency of a traditional planner?
That’s exactly what the Owl Paper planner aims to deliver. This hybrid solution promises the best of both worlds, catering to those who crave customization without sacrificing practical functionality.
In this review, we’ll explore how this unique planner stands out, its design features, and whether it truly lives up to its potential as a versatile planning companion.

The idea of “planner peace” is one that resonates deeply with anyone who’s tried to organize their life on paper. It’s that elusive, perfect balance where your planner works seamlessly with your life, helping you stay on top of everything while feeling inspired and in control.
Yet, as many of us know, reaching that state can be a moving target. Your planning needs to evolve just as your life does—what worked last year might not make sense today.
You might crave the creativity and freedom of a Bullet Journal one day, only to feel like you need the structured approach of a pre-made planner the next. Finding a solution that bridges those extremes can start to feel impossible.
That’s where the Owl Paper planner steps in. Designed as a hybrid between a Bullet Journal and a planner, it aims to meet you exactly where you are, whether you lean toward structure, customization, or a little of both.
Marisa, the talented creator behind Owl Planned, knows this struggle all too well. After searching high and low for a system that fit her needs and coming up short, she decided to take matters into her own hands. She created the Owl Paper planner to offer an option that blends flexibility with functionality in a way that no other system out there could.
When Marisa first told me about her planner, I was intrigued. She graciously sent me a copy to test out, and I’ve spent the past year putting it through its paces. After twelve months of using this hybrid planner, I’m thrilled to finally share my thoughts.
If you’ve been on the hunt for a solution that helps you find your own planner peace, this might just be the tool you’ve been waiting for. Keep reading as I break down what makes the Owl Paper planner so unique and why it could be the answer to your planning prayers.
This post may contain affiliate links. They will be of no extra expense for you, but I receive a small credit. Please see my Disclosure for more details. Thank you for supporting Masha Plans!
General Information
Let’s start with some general details of the planner, and there is a lot to go through. We will talk about every aspect in detail, but to begin with, let me just share the basic information.
Here are all the basics of this planner:
- B6 Size
- Softcover
- 6 month breakdown
- 320 Tomoe River paper pages
- Pre-made calendar and weekly spreads
What does it all mean? This means that you have a smaller-sized light journal that is easy to carry around and very convenient to plan since it already has all the pre-made planning pages you need.
For each year, there are two Owl Paper planners: one is January-June, and other one is July-December. The best part is that you can get them both or just one to give it a try for half a year and see if it works for you.
But of course, with all the new features, you lose some other ones, so let’s look in detail at each characteristic so you get a better idea about the planner and what it has to offer you.
Size And Color
First of all, let’s talk about size. Your usual Bullet Journal is an A5 size and pretty thick as well, with just around 160-190 pages.
This notebook has 320 pages, and yet it’s thin and pretty light. It also is a B6 size. It deons’t mean that you have less space to add your data, it just means that the grid there is smaller.
In comparison, here is an Owl Paper planner together with an A5 Archer and Olive journal, which has 160 pages.

As you can see, size-wise, an Owl Paper planner is much smaller, so it would be more portable. This is perfect if you have a habit of always having your journal with you and planning on the go.

As you can see in terms of thickness, even though the Owl Paper planner has basically twice the pages of Archer and Olive, it is significantly thinner, making it lighter as well.
Owl Paper planners have a soft cover, which means they are not that sturdy. But if you carry your planner with you all the time and need some extra protection, do not worry! Marisa also created some beautiful covers for your journal, so it’s always safe and protected.

I really love this cork cover, but there are many other options available, from a transparent cover to almost a planner pouch type of cover.
Next, let’s talk about the covers and the color options because, of course, we want to have a planner that reflects our style and aesthetics.
As I mentioned before, there are two planners a year, and each comes in different colors.
When I got mine, there were just three colors, but now Marisa added more, and they all look stunning!
For the first half of the year, January-June planner, you can choose between light blue and rock grey.
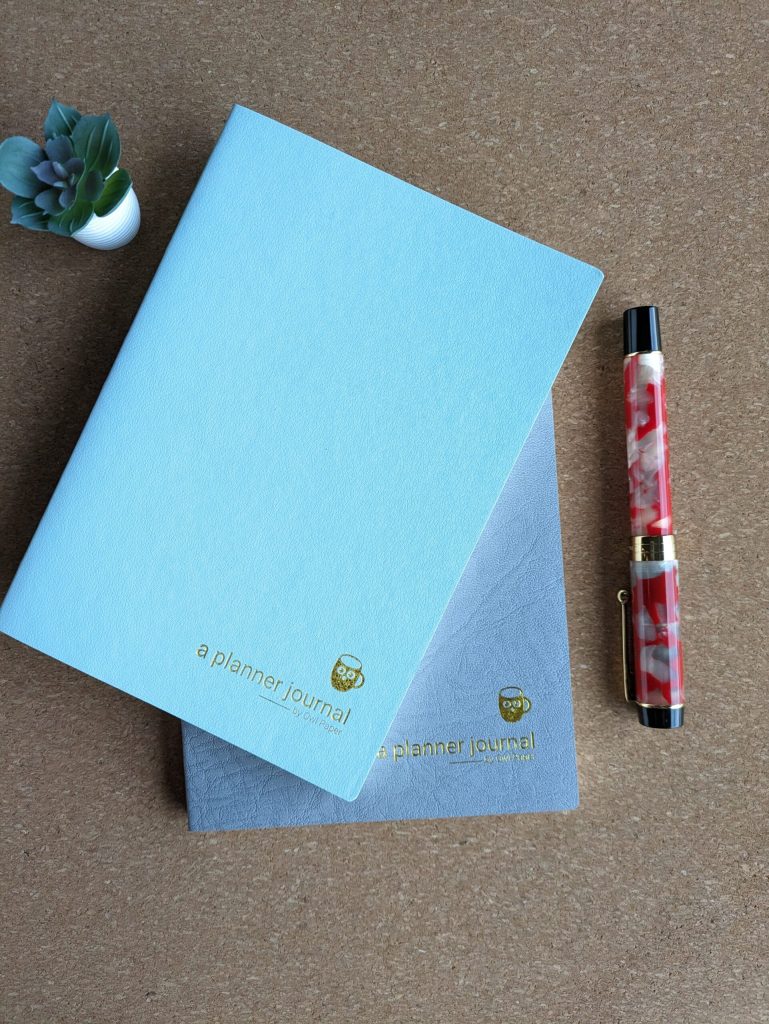
For the second part, July-December planner, the color options are leather brown and peach. Of course, Marisa has much more creative and fun names for the colors!

As you can see, the covers also have silver or gold embossing on the bottom right corner, and I think it makes them look very stylish.
Now that we have talked about the looks let’s look at what’s inside, starting with the paper.
Paper And Pen Test
Paper is an important part of the journal, and planners use paper that is different from your usual Bulelt Journals.
Owl Paper planners use Tomow River pages, which are thin (52 GSM vs the 120-160 GSM most Bullet Journal notebooks have) and very smooth. Also, unlike other Bullet Journal notebooks, Own Paper has a proper grid and not just a dot grid.
The grid is also smaller than the usual 0.5 cm dot grid journals. This works very well for me and my smaller handwriting, but it’s definitely something to consider.
Here is the grid comparison image for you.

Ok, so I dumped a lot of information; what does it mean? Let’s look at the pros and cons of using that different type of paper.
Oh, and if you’ve ever used a Hobonichi planner, you’ll know exactly what kind of paper it is.
Pros of the paper:
- Because it’s much thinner, you get to have 320 pages to plan and be creative at while having a small and very light journal.
- A smaller grid allows you to fit just as much information in less space. I know I usually find the bigger grid too big, and these planners solved this issue for me.
- It’s smooth and so pleasant to touch!
Cons of the paper:
- Because it’s thinner, you will have a lot of ghosting and, with some pens, maybe even bleeding.
- Smaller grids and smaller pages mean less space for creativity.
- You probably won’t be able to use strong mediums like watercolors.
- It’s thin but sturdy. I never really ripped a page, but I did end up having quite a few wrong folds, so you do need to be a bit more gentle with it.
Now, for the moment, we’ve all been waiting for – a pen test! After so many moves I’ve made in the past few years, I don’t have a large stationery collection anymore.
But here is the pen test for all the pens I do have.

None of them are very heavy on the ink, so they all went pretty soft on this paper. As you can see below, there was ghosting, but it wasn’t really that bad, and it didn’t end up bothering me at all.
For me, it almost feels like a special aesthetic to use this type of paper.

Another thing I noticed, by the way, was that because I put basically my entire body weight behind my pen when I’m writing, you can actually feel the writing texture. Like on the back of the page, when you touch it, you can feel the outline of the text written.
I kind of liked it, but it is something different from the dot grid journals I’m used to, so I thought I’d mention it. And actually, this effect didn’t exist when I used fineliners, just the usual gel or ballpoint writing pens.

Something interesting I thought I’d mention.
Now, let’s look inside and see what this planner has to offer!
Inside The Planner
Time for us to dive in and look at all the things inside that planner that make it such a fun and unique journal.
There are basically four different sections. First is the introductory section.
Introductory section
Here, you have your usual welcome page, the author page, and three important pages for yearly planning.
First of all, there is an Index page, and considering that all the pages here are numbered, it’s a very convenient way to find any information you need.
It basically means that you don’t have to go more linear like you would with a Bullet Journal, so it’s fine to have different pages for the month in different areas of your journal. You’ll still be able to find any information you need easily.

Next up is two pages for your goals. I didn’t use this page much, but it’s good to know that the creator added this space for you. And actually, you can easily repurpose it for anything you need.
As you can see, there is a little header for the page, but it would be easy to cover it up and create a different header if you need something different.
The final page in the first section is a space for a future log. Since the planner is for 6 months, it provides you with well-divided 6 sections to plan your half a year.
I decided to add calendars because I really like having calendars in my future log (even when I don’t really use it), but you really don’t have to; you could just add the name of the month and dive right into it.
The next section is the monthly planning.
Monthly Planning Section
There are monthly logs for each month, and they are all in calendar view, which for me was a big plus since it’s the format I love the most.
Around each monthly log, you get plenty of free space to add anything else you need, or just to use it for decorating.
After each monthly log, you also get two more free pages to use for whatever you need. My favorite way to use them is to create a brain dump and sort out all the tasks and thoughts I have for the month.
But you can definitely use these pages for your monthly trackers or anything else you need.
Next section is the weekly planning.
Weekly Planning Section
Weekly planning is like vertical weekly spreads with an option to actually schedule your tasks each day. Each day has time from 5 am to 9 pm, so it really covers most of your day.
Having a way to assign tasks in a timely manner can be more beneficial for your productivity since it will allow you to block or batch your tasks.
And if you don’t feel like using the time, you can always write on top of it or maybe use some thin washi tape to cover it up.
I also like that around the weekly spread itself, there is plenty of space to add any other information you need.
The weekly spread section also has little color coding on the side, so you can easily find your weekly spreads for the ongoing month.

Personally, I prefer tabs, so if I used this function, I’d add some washi tape tabs or maybe monthly tabs that you can buy off Amazon.
Now, let’s move on to the final section.
Blank Pages
The last section is what really makes this planner special! After the weekly spreads, you get around 234 blank pages!
That means you have all that space to add anything else you need from your journal.
Add more trackers, use this space for notes, or maybe just use it to be creative – it’s all up to you.
The idea is that this plan gives you structure but also a lot of freedom to customize, create pages that help you with your life, and really make it your own.
I used this space for some day-to-day notes, projects, and monthly pages like mood tracker and gratitude log.
Final Thoughts On Owl Paper Journal
Ok, now you know all the details of the Owl Paper planner, and I hope you have an idea of whether it’s something you’ll love using or not.
Either way, I wanted to have this little section to summarise all the pros and cons of this planner.
Again, this is based on my own opinion and my own planning needs; some things that I consider cons might be pros for you or not big deal breakers.

So here is my list, and you can check and decide if it’s also something important for you or not and whether this system works for you.
Pros of the planner:
- It’s small and lightweight, so it’s convenient and easy to carry with you and always have on hand.
- It has 320 pages, including 234 blank pages, so you have plenty of space to add all the information you need day to day.
- There are pre-made pages for day-to-day planning, so you can dive in and start using it right away.
- Weekly pages have an option to time schedule your tasks.
- The paper is smooth and so pleasant to touch!
- The pages are numbered, and there is a page for index, so it’s always easy to find any information.
Cons of the planner:
- The paper is thin, so there is ghosting, and there might be bleeding with some pens.
- Pre-made weekly pages are all in vertical format, which could be a minus if you prefer to plan differently (like in horizontal format or maybe using daily logs).
- The structure is different; your monthly pages are not all together. This is not necessarily a con, to be honest, but even with the index, it was still a big thing for me to adjust to.
In short, I think it’s a great system, and it will surely give a lot of people options.
For me, it was a really fun experiment, especially during the busy year I’ve had. But I’m coming back to Bullet Journaling – I really missed all the space and creativity of making your own weekly pages.
But I also don’t really take my journal out of home a lot, and I use more than just one journal, so I don’t need that many pages for planning. If you’re looking for a planner that is easy to always have with you and has plenty of space for you to take ALL the notes, this one is definitely perfect!
Now that you have heard of all my thoughts and all the information about the planner, what do you think? Would you use it for your planning? Leave your thoughts in the comments!
More Resources
There are many more amazing journals and planners out there, and I have quite a few reviews on this blog.
Here are a few more posts for you to check out next:
- Bullet Journal Review: Archer and Olive Dot Grid Notebook
- Planner VS Bullet Journal: Which Is Better
- Nuuna Journal Review: A Notebook Like No Other
>>> Share your thoughts in the comments; I’d love to know if this planner is a good fit for you!
Hope this post was interesting. If you find it so, please share! If you enjoy my content and want to show your appreciation, please consider supporting me with a cup of coffee.
And remember: Keep Journaling, and Don’t Be A Blob!


Thanks for reviewing this journal, Masha. I’m sure it will work great for some folks. It seems like there would be too much flipping back and forth as you use this journal, because of how things would be spread out, and all the blank pages.. unless I misunderstood that part. Over time I have tailored my bullet journal to my needs so much that it has very few of the original Ryder Carroll bullet journal elements. I’m sure that is quite common. Thanks for your review!
Hey Karla, thank you for the comment! Yes you understood correctly, there is a bit of flipping back and forwards. But you’re also right that there surely are people who will find this structureworking for the m and pre-made pages useful. I’m glad you figured out your own Bullet Journal system that works for you =)