Step-By-Step Guide To Bullet Journaling For Beginners
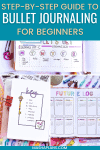
This blog post will be your trusty compass in the world of Bullet Journaling for beginners, guiding you through the maze of indexes, collections, and monthly spreads with the ease of a seasoned explorer.
Remember the first time you tried to flip a pancake and ended up with a somewhat charming, albeit lopsided, breakfast? That’s a bit like starting your first Bullet Journal—full of hope, a dash of uncertainty, and bound to get a little messy.
But fear not! Just as you didn’t give up on achieving that perfect golden-brown pancake, I promise you, the art of Bullet Journaling will become second nature with a bit of patience and practice.
Embarking on this journey, you’ll discover more than just a way to jot down appointments and tasks. You’re about to unlock a creative outlet that marries the practical with the personal, turning everyday planning into an exercise in mindfulness and self-expression.
So, let’s chuckle at our mistakes, celebrate our wins, and maybe misplace our favorite pen along the way (it’s always in the last place you look). Together, we’ll navigate this Bullet Journal adventure—one dotted page at a time.
Bullet Journaling is this incredible, totally customizable way to plan your day and keep a laser focus on your goals. And if you’ve got a creative streak itching for an outlet, oh boy, are you in for a treat!
However, I get it—the sheer customization can turn into a double-edged sword. With endless ideas and planning styles out there, it’s like standing in the world’s most overwhelming ice cream shop trying to pick just one flavor. “Do I want chocolate chip today, or am I more of a mint choc chip person? Wait, they have unicorn sparkle flavor?!” Yep, starting can feel just as daunting, especially if you’re new to the Bullet Journal scene.
I vividly remember my early days, scrolling through pages upon pages of Bullet Journal inspo, feeling both amazed and slightly panicked. “What on earth is Bullet Journaling really about?” I’d wonder, as I tried to make sense of all the creative spreads and tracking systems.
But hey, here’s the good news—you don’t have to wade through the sea of information alone, trying to piece together the puzzle. I’ve been down that rabbit hole, and I’ve come back with a treasure map!
This post is pretty much your golden ticket, designed to smoothly guide you through each step of setting up your very first Bullet Journal. One that’s tailored just right to suit your needs.
So, grab your notebook and pen, and let’s embark on this journey together. By the end of it, you’ll not only have a functional Bullet Journal but also a space that allows your creativity (and productivity!) to soar.
You can also check the end of the post for my FREE course on Bullet Journaling for beginners, where you’ll find even more information for your journey.
Step-By-Step Guide To Bullet Journaling for Beginners
There are a few steps in this process, but I’ve got you covered with all the information you need and all the best recommendations for you to quickly get it all started right away.
In t this post, we’ll go over all the basics, but a very important thing for you to remember is that this is an outline, but it’s up to you to choose which of these ideas you’ll use and which ones you won’t.
The best way to figure it out is to try the basics and then, as time goes on, keep customizing it, throwing away the pages that don’t work for you and keeping just the ones that help.
With that being said, let’s dive in.
This post may contain affiliate links. They will be of no extra expense for you, but I receive a small credit. Please see my Disclosure for more details. Thank you for supporting Masha Plans!
Step 1: Get Your Supplies
First things first, you’ll need to get some supplies to get started. Well, actually, you don’t; you can start your Bullet Journal with any supplies you already have. After all, all you really need is any notebook you have lying around and any pen you have.
But let’s be honest: half the fun of starting a Bullet Journal is buying all the cute supplies. Plus, sometimes, an extra-aesthetically pleasing journal is the right thing to help you keep up with that new habit.
Whichever you choose, I just wanted to share with you some of my recommendations so you get the great supplies you’ll love using.
- A journal. And even though you can get any journal you want, I’d definitely recommend a dot grid one, with is a favorite in the Bullet Journaling community. You can go fancy with Archer and Olive (get 10% OFF with my code MASHA10), or with something more affordable like the Scribble & Dot Bullet Planner/Dotted Journal.
- A writing pen. You’ll do a lot of writing to it’s a good idea to have a good pen you lie to write with. I love Muji pen for thin lines and Pilot G2 Pen for thicker ones.
These are all you really need to get started. But if you’re looking for some recommendations on a few extra things, there you go.
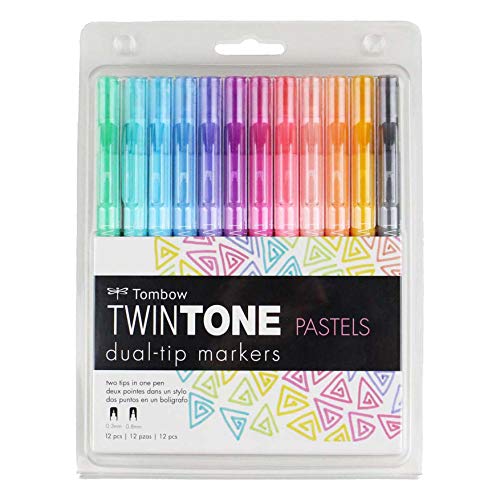
- Fineliners. There will be a lot of drawing and adding lines on your bullet journal pages, and you need a good pen for that. I’d recommend a set of fineliners, like these Sakura Pigma Micron pens, that also come with different nib sizes to have a wider variety of line thicknesses.
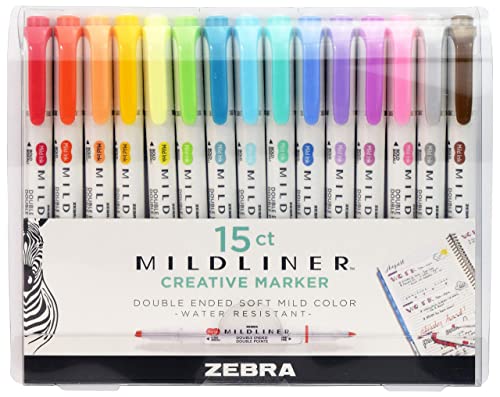
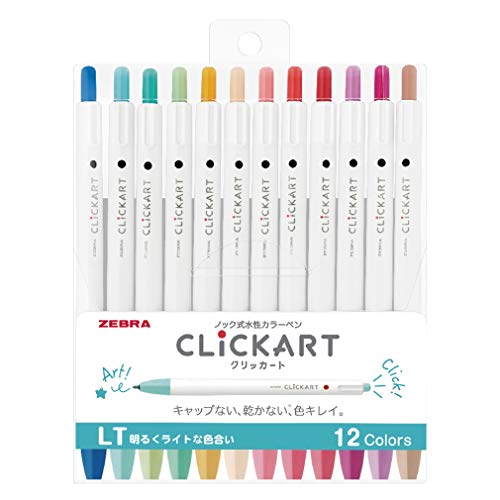
- Markers. If you like adding color to your Bullet Journal pages, you could use some markers. I recommend starting with Crayola Super Tips, which are affordable and come in many colors.
- Brush pens. If you want to decorate your spreads with some beautiful brush lettering, you’ll need some brush pens. I recommend Tombow Fudenosuke, which are small tip brush pens that are perfect for beginners, and Tombow Dual Brush Pens for large brush pens and more color options.
- Washi tapes are perfect for quickly adding decoration to your Bullet Journal pages. There are so many different styles and designs that you can definitely find one that fits your aesthetics. If this is a new item for you, try a few and see how you like it. My bet is that you will not be able to say no to these beautiful and very practical roles of happiness.
- Stencils. The final amazing item on this list is stencils – they are your shortcuts to creating beautiful pages in half the time! I recommend starting with these stencils from Amazon.
I can talk stationery for hours, but let’s move into the next step.
Step 2: Find Your Why
Ah, I can almost see it now—you, surrounded by an arsenal of pens, a stack of notebooks, and enough stickers to rival a stationery store. You’re all revved up and ready to leap into the world of Bullet Journaling, aren’t you?
Hold your horses, my enthusiastic pal! Before you let that pen grace the first empty page of your notebook, might I nudge you to pause for a second? There’s a sneaky yet utterly pivotal step you might have glossed over setting your Bullet Journal goals.
“Goals? In a journal?”. Yep, you heard me! Your Bullet Journal isn’t just any old diary; it’s a powerful tool waiting to be wielded with purpose. Those goals of yours? They’re the secret sauce that will shape your Bullet Journal into a bespoke masterpiece, tailor-fitted to snugly suit your life and aspirations.
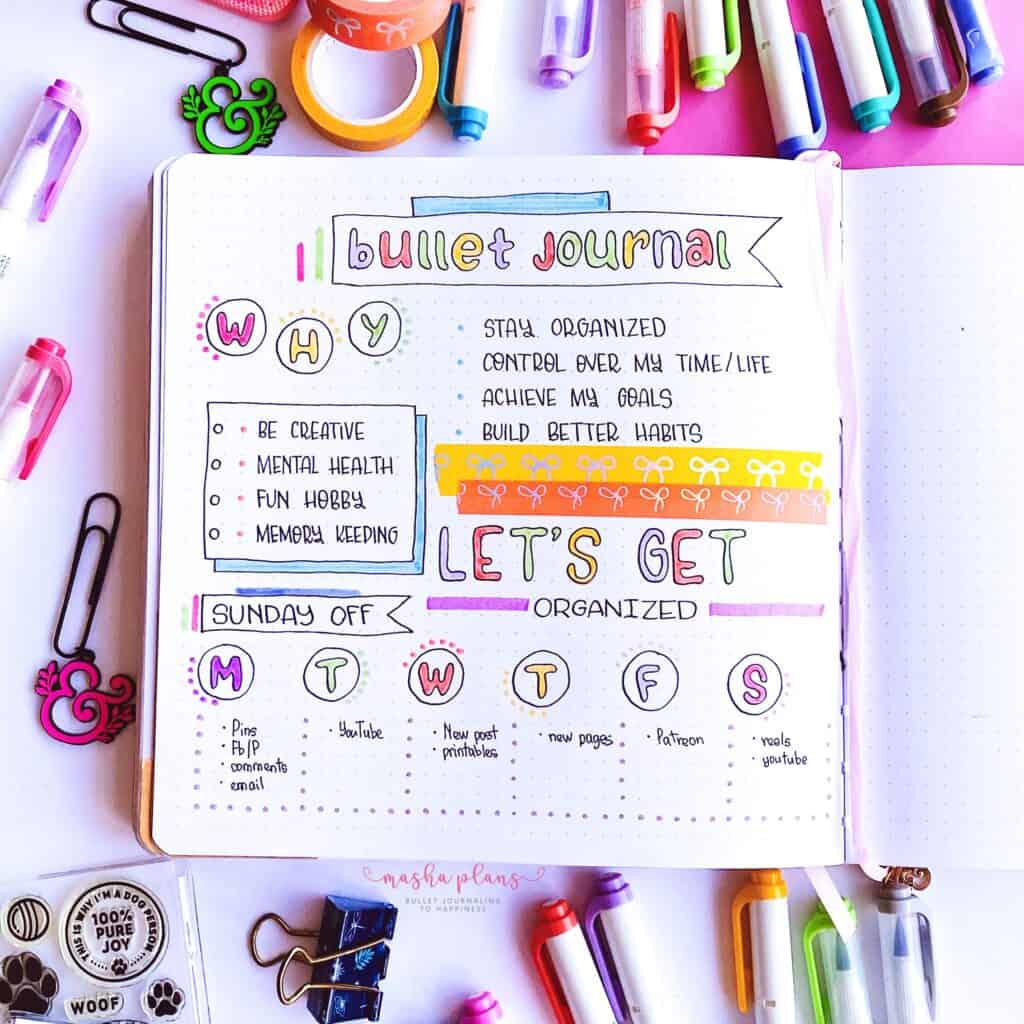
Think of your goals as the architectural blueprint of your Bullet Journal. They’re what will steer this ship in the right direction, ensuring every dot, line, and doodle serves a purpose.
Your Bullet Journal goals will help you figure out what pages to use and definitely will help you stay motivated when the novelty of Bullet Journaling wears off, as it always happens with pretty much everything.
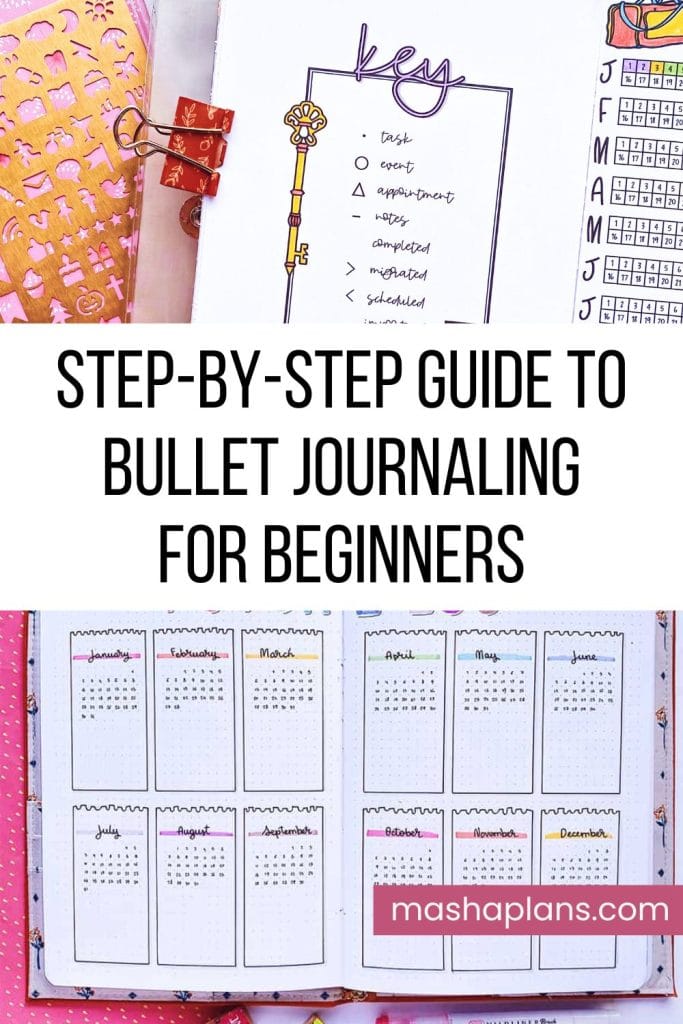
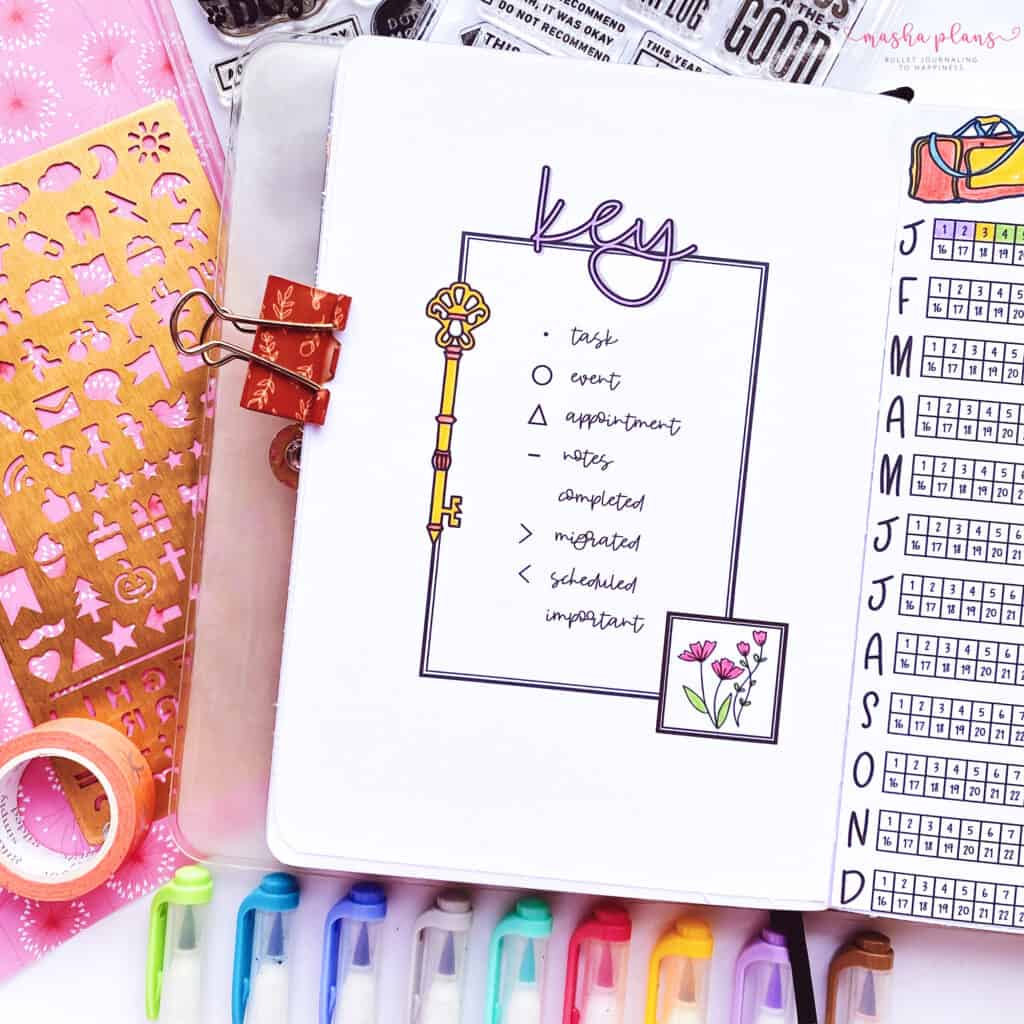
Step 3: Bullet Journal Key
The key is the heart of your Bullet Journal – think of it as your very own secret decoder ring. This nifty little section is where you’ll scribble down all those clever symbols (or signifiers, if we’re feeling fancy) that are about to make logging your life’s details quicker than a wink.
Let’s talk about the big three symbols you’ll be cozying up with:
- A Dot (•) for tasks.
- A Dash (–) for notes.
- A Circle (O) for events.
This page is like creating a cheat sheet for your future self, making sure you can find what you need at a glance.
Now, here comes the part where Bullet Journaling really gets its wings – customization. As you settle into this journey, you might find yourself itching to add new symbols or maybe give a little makeover to the ones you started with.
And guess what? That’s more than okay; it’s encouraged! The aim here is to craft a system that simplifies your life, not one that feels like you’re deciphering ancient hieroglyphs.
However, let’s not forget – experimenting is half the fun of Bullet Journaling. Feel free to dabble with different symbols, splash some color around, or even invent a code that would make a spy jealous. The quest for that “just right” combination that makes your journal feel like home is part of what makes this whole process so special.
Simply remember now not to overdo it. Too many signifiers can become overwhelming, and then they will stop serving their original purpose.
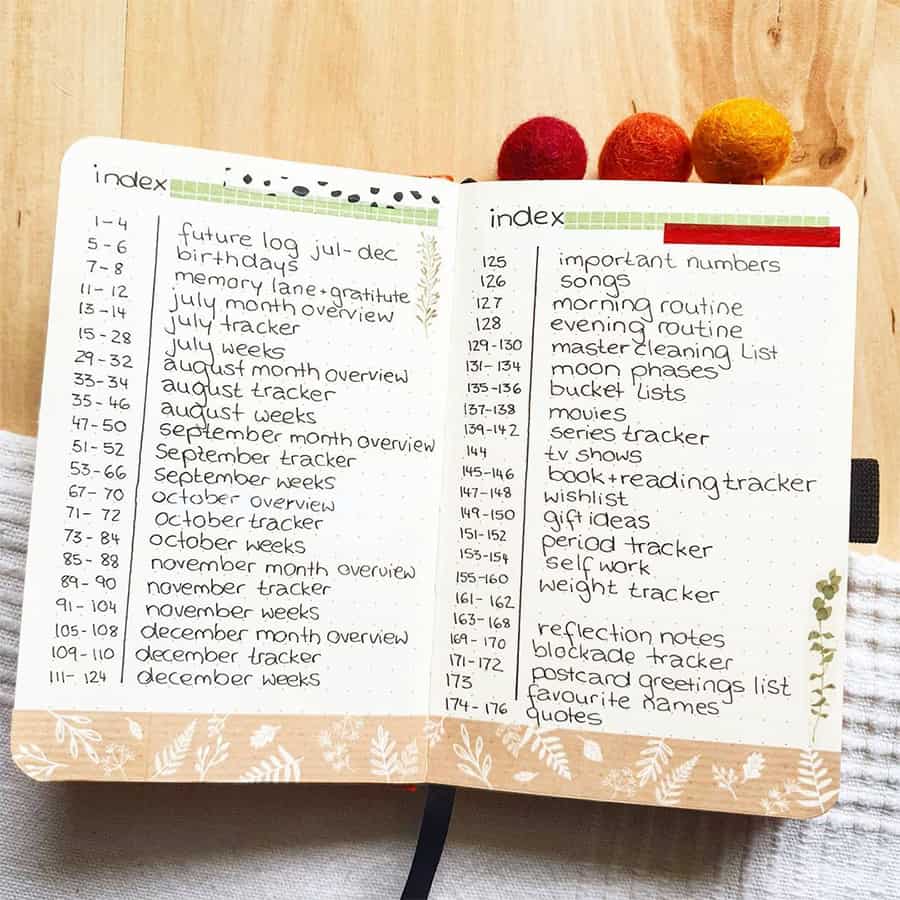
Step 4: Bullet Journal Index
The next page to create is your “Index”. Picture it as the GPS system for your Bullet Journal – this nifty feature is your golden ticket to navigating your entries like you’ve got a map to hidden treasure!
So, what’s an Index, you ask? Imagine it as your Bullet Journal’s very own table of contents. Pop it right at the beginning, and bam! You’ve got yourself a quick reference guide to all your musings and masterpieces.
Every time you whip up a new section or dash off something utterly brilliant, don’t forget to slap a page number on it and scribble it down in your Index. This way, when you’re on a mission to revisit that genius idea you had last Tuesday or that doodle that had you chuckling, all you need to do is make a beeline for your Index, find the page, and boom – there it is. Say goodbye to the days of thumbing through page after page; your Index is here to save the day.
Now, let’s get a tad personal. Here’s a juicy confession – I don’t actually use an Index in my Bullet Journal. Gasp, I know! But here’s the beauty of Bullet Journaling – it’s all about making it your own.
So, even though I’m living life on the wild side without an Index, I’m a big advocate for testing the waters with it, especially if you’re just dipping your toes into the Bullet Journal pool. Give it a whirl, feel it out, and then you do you. Decide if it’s going to be your trusty sidekick or if you’re more like me, a bit of a rebel. Either way, it’s all good!
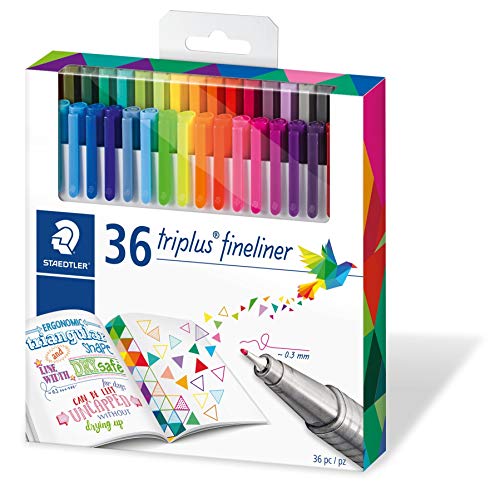
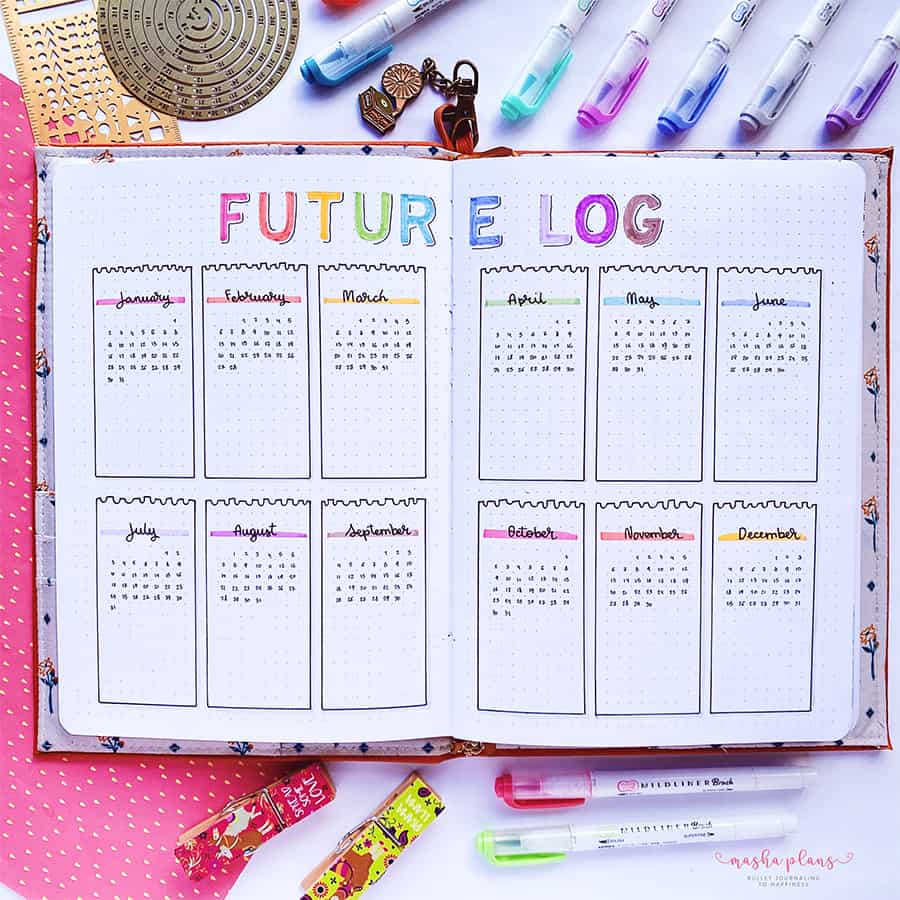
Step 5: Future Log
Okay, with your Index in the bag, it’s time to zoom out to the next horizon on your Bullet Journal journey – cue the Future Log.
Imagine the Future Log as your very own crystal ball, offering you glimpses into the days ahead.
This is the spot in your Bullet Journal for jotting down events, tasks, and deadlines that are on the horizon, beyond the current month. From Aunt Sally’s epic birthday celebration a few months down the line to that looming project deadline at work, the Future Log is your trusty sidekick, ensuring you never miss a beat. It’s like having a panoramic view of the future, always keeping you one step ahead.
Crafting your Future Log is a breeze. Just grab two pages, sketch out three horizontal lines across both, followed by two vertical lines down each to create twelve neat boxes for the year. If you find yourself needing more room, simply extend your canvas to four pages and carry on.
While I’m all for decking out each month with its own mini calendar for a touch of detail, remember, that’s just icing on the cake. The key here is to keep it straightforward and manageable. Ease into it, and avoid diving into complexity right off the bat.
Once your Future Log is in place, it becomes the central hub for migrating important dates and tasks to your monthly and daily logs, seamlessly bridging your personal and work life.
And hey, don’t forget to swing by your Index to note down those Future Log pages. Keeping everything organized and easily accessible is what makes your Bullet Journal so powerful. After all, it’s about smoothing out the bumps in life’s road, giving you clarity and control, no matter what lies ahead.
Step 6: Monthly Log
Alright, team, it’s time to flip that page and dive headfirst into the wonderful world of monthly logs.
And guess what? You don’t need to twiddle your thumbs waiting for a new month to dawn. Nope, you can start your monthly log smack-dab in the middle of the current month if that tickles your fancy. Talk about bending the rules to your will!
Now, I’ve seen some folks turn their monthly logs into a full-blown art project with swanky cover pages that could make a scrapbooker weep with joy. If that’s your vibe, I say unleash your inner Picasso and have at it! But if you’re someone who prefers to keep things on the down-low, a simple flourish of the month’s name at the top of two fresh pages does the trick nicely.
But let me pull back the curtain on my Bullet Journal escapades—I go all out. I’m talking about embracing the calendar format for my monthly log like it’s my job. So, let me give you the scoop on how I tackle it, but remember, this is the “extra” route.
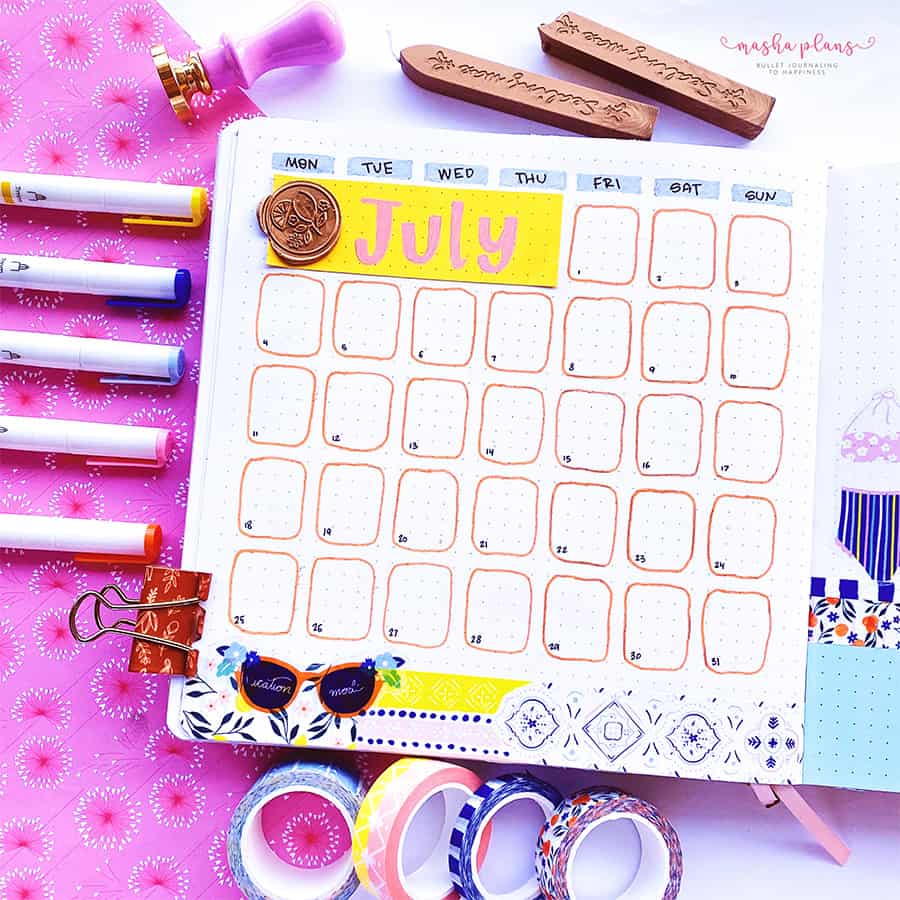
The easy-peasy setup goes like this: On page one, line up the dates and days of the month like soldiers ready for inspection. Then, march over to page two, where you’ll rally your monthly tasks.
Yep, those big-ticket items you’re aiming to conquer this month? They go right here.
These twin pages serve as your month-at-a-glance, a command center that keeps you from drowning in the sea of to-dos. Trust me, laying it all out like this is a game-changer. It transforms that overwhelming feeling of “I’ve got a zillion things to do and zero clue where to start” into a manageable, “Hey, I’ve totally got this” vibe.
Step 7: Weekly Log / Daily Spread
Ah, let’s talk about the heart and soul of your Bullet Journal: the weekly and daily spreads. They’re more than just pages; they’re your trusty sidekicks in the epic saga of Getting Things Done. Armed with these, disorganization doesn’t stand a chance!
Picture your weekly spread as the trusty map you consult on your quest through the week. It’s where you’ll plot every task and goal, marking the treasure spots where productivity gold is buried. And the best part? You get the full lay of the land—all seven days—without even turning a page. If that’s not a secret weapon for boosting your productivity, I don’t know what is!
Now, here’s where you can let your inner artist loose. Carve out columns for different arenas of your life—tasks, events, musings, you name it. It’s like organizing your thoughts into neat little boxes, making it crystal clear where you need to channel your superhero efforts for the week.

But we all know life isn’t always neatly compartmentalized. That’s where the daily spread swoops in, ready to tackle the chaos of any given day with laser focus. Think of it as the weekly spread’s detail-loving sibling, always ready to dive into the weeds.
And sure, you can deck out your daily spread with categories or keep it free-flowing. The world is your oyster (or should I say, your journal is your canvas?).
Now, if you’re sitting there thinking, “Gee, this sounds like a lot,” hold up! It’s really not as daunting as it seems. Crafting your spreads is all about discovering what makes your heart sing (or at least what doesn’t make you want to pull your hair out).
And here’s the kicker: there’s no rule saying you must stick to one format forever or use both formats all the time. Your Bullet Journal is like a faithful friend, evolving with you over time. If something’s not clicking, shake it up! Experiment, explore, and most importantly, have fun with it. After all, the journey of Bullet Journaling is all about creating a space that’s uniquely yours, changing as you do, and always, always serving your needs.
Step 8: Migrate, Reflect, Evaluate
Oh, buckle up because we’re about to tackle what I consider the secret sauce of Bullet Journaling. Yep, it’s that crucial step that, believe it or not, slips through the cracks for many. But not you, not today!
So, here’s the deal: before you leapfrog into the shiny new month ahead, let’s hit pause and cast a glance over our shoulder at the past month’s daily and weekly logs. You know those tasks that were all gung-ho at the start but somehow didn’t cross the finish line? It’s their moment in the spotlight now.
Time for a little heart-to-heart with yourself. Look each task in the eye and ask, “Do you really deserve a spot on my dance card? Are you worth the twirl?” This, my friend, is your to-do list having its very own reality TV moment.
Have you stumbled upon a task that’s kind of like a fine wine (it needs a bit more time to mature)? Easy peasy. That’s your cue to waltz back to your future log and give it a cozy spot there.


And hey, why stop the party at tasks? This is the perfect time for a little Bullet Journal introspection as well. Flip through those pages and play a round of “What’s Hot, What’s Not.” Which spreads had you at hello, and which ones were more meh? It’s also prime time to reflect on those life challenges that keep playing hard to get. Maybe there’s a shiny, new Bullet Journal spread that could be your knight in shining armor.
Remember, the goal is to keep your Bullet Journal as dynamic and vibrant as you are. It shouldn’t morph into a dust-gatherer or another item on your “ugh” list. So, take this monthly ritual to heart. It’s your chance to ensure your Bullet Journal is not just keeping pace but sprinting alongside you, pom-poms in hand, cheering you on every step of the way.
And there you go, just like that, in eight easy steps, you’ve got yourself your first Bullet Journal setup! And yes, there are plenty more pages out there, which you’ll often see on people’s Instagram pages, but it’s always best to start with the basics.
If you’re ready to dive deeper and see a few more ideas, simply click the links in the “More Resources” section below.
Free Course On Bullet Journaling For Beginners
Do you feel like you still need some more help? I’ve got you covered, baby!
I’m rolling out the red carpet for you to join our absolutely FREE course, whipped up with love for Bullet Journaling newbies and seasoned pros alike. It’s your golden ticket to a treasure trove of knowledge, tips, and boundless inspiration designed to craft a Bullet Journal that mirrors the unique mosaic of your life and dreams.
Simply sign up in the form below, and once you confirm your subscription, all the details;s on how to start the course will be sent straight to your inbox!
More Resources
Of course, there is so much more in the world of Bullet Journaling! And I bet even after this quick guide you still have plenty of questions in your head.
No worries, here are a few helpful blog posts for you to check out next:
- 11 Things You Need To Know Before Starting A Bullet Journal
- 13 Simple Bullet Journal Beginner Ideas
- Must-Have Bullet Journal Supplies List
>>> What are you struggling with when starting a Bullet Journal? Share with us in the comments!
Hope this post was interesting. If you find it so, please share! If you enjoy my content and want to show your appreciation, please consider supporting me with a cup of coffee.
And remember: Keep Bullet Journaling, and Don’t Be A Blob!


