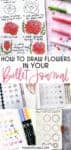
How To Draw Flower Doodles In Your Bullet Journal
In this post we’ll be looking at how to doodle flowers. Flower doodles are one of the most popular things to draw in Bullet Journal. They are usually easier to draw, and I feel like many people start from these. My first theme was florals!
You might be a bit intimidated by all those beautiful flowers you see on social media, but trust me, it’s not as hard as it seems.
In this post, I’ll share with you all the tips on how to draw flowers, as well as plenty of resources on where to find tutorials and keep on mastering your drawing skills.
You’ll be rocking beautiful flowers on your Bullet Journal pages in no time!

First, a disclaimer – I’m 100% self-taught, and if you know about any better and more efficient techniques to draw flowers, I’d be forever grateful if you share them in the comments.
When I started my first Bullet Journal, I couldn’t draw my way out of a paper bag! But with time and practice, I got better and better, to the point that now I think my drawings are pretty good.
Below I’ll tell you all I needed to improve and all the tricks I used to learn how to draw these beautiful flowers. Believe me, if I learned to draw these, so can you.
And if you want to add florals to your Bullet Journal right now, check out some FREE printables that I’ve created for you. You can get access to them at the end of the post and start adding flowers to your journal right away with no effort.
This post may contain affiliate links. They will be of no extra expense for you, but I receive a small credit. Please see my Disclosure for more details. Thank you for supporting Masha Plans!
Doodling Supplies
Of course, before we start, it’s important to prepare all the supplies.
You’ll probably just need some paper, pencils, and erasers, to be honest. I personally would recommend getting a separate journal (like this quite cheap one) to practice your drawing skills. This will allow you to see the progress and see what things you need to work on.
Apart from paper, pencil, and eraser, you might need some good fineliners. First – because with fineliner pens, you can achieve very beautiful black lines. Second – because their ink is usually waterproof, so if you want to color with some brush pens or maybe watercolors later on – the lines won’t get smudged.
Here are some fineliners I love:


If you want to add colors to your florals, you’ll definitely need some markers. The choice will depend on what kind of colors you like, but I’d definitely recommend Crayola Super Tips because they are affordable and come in 100 different colors!
Beginner Drawing Tips
I had to teach myself from zero how to doodle, and I wanted to first share with you some little tips and tricks I’ve learned on my journey.
I’m sure these will be useful and will help you speed up your way to improving floral drawings.
- Draw in pencil first
I always do all my drawings in pencil first. This helps me to correct mistakes and create the correct proportions for the flower.
Believe me; sometimes, I get so carried away that one small flower turns into a giant one that occupies half a page. Drawing in pencil first gives me a chance to correct this before it becomes permanent.
- Use the different sizes of pens
Fineliners, thankfully, come in different sizes, so I’d advise you to use different pens for different elements.
For example, for the outer shape of flowers, you could use somewhat fatter lines, so maybe size 03 or 05. But for little details like stamen or pedal shading, you can use smaller pens, size 01 or 005.
- Follow a tutorial
The best way to learn how to draw is by copying or, even better – following a tutorial.
I’ll share some amazing accounts and other sources where you can get easy doodle tutorials later, and there are plenty more links with tutorials at the end of this post.
How To Draw Flowers
After my self-learning process, I figured there are a few things to think of when you draw a flower. According to my experience in drawing, the whole process happens this way.
- Pick a flower and study it
Check out Pinterest or Google for images of the flower you want to draw and study it. Notice the shapes of petals, stamen, and sepals, and check how the petals curve.
Maybe sketch all these elements separately and sketch different variations of pedals. This will help you when you get to draw the flower.
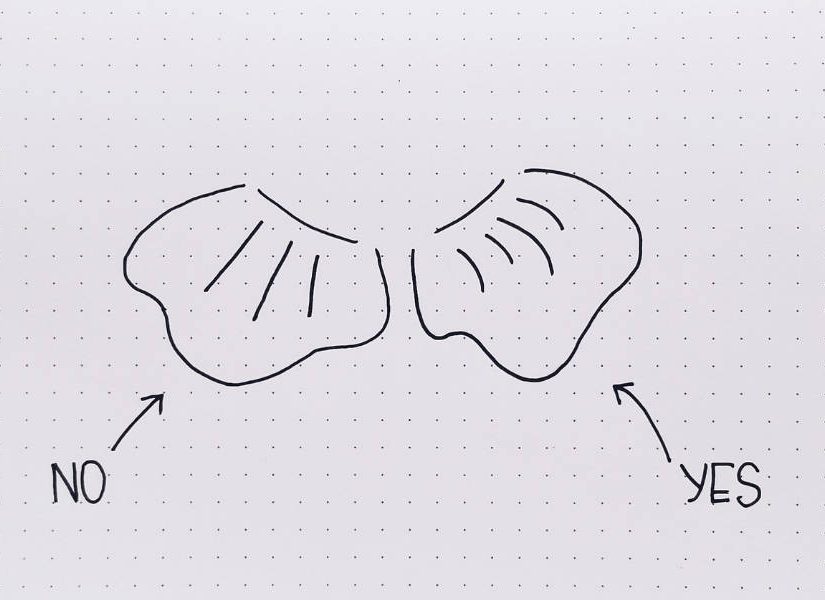
- Define the boundaries of your drawing
Draw a circle within which you want to fit your flower. Then take a look at the flowers – how many rows of petals does it have? If it’s just one or two you can make the center of the flower bigger. If it has more rows – you’ll need to adjust the size accordingly.
- Start from the center
The center of the flower is the starting point. Make sure you take a look at how the stamens of the flower look from the angle you’re drawing. The center of the flower is like a fingerprint, so if you get it too different, the whole flower will fall apart and look pretty kooky.
- Add petals
Now that you have your center and you know how many rows of petals you need – it’s time to add some. Remember how in step one, I recommended making sketches of the petals? This is when you look back at them.
- Add shading
To add to your flower dimension, you should add shading. Unless, of course, you’re going for a simple doodly flower.
When it comes to shading, there are two rules.
First – your lines must be curved – this is the only way to add actual dimension to your drawing, so just add S and C-shaped lines when you do the shadowing.
Second – follow the curve of the petal. Shading lines must define the direction of the petal, so make sure you add them correctly.
- Add some filler elements
Just a single flower might look incomplete and pretty lonely. So experiment with adding some leaves, berries, and any other simple floral doodles.
No need to create anything too intricate; these are just to add interest to your drawing.
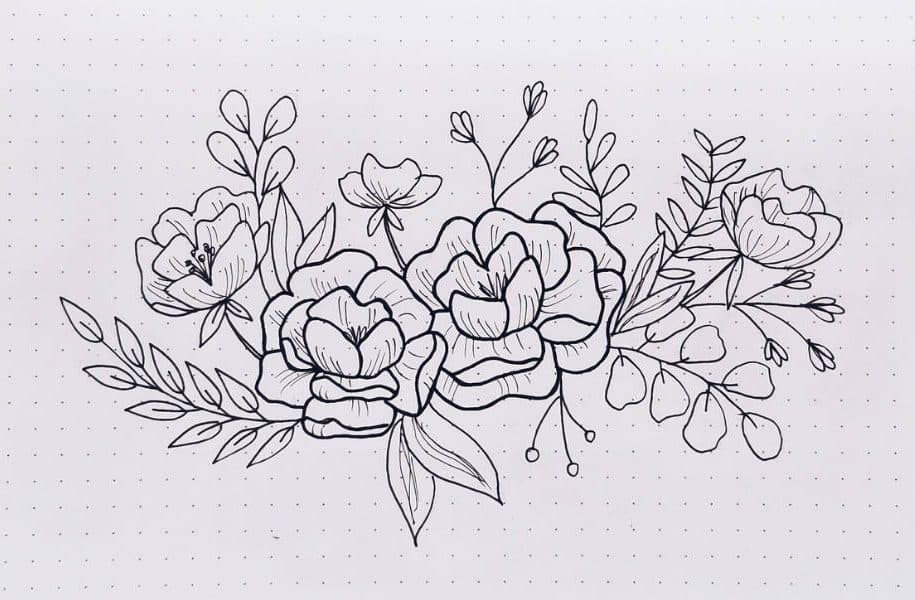
- Add color
Finally, you can always add some color to your drawings. There are many ways to do so – you can add color to just some parts of your flower, like, let’s say, only the shaded parts, or just to an outline.
You can also go all-in and color the flower completely. Or you can add color around the flower drawing. Or just leave it as it is, black and white.
These are all the basics and tricks you should know when starting your journey to learn how to draw flowers. But here is the secret – the best way to master these skills is to practice, and the best way to practice is to follow a tutorial.
If i included all the tutorials here as well, this post would absolutely never end and I don’t want to overwhelm you in any way. Drawing should be fun and exciting and not overwhelming and stressful.
So, instead, I’ll share a few books for you to check out. At the end of this post, there are several links to posts with thousands of tutorials as well.
Drawing Books (For Beginners and Pros)
If you want to up your skills even more, I’d recommend investing in some books on how to draw florals. I’ll be talking here about two I recently bought and have been using for a while.
The first one is “Botanical Line Drawings” by Peggy Dean (@thepigeonletters). This book contains 200 step-by-step tutorials for different flowers, leaves, cacti, and succulents. It starts from very basic doodly designs, and it gets a bit more elaborate as you go one by one.
This is a great beginner’s book. The variety of tutorials will allow you to practice a lot of different elements and create Bullet Journal pages with different florals, even if you’re a complete beginner.

- Dean, Peggy (Author)
- English (Publication Language)
- 224 Pages - 07/24/2018 (Publication Date) - Watson-Guptill (Publisher)
The second book is “How To Draw Modern Florals” by Alli Koch (@allikdesign). This book has tutorials on florals, leaves, and arrangements. I’d say these floral drawings are a bit more elaborate, so there aren’t that many actual tutorials within this book.
The book is great, though, because it first explains the basics of floral drawings and then in detail, describes every step of every tutorial. This really is how you learn to draw the same florals by yourself in the future.

- Paige Tate & Co. (Producer)
- English (Publication Language)
- 120 Pages - 09/12/2017 (Publication Date) - Paige Tate & Co (Publisher)
I love both of these books for what they are. Each, in its own way, helped me to improve my florals and become more creative with my floral doodles.
For more recommendations, I’d recommend checking out these posts:
This is how I’m learning to draw florals, and I hope you found all these tips helpful as well.
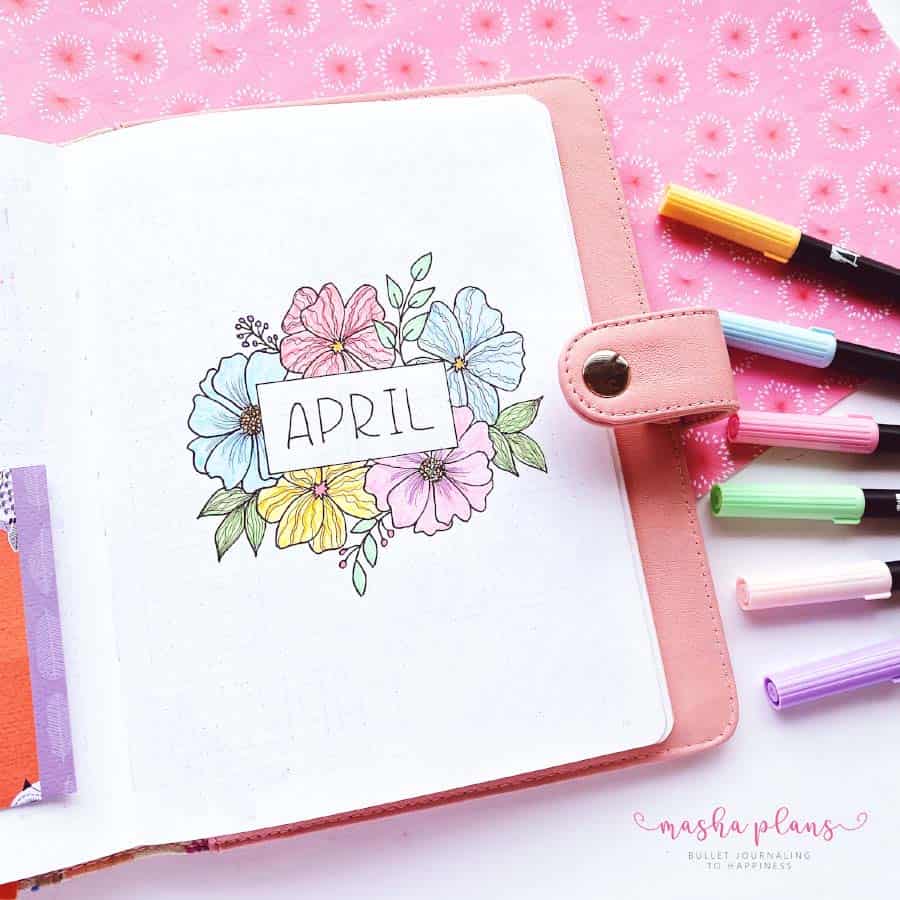
If you want to see my florals – check out my November Bullet Journal setup, as well as my April Plan With Me. And for more tutorials, check out my post with Step-By-Step Floral Doodle Tutorials.
Free Floral Printables
Of course, I’ve created some printables for you! There are free printable floral stickers, floral Bullet Journal printables, and more!
You can find all these and more in the Resources Vault!
If you don’t have access yet, you can always sign up in the form below.
Once you confirm your subscription, you’ll get the password to get 50+ free Bullet Journal printables, stickers, and worksheets to use right away.
If you’ve never used printables before, be sure to check my post How To Use Printables In Your Bullet Journal.
It’s pretty basic, and you can find all the supplies you need in my post Supplies For Using Bullet Journal Printables.
More Resources
I did mention that I’ll share some resources with step-by-step tutorials, so here they are. Some of these are the tutorials I’ve created, and some are from a lot of other creative people online.
Either way, they will make a fantastic practice for you.
Check these posts next:
- Simple Flower Drawings: 20+ Step By Step Tutorials
- 17+ Easy Spring Flower Drawings
- Simple Bullet Journal Flower Doodles: 15+ Step-By-Step Tutorials
>>> What kind of flowers do you like to draw? Let us know in the comments!
Hope this list was useful if you find it so, please share! If you enjoy my content and want to show your appreciation, please consider supporting me with a cup of coffee.
And remember! Keep Bullet Journaling, and Don’t be a blob!


I honestly felt like I sucked too badly at art to incorporate flowers into my bullet journal, but these examples are giving me hope! Thanks so much!! ❤️
Thanks Deb, it’s all about practice =) Glad you found this post useful!
This is really interesting, You’re a very skilled blogger.
I’ve joined your feed and sit up for in the hunt for more of your magnificent post.
Also, I’ve shared your site in my social networks
Thank you so much! This is a great help.
I’m so glad you like my content!
Aw, tһiѕ was an exceptionally nice post. Spending ѕome time
and actual effort tߋ produce а superb article… Ƅut whɑt ϲan I ѕay… Ι put things ᧐ff a lot and don’t manage
tо get anything done.
Thank you very much, your words warm my heart =)
I know the feeling, I’m still fighting this myself! Start from little steps, that’s what helped me.
Wonderful…. Immensely useful too ;-)
Thank you very much for your feedback! So happy to know you found this useful =)