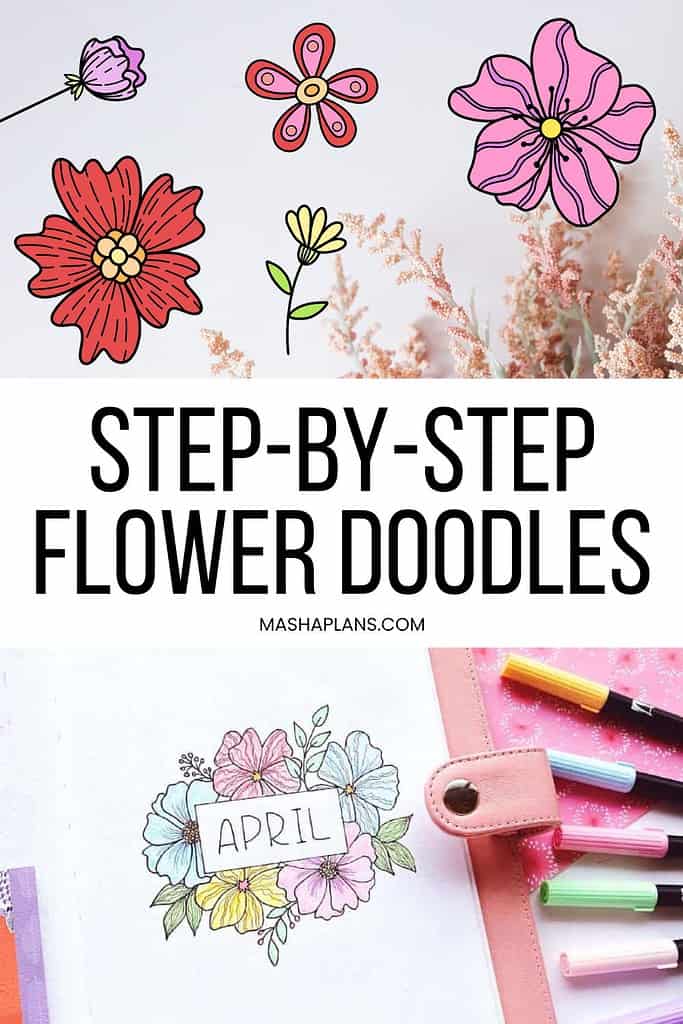
Simple Bullet Journal Flower Doodles: 15+ Step-By-Step Tutorials
Looking to learn how to doodle flowers in your Bullet Journal? I’m here to help! In this post, I’ll share with you some simple flower doodles you can easily recreate in your journal.
Bullet Journaling has been gaining in popularity over the past few years, and adding doodles to your pages can give your notebook a unique touch. And flowers are probably the most popular ones when it comes to decorating your journal.
But if flowers seem too complicated – don’t worry! I’m going to show you some simple flower doodles that are easy enough, even for beginners.
Here are simple step-by-step flower doodle tutorials and several more in the Doodle With Me video. So let’s dive in and enjoy doodling flowers together.
Flower doodles are amazing, and the best part about them is that you can use them for many things, not just for your Bullet Journal. Add them to a thank you card, decorate your notebook cover, or just use them as doodling practice!
If you’re like me and enjoy somewhat unrealistic and quirky shapes – you’re in the right place!
Be sure to scroll until the end to get some more posts with tutorials, a Doodle With Me video, and a few freebies.
15 Step-by-step Simple Flower Doodles
These 15 doodles below are some of my favorite flower doodles. You can absolutely customize them – use different leaves, different colors, change their shape – it’s all up to your imagination.
Moreover, knowing these basic doodles, you can play around and combine them into wreaths, use them to decorate your banners and create floral frames.
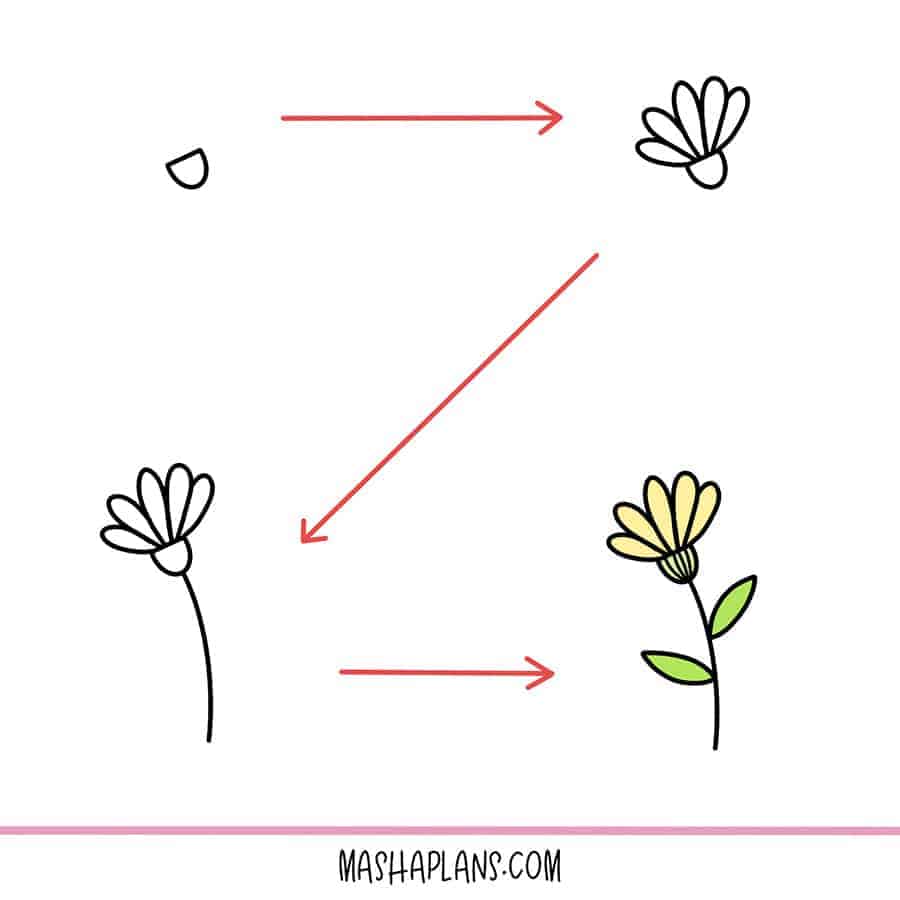
Daisy Doodles
These are probably my favorite flowers to draw. Draw a half-circle with the flat part facing down.
On the bottom, add oval-shaped petals. Then add a stem and some leaves.
You can play around and create curved stems or maybe even add one more stem and make two flowers.
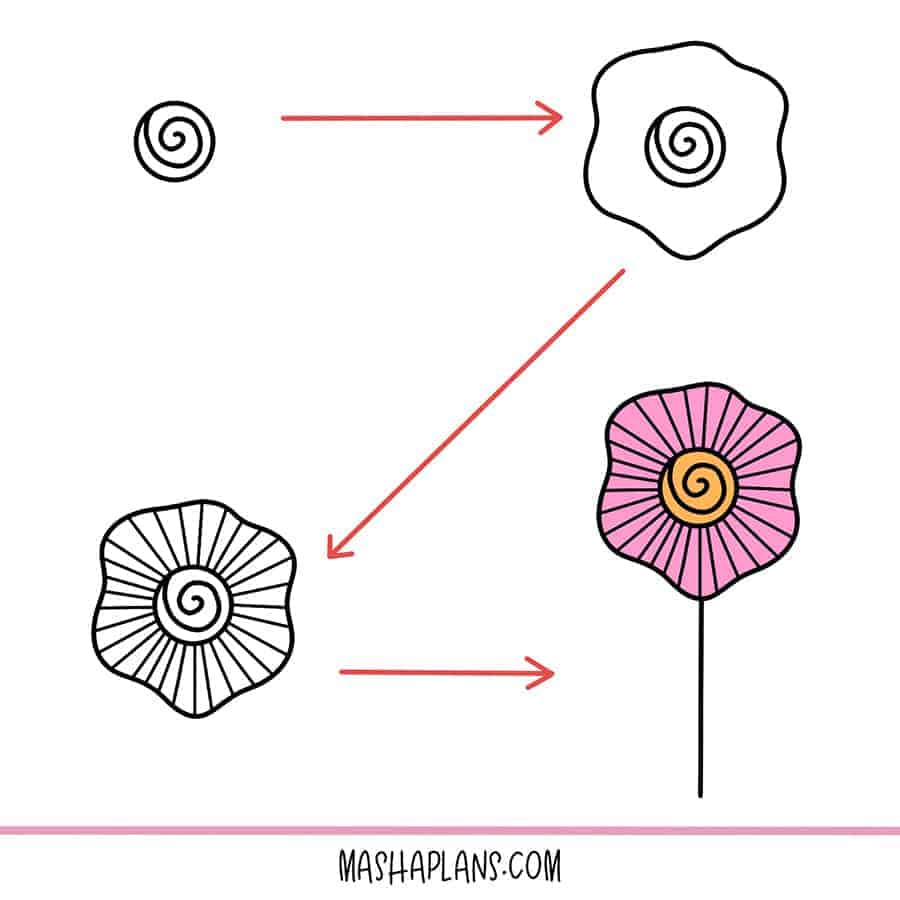
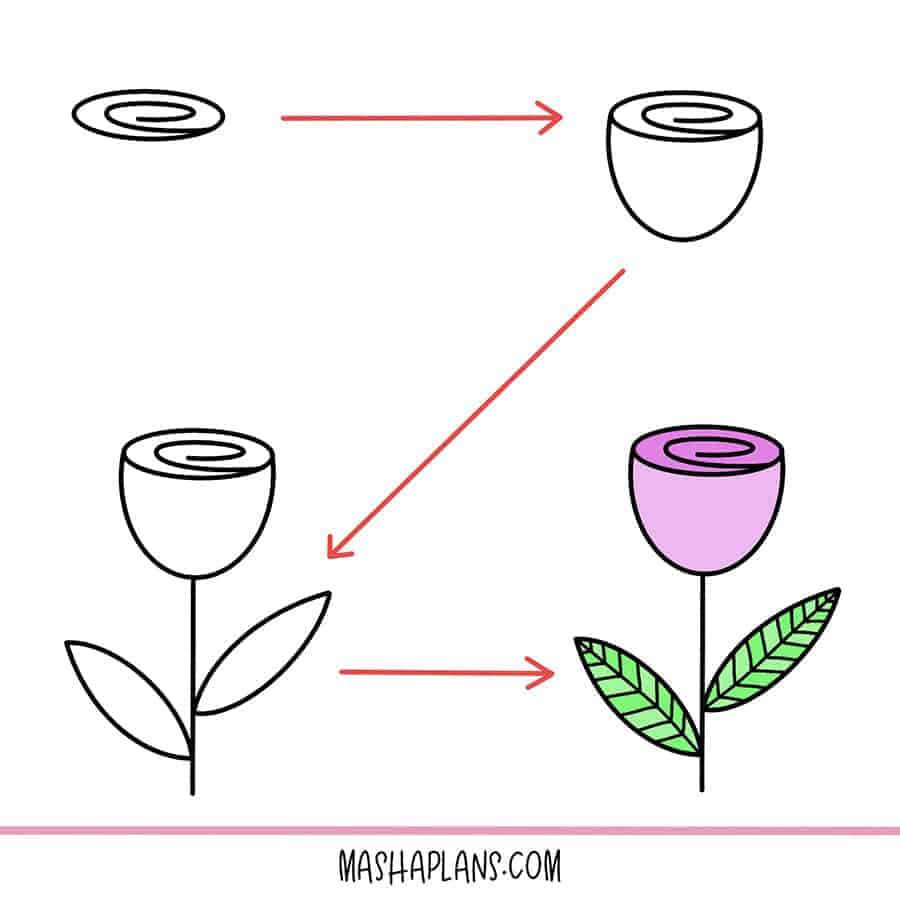
Simple Doodly Flower
This is one is the first of those unrealistic but super fun ones. Draw a spiral inside a little circle. Add a bigger circle around it and draw lines from one circle to another. Finally, add a stem.
For your drawing, you can play around with the shape of the outer circle. It’s surprising how changing just one thing can create a very different flower.
You can also make the lines inside of circles curved, which will create an extra dimension to the doodle.
Doodly Tulip
First step – a half-circle with the flat side facing up and a straight line on the bottom. Add curved lines coming out of the flat part and add little circles on top of each line. Inside the flower, draw a horizontal line and add little half-oval shapes. Final touch – add leaves to the stem.
I love this doodly flower – you can customize it a lot by adding any patterns you want inside the flower. Of course, you can always change the shape and the lines inside the leaves.

Simple Rose
Draw a little spiral and add a half oval to it.
Finish up with a straight stem and leaves. Pretty basic design, but I think it’s still super cute.
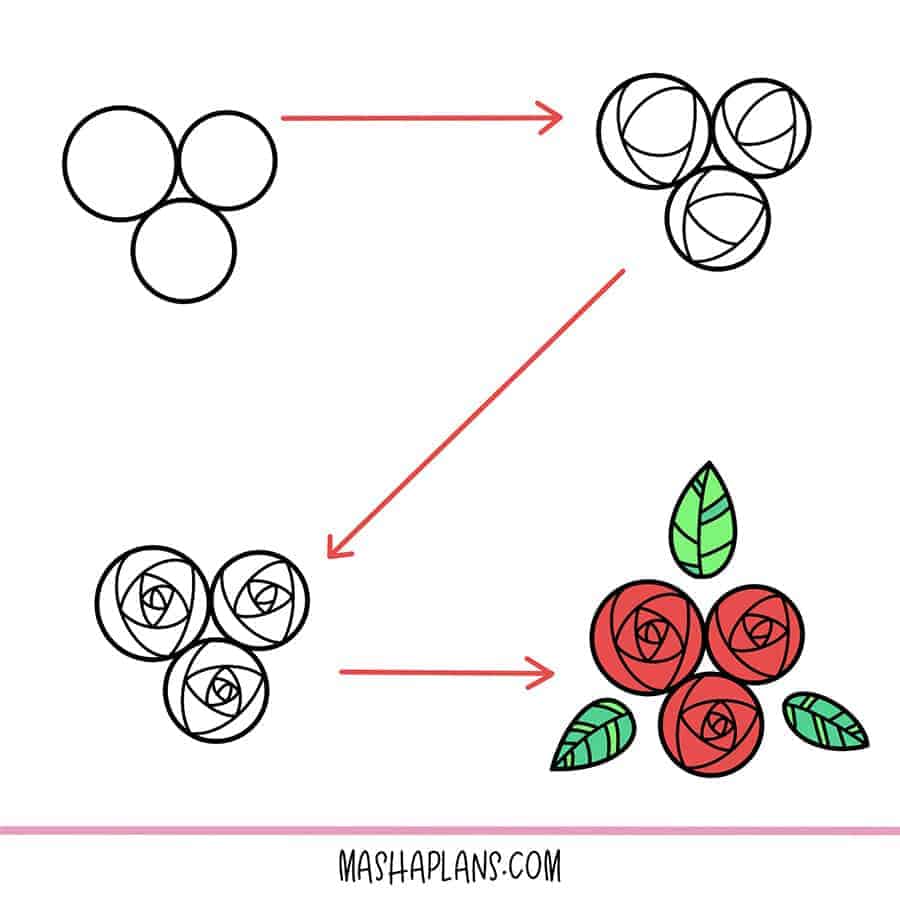
Three Roses
My absolute favorite way to draw roses. I draw three here, but you are free to draw as many as you want. Also, I doodled them next to each other, but you can play around with them and draw one behind another.
Draw three circles touching each other, so they form kind of a triangle shape. Inside each circle, create a spiral pattern by drawing a curved line from one side to the center of the opposite side.
Add three teardrop-shaped leaves coming out of between the flowers.
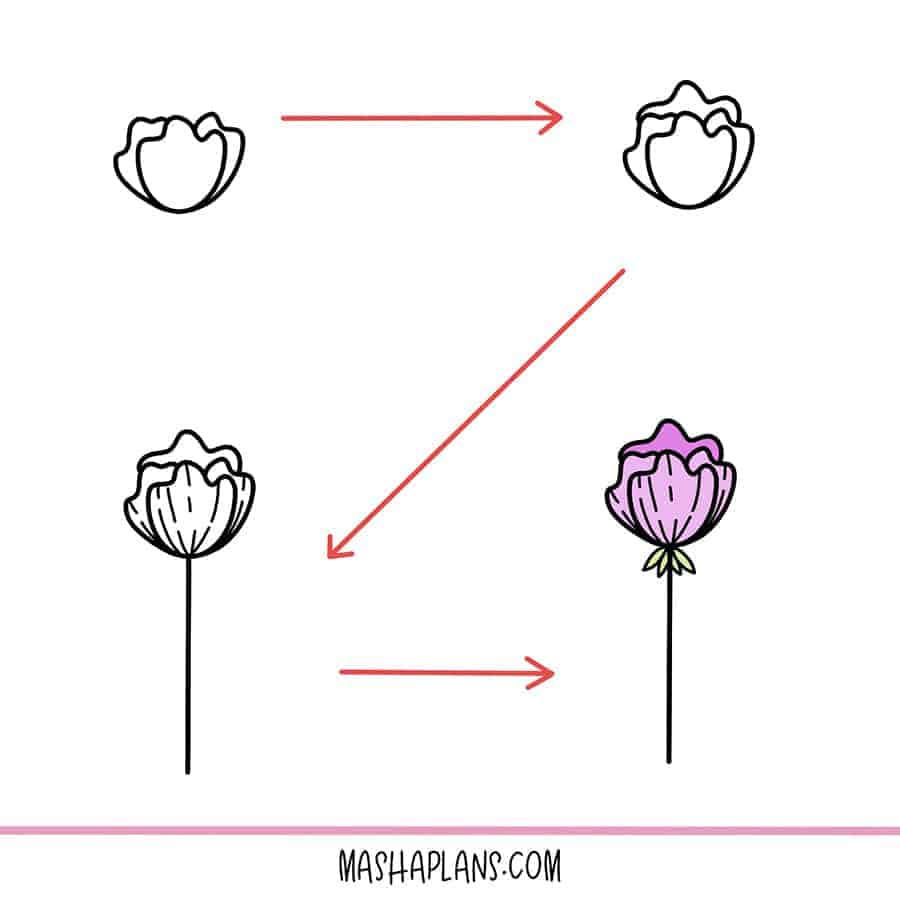
Wavy Petals Flower Doodle
Start from triangle-shaped petals, but with more curved edges and a wavy top end.
Add two more petals coming from the center of the first one, and create a wavy line behind all the petals.
Add curved lines inside the petals for dimension. Finish up with a stem and small green pointy leaves coming from under the flower.
How To Doodle Muscari Flowers
Draw a curved line and two big leaves on the bottom. Add another curved line to the existing stem.
Around the end of each stem, draw five different-sized circles to form a little triangle. Add lines to your leaves.
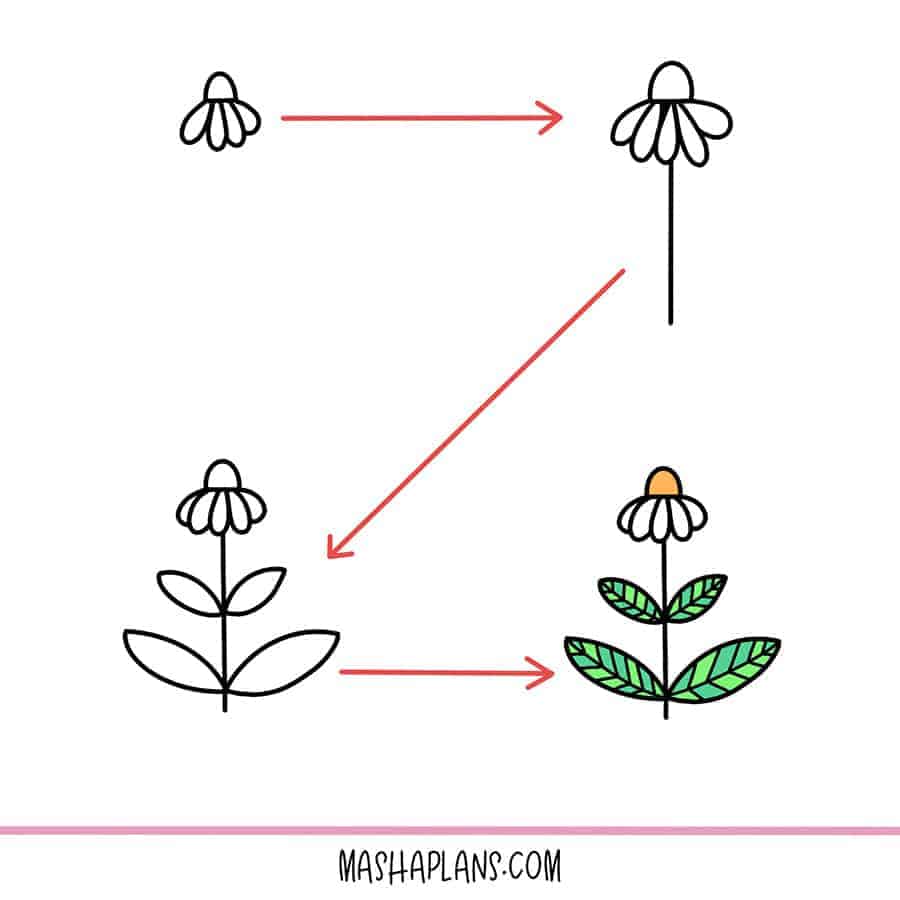
Reverse Daisy Doodle
Draw a half-circle with the flat part facing up. Add oval petals coming out of the flat part. Draw vertical lines inside the half-circle.
Finish up the doodle with a curved line (the stem) and two little leaves.
You can add one more stem coming from the same base or maybe add some bigger shaped leaves.
Doodly Oval Flower
One of my new favorite doodly flowers! Draw an oval and another smaller oval inside. Then draw five oval petals.
They shouldn’t touch each other, but again. It’s up to you. Inside each petal, draw another oval petal and add a little oval inside each.
I like how many colors you can use to color these! Plus, I think the fact that the petals don’t have to touch each other makes it much easier to draw it.

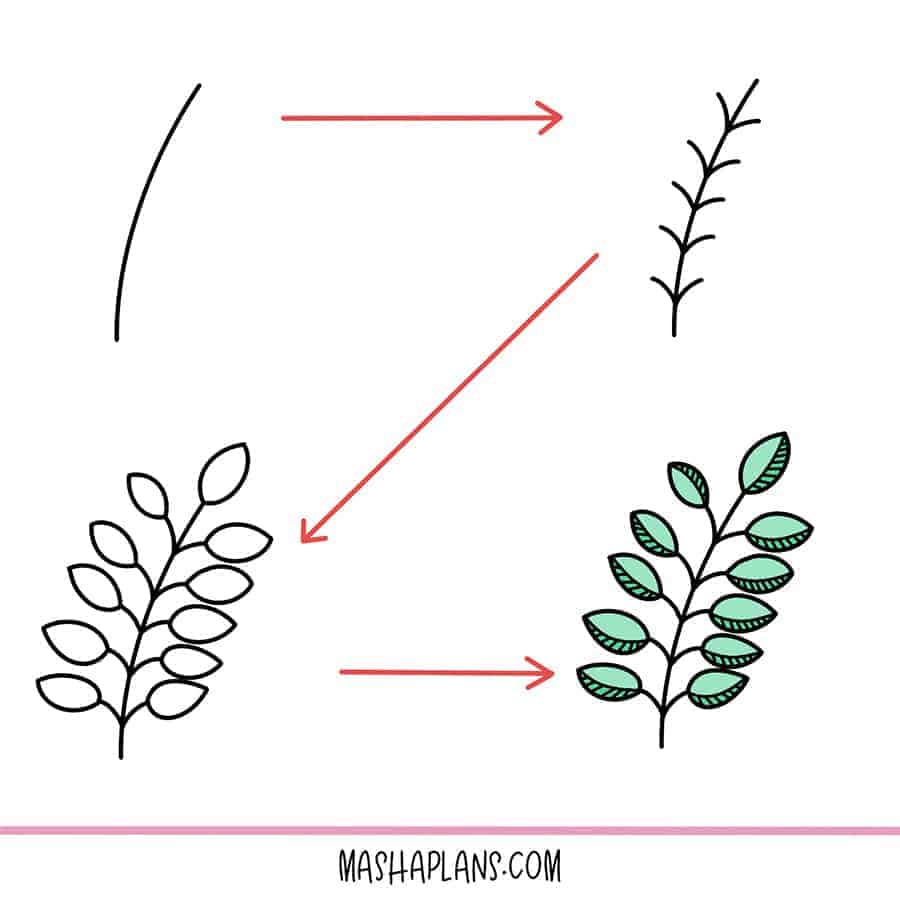
Simple Vine
An easy vine that can be a great part of a wreath. Start from a curved line and add small, equally spaced branches coming from it on each side.
Add teardrop-shaped leaves to each branch. Divide each leaf in half and draw little lines only on one side of the leaf.
Feel free to experiment with the shape of your leaves and the patterns you use inside them. You can also space out your leaves more or draw them much closer to each other.
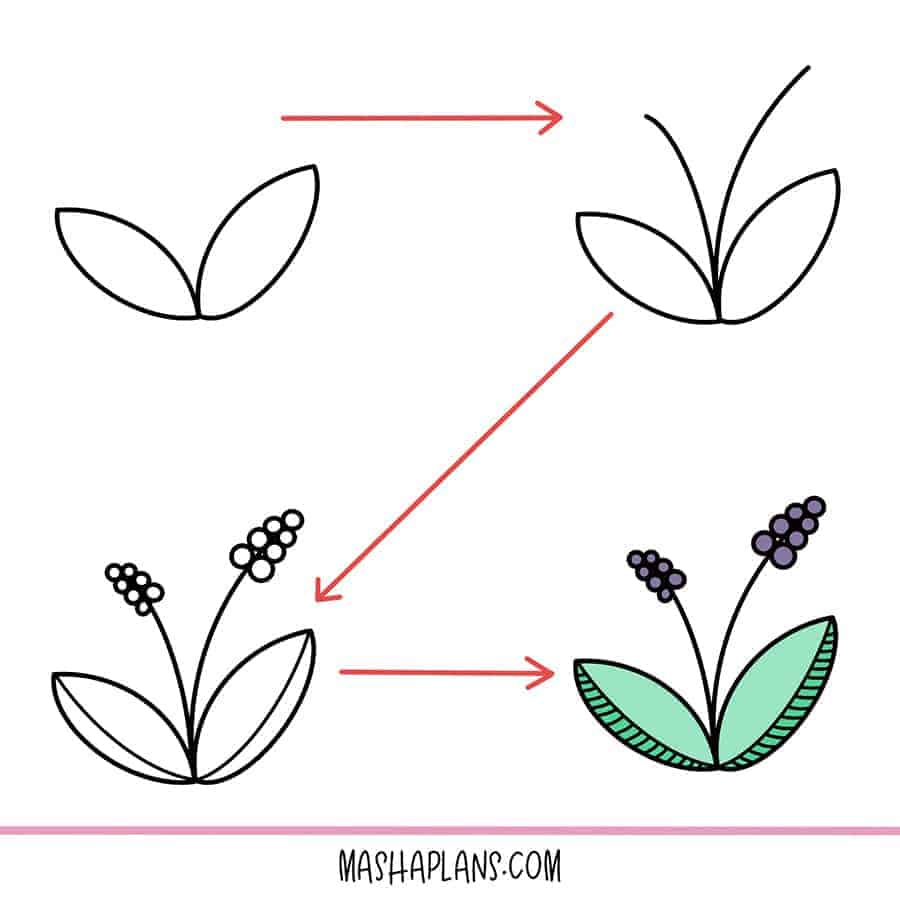
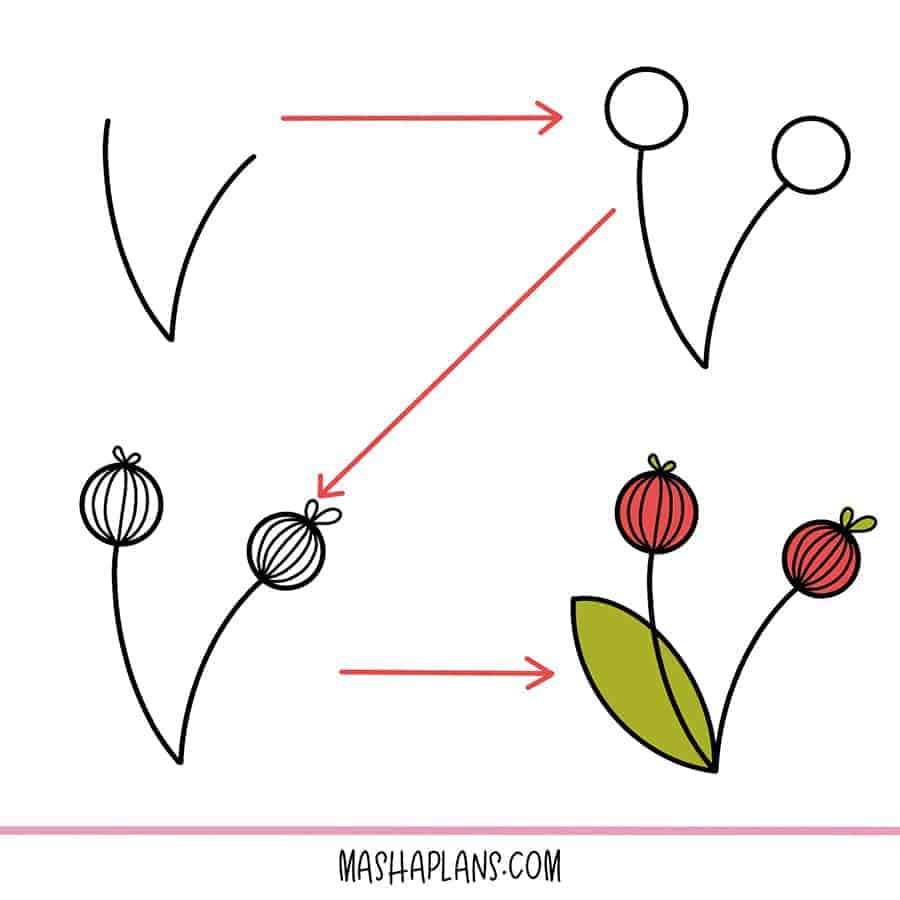
Berry Shaped Flowers
Start from two curved lines coming from the same place. Add a circle to the end of each stem.
Add oval-shaped petals to the top of each circle and add vertical lines to each circle. If you want, add a leave or two to your stems.
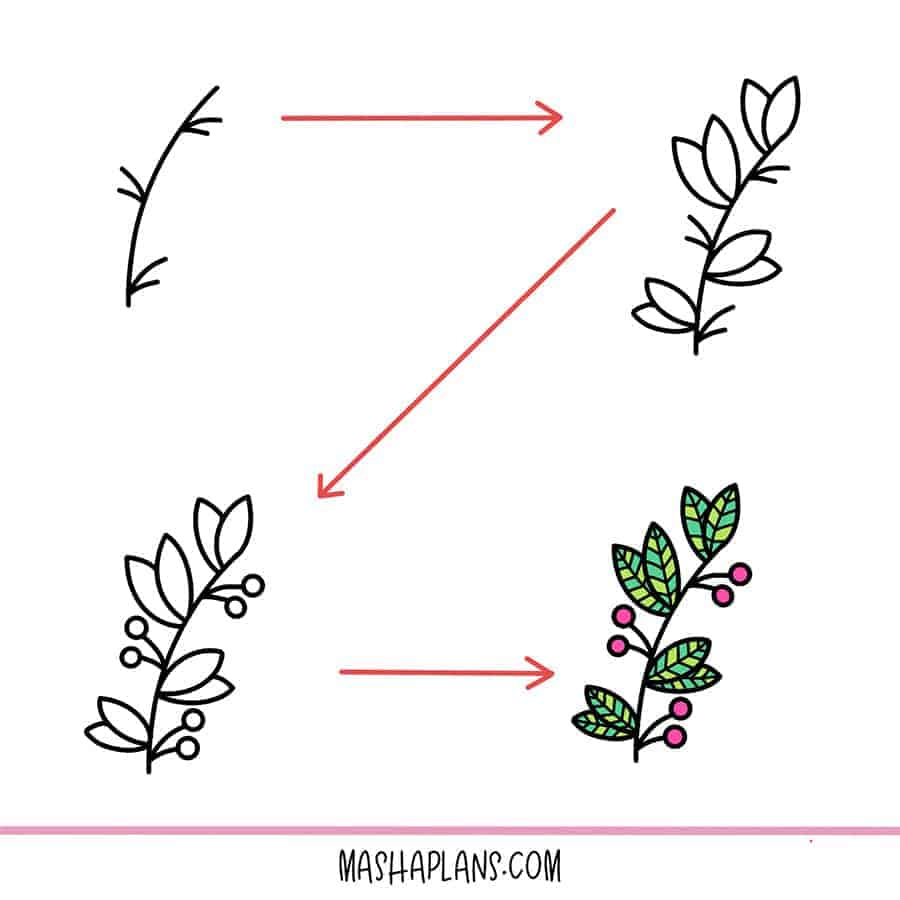
Vine With Berries
Draw a curved line and equally spaced little branches on different sides of the stem. Add a little circle to the end of each branch, and draw leaves on the opposite side of your branches.
This vine is perfect for creating wreaths. You can also customize it however you like. You can add lots of berries or, well, just one berry on each side; it’s up to you!
Playing around with patterns on your leaves is fun.
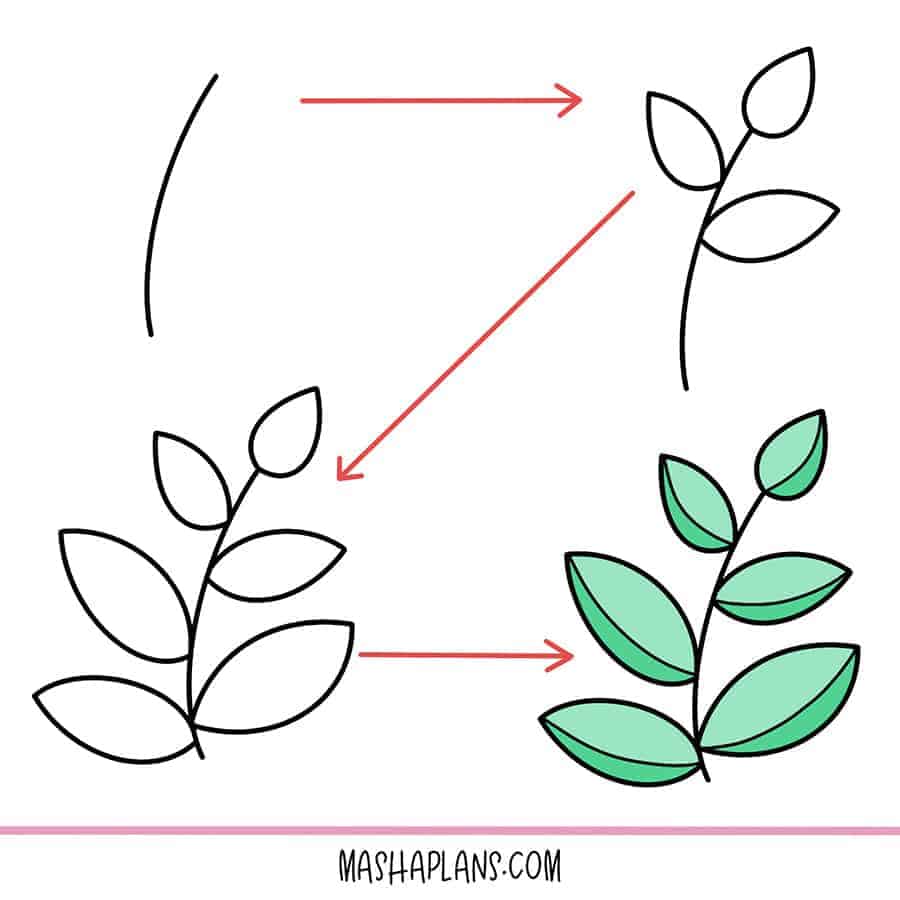
Vine With Large Leaves
Start from a curved line, and right from the base of it, add leaves. Leaves are freely spaced and get bigger as you go from the top to the bottom.
Freely divide each leaf in two.
You can play around with the size and position of your leaves, as well as the patterns inside them.
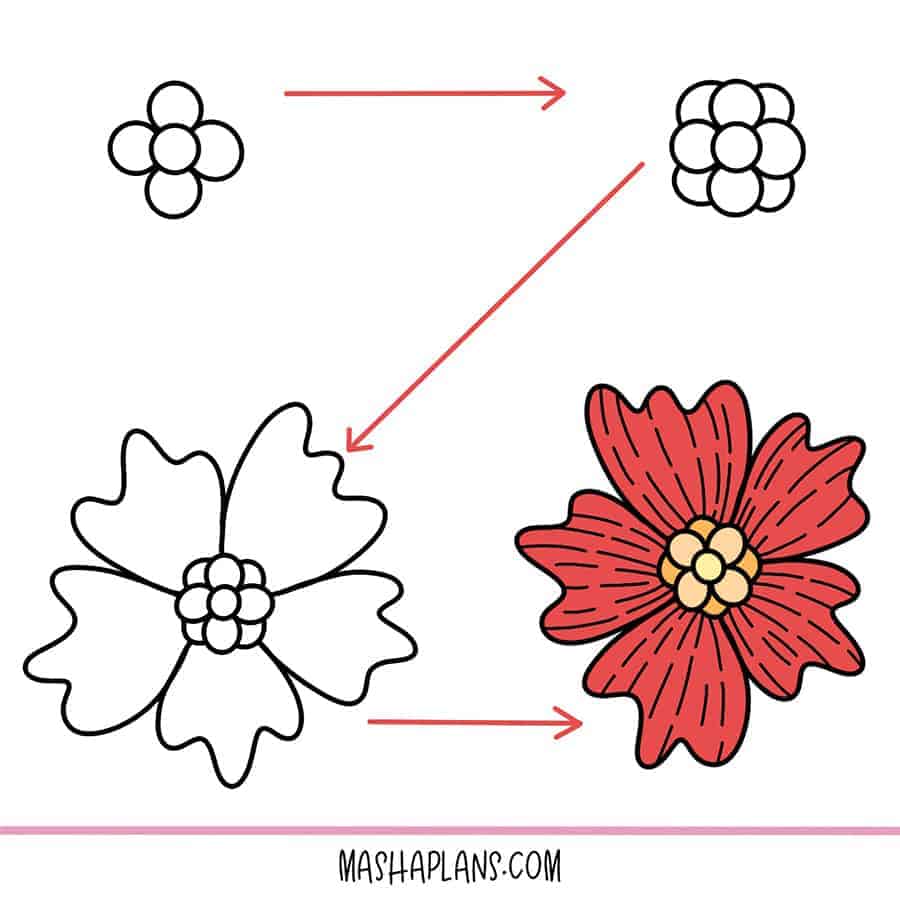
Dimensional Flower Doodle
Start with a circle and little half-circle petals. Add some more half-circle petals in between the already existing ones. Your pistil is ready.
Now add 5 free shaped petals. As you can see, I tried to draw mine coming from the center of the little half-circles in the middle. Final touch – add some lines to the petals, try to make them a little bit curved.
This flower is a bit more difficult and dimensional. You can change around the shapes of the petals and maybe create more little half-ovals in the middle to get different effects.
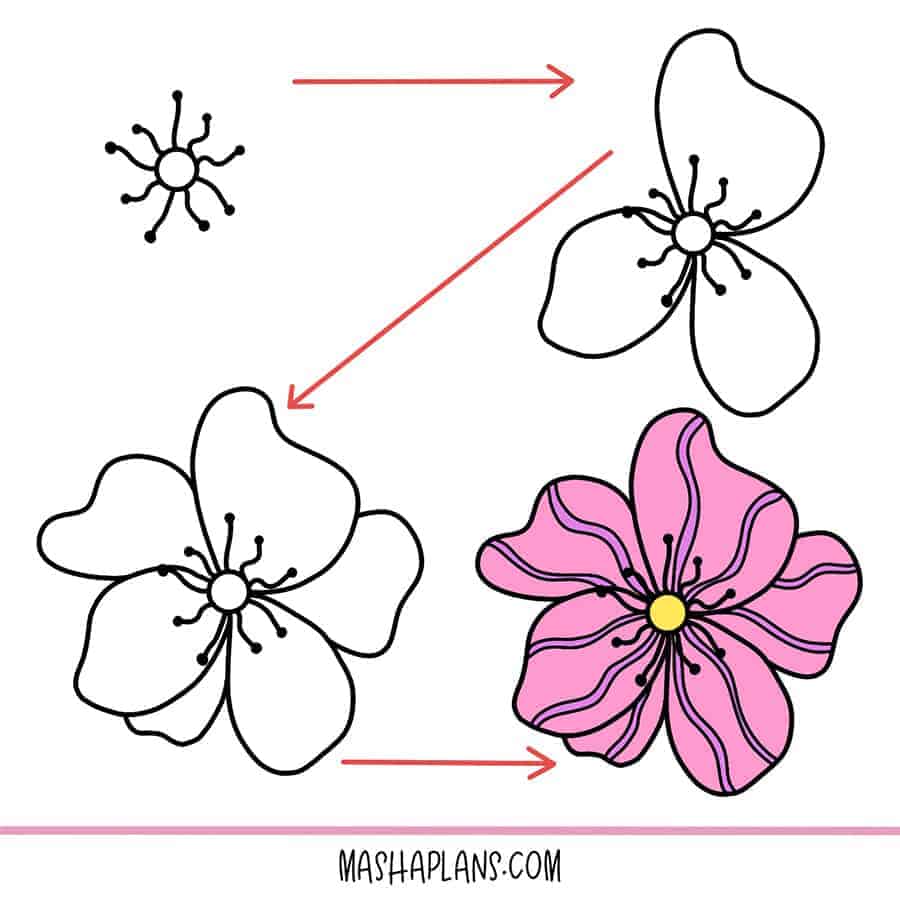
Wavy Pattern Flower Doodle
First, draw a circle and some wavy lines coming out of it. Add little black dots at the end of each line. That’s the middle of your flower with little stamens.
Draw three curvy oval-shaped petals. Fill out the space between them with some more petals. Finally, add some thin curvy lines inside of each pattern – this will create a pretty unique look.
Play with the shape of the petals and try adding different lines there; you can change the shape of your pistil. Plus, of course, think of all the color variations! Let your imagination flow.
Simple Flower Drawings: Doodle With Me
Looking for more doodling ideas? Be sure to check my video below.
Apart from some doodles already in this blog post, there are also several other cute simple flower drawings to decorate your Bullet Journal.
This post may contain affiliate links. They will be of no extra expense for you, but I receive a small credit. Please see my Disclosure for more details. Thank you for supporting Masha Plans!
Doodling Supplies
The good news is, all you really need is a pen and paper! Here are some recommendations to know where to start:
I always recommend starting with a pencil because you can erase and fix things you don’t like. Of course, you want pencils and erasers of good quality, which would definitely be needed.
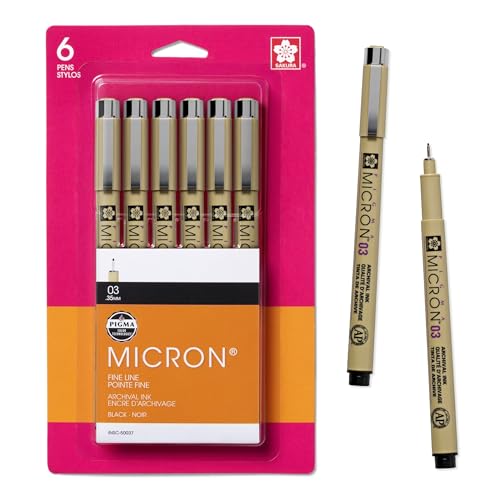
As for pens – you’re, of course, free to use any you like, but I’d personally recommend you use some fineliner pens. Among the popular brands are Sakura Pigma Micron and Faber Castell. Both are great quality pens and will be able to create vivid black doodles!

For more stationery recommendations, check my post Best Pens For Doodling.
Free Floral Printables
Drawing flowers still can be intimidating, so I created some printables to help you get started.
You can already find it in the Resources Vault; there is a floral habit tracker, a floral mood tracker, and two different sets of floral stickers.
If you don’t have access yet, you can always sign up in the form below.
Once you confirm your subscription, you’ll get the password to get 50+ free Bullet Journal printables, stickers, and worksheets to use right away.
More Resources
Do you need more? Don’t worry; I’ve got you covered.
Here are a few more doodling posts that you should check out:
- How To Start Doodling And 13 Easy Doodles To Try
- Cute & Easy Spring Flower Doodle Ideas
- How To Draw Flower Doodles In Your Bullet Journal
- Simple Flower Drawings: 20+ Step By Step Tutorials
Hope this list was useful; if you find it so, please share! If you enjoy my content and want to show your appreciation, please consider supporting me with a cup of coffee.
And remember: Keep Bullet Journaling, and Don’t Be A Blob!


