How To Make Printable Stickers For Your Bullet Journal
Are you an aspiring crafter looking for a new way to express yourself in your Bullet Journaling? If so, then look no further than printable stickers – the perfect accessory for adding color and flair to your pages.
Printable stickers will not only speed up your Bullet Journal setup process but will also allow you to design something that fits your style and aesthetics.
Today we are talking about exactly that – creating your own journal stickers at home. It’s very fun and will help you with adding creativity to your journal pages a lot.
So whether you are a doodler wanting to go digital or somebody who hasn’t discovered their creative side yet – I have all you need to create your stickers disregarding!
Stickers are such a great way to add some creativity to your Bullet Journal. They also are a great way to cut down on your page setup time – just add a few habit tracker stickers and TA-DAM – you save yourself an hour of planning! Pretty handy for the busy days.
I haven’t used many stickers in my journal before; it’s really a newly-found obsession of mine. And to be honest, I quickly realized how expensive it could become.
Once you start using them – they run out pretty quickly, and you need to get more and more and more. Not that I’m complaining (I’m a bit of a shopaholic myself), but my wallet isn’t really happy about it.
Another thing is – sometimes I just can’t find something that fits exactly my needs. Or even worse, I have to buy a set of stickers just for that one guy I really need.
All this led me to the idea of creating my own stickers, which is my new obsession, to be honest. It turned out to be such a fun and addictive hobby!
Today, we’ll cover many of those aspects, so be ready! I will be talking about different ways of creating stickers and cutting them out, so feel free to just scroll down if there is something, in particular, you’re interested in.
Here are a few main topics we will be going through:
- How to turn your hand-drawn designs into stickers
- How to create stickers with the free and easy-to-use tool Canva
- How to create stickers on iPad
Let’s just go for it, then! I’ll see you by the end of the post, hopefully, ready to design your own stickers!
There’ll also be a freebie waiting for you there, so be sure to scroll down.
This post may contain affiliate links. They will be of no extra expense for you, but I receive a small commission. Please see my Disclosure for more details. Thank you for supporting Masha Plans!
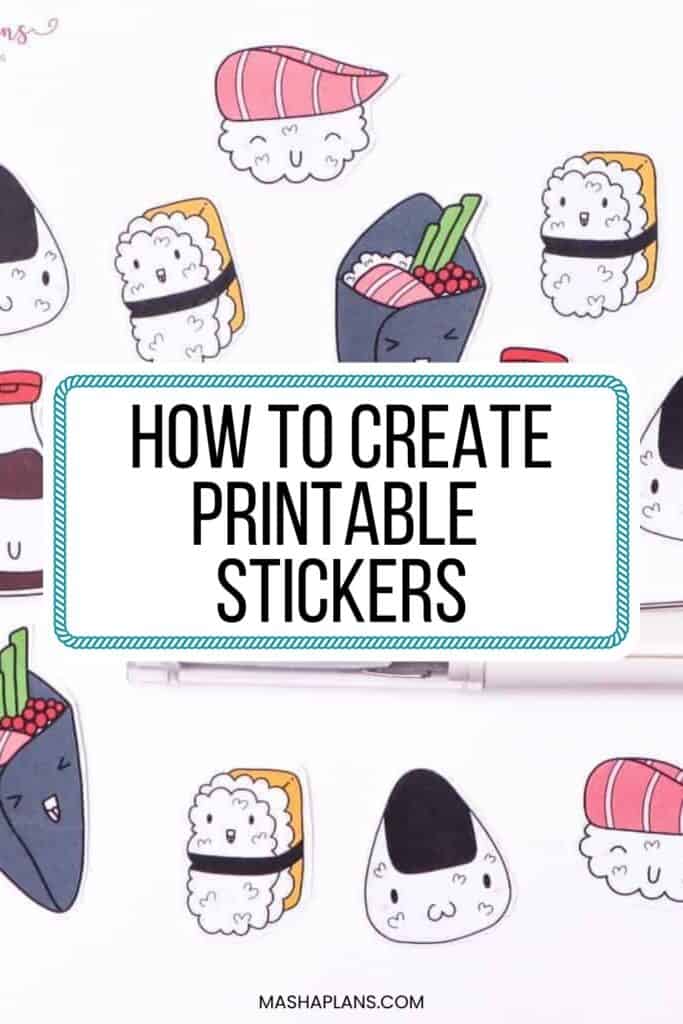
Turn Drawings Into Stickers
We will start from the basics – if you’re already pretty comfortable with paper, let’s check how you can turn them into your own stickers.
Step 1: Get Your Supplies
Here are the supplies you’ll need:
- Pencil (Pilot Dr. Grip Pencil is my favorite)
- Eraser (be sure it doesn’t leave any color after using it, my recommendation – foam erasers)
- White paper (better choose marker-friendly paper that won’t feather, like Canson XL Series Marker Paper)
- Scanner
- Printer (I recommend HP OfficeJet Pro, since it also has scanner that you’ll need)
- Computer
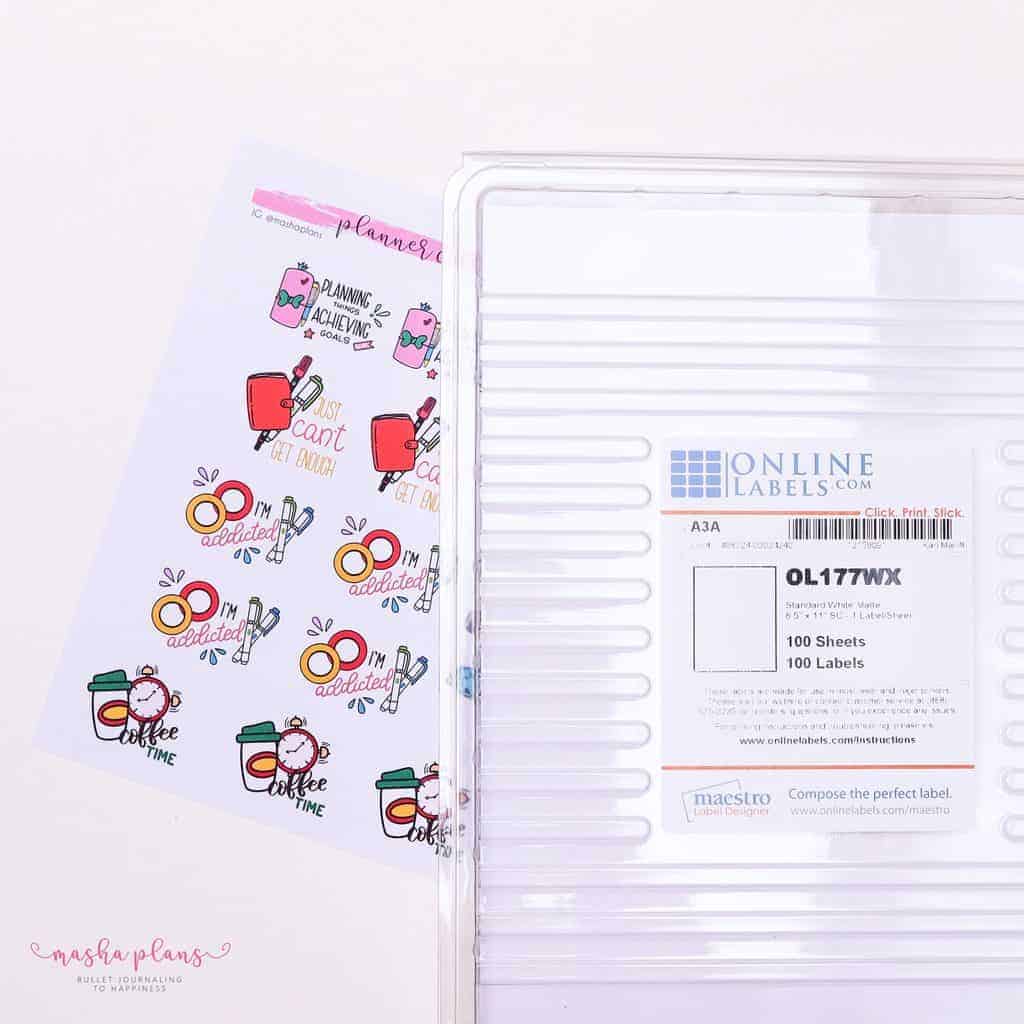
- Sticker paper (I found that Online Labels paper works very well for me, but you can also try out Avery sticker paper)
Step 2: Draw Your Stickers
It’s pretty simple; just do your best for your doodle to have more contrast and no unwanted lines, like badly erased pencils or smudges.
Here are several kinds of stickers that would be easier to get started with:
- Daily headers
- Habit trackers
- Icons
- Banners
The important thing is – to be sure you measure your drawings. Since you’ll be using the stickers in your Bullet Journal, you want them to be the right size.
Another thing is – what if you can’t draw? Well, I got you completely covered on that one!
First of all – don’t think that drawing is some kind of crazy talent only some people have. It’s a muscle, and you just need to train it!
When I started my very first BuJo, I had no idea how to doodle anything, but I persisted, and now look at me creating my own stickers and all!
If you’re just getting started, I have tons of doodling posts on my blog. Here are a few to get you started:
- Learn To Doodle: Beginner’s Guide To Bullet Journal Doodles
- Fun and Easy Stationery Bullet Journal Doodles
- How To Draw Flowers In Your Bullet Journal
If these are not enough, I have two more amazing resources to check. The first one is Skillshare – it’s a learning platform with tons of classes on all subjects, including doodling and other creative skills.
You can get 2 weeks of Premium Skillshare with access to ALL their classes for FREE if you follow this link.
Ok let’s assume you’re done with the first step and move on to….
Step 3: Scan Your Stickers
You probably know your scanner better than I do, but in case you’re brand new, here are a few recommendations.
Once you’ve loaded the paper to your scanner face down, be sure to define the kind of scan.
For black and white doodles, choose TEXT because it will create the cleanest and crispiest lines that way.
If you’re scanning a colored doodle – just choose COLOR.
When saving the scan, be sure to do it as a PDF document with DPI 300, it will give you the best quality.
Step 4: Print Your BuJo Stickers
Now that you have a PDF of your stickers, all that’s left is printing them.
Each printer is different, so be sure to check how to do it on yours, but generally, when you load the sticker paper, load the side that it will be printed on down.
Then use a PDF reading software such as Adobe Reader (100% free and safe download) to open the file and send it to printing.
Be sure that printing settings are set to COLOR and ACTUAL SIZE.
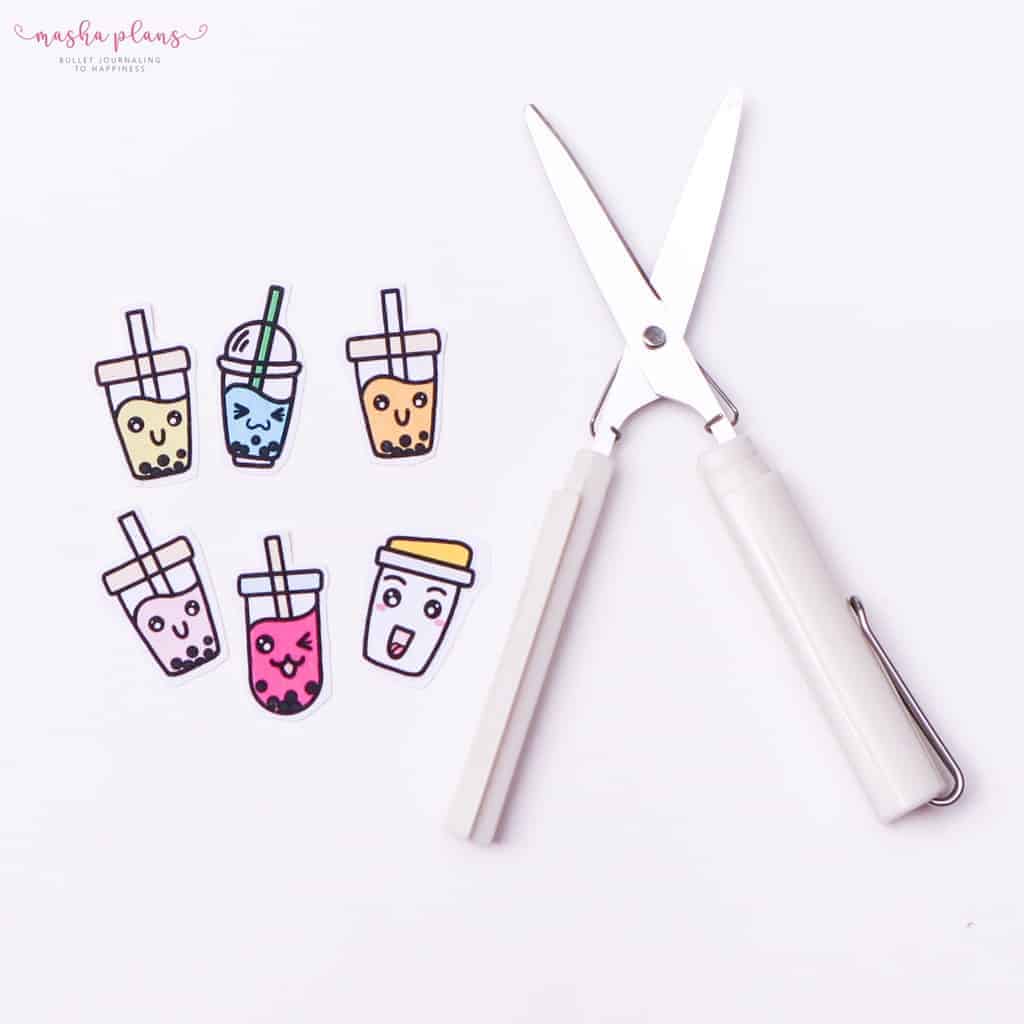
If you printed on sticker paper, you’d just need to use scissors or an Xacto knife to cut them out and stick them straight to your journal.
If you use normal paper, you’ll need glue or Tombow adhesive tape to stick them to your BuJo pages.
And you’re done! You can reprint your stickers as many times as you want.
The Alternative – How To Make Canva Stickers
Now let’s say you really don’t want or know how to draw your own stickers. This shouldn’t stop you! There is a very simple way you can still create personalized stickers.
You’ll just do it using Canva – a very simple online digital design program. It sounds scary but doesn’t worry; I’ll walk you through each step!
What you’ll need for these stickers is:
- Printer
- Computer
- Sticker paper (I found that Online Labels paper works very well for me, but you can also try out Avery sticker paper)
Step 1: Getting Started With Canva
First, you’ll need to create a Canva account. It’s completely free, and a free plan will be just enough for you to create tons of amazing stickers.
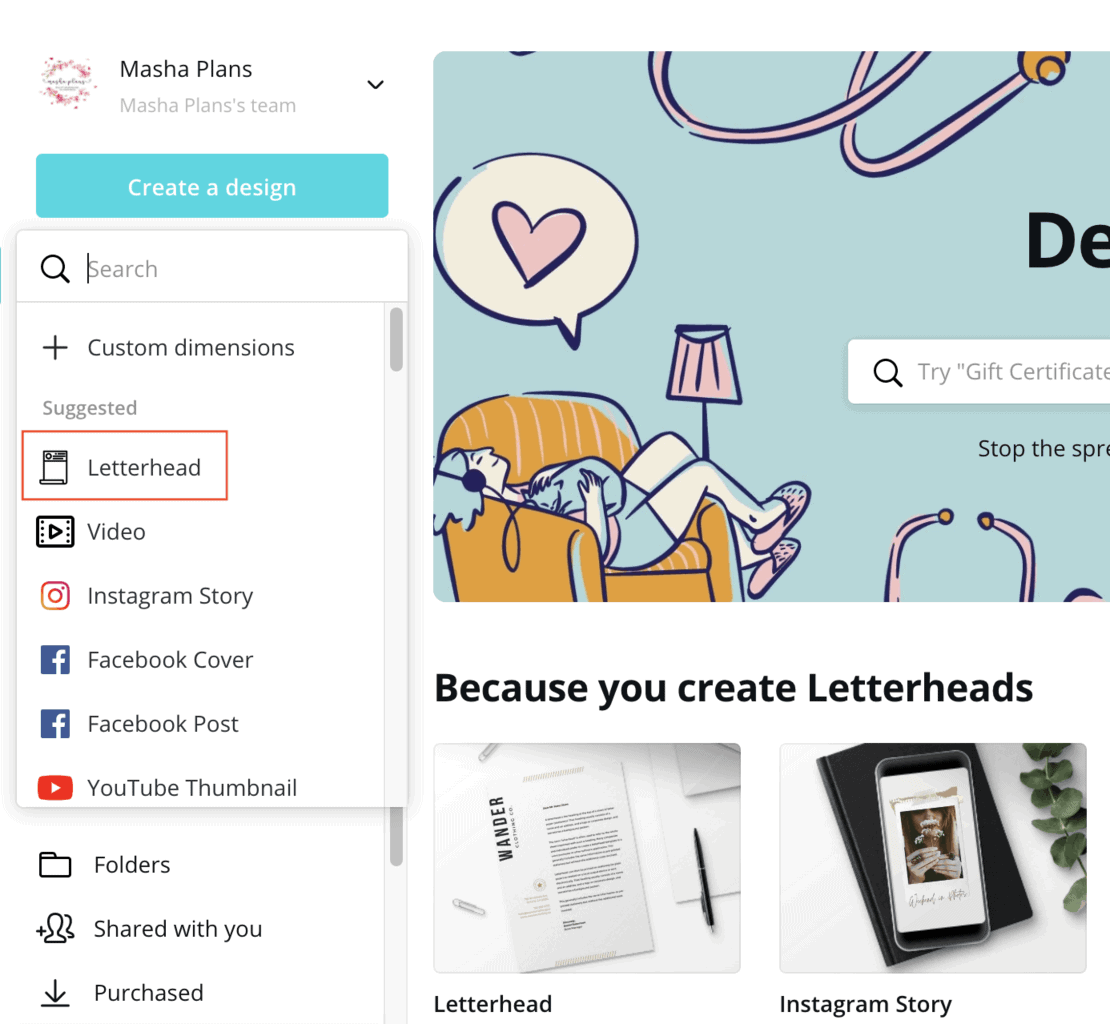
Once you’re in, click on “create a design” and choose “letterhead”. It will open up a canvas 8.5” by 11” size.
Step 2: Design Your Stickers
Start by thinking about exactly what you’d like to have as stickers. For me – I usually prefer having as stickers some things that I use often, like icons or banners.
I also really like creating stickers with some pretty lettering; it can be days of the week or maybe some little quotes to decorate the pages.
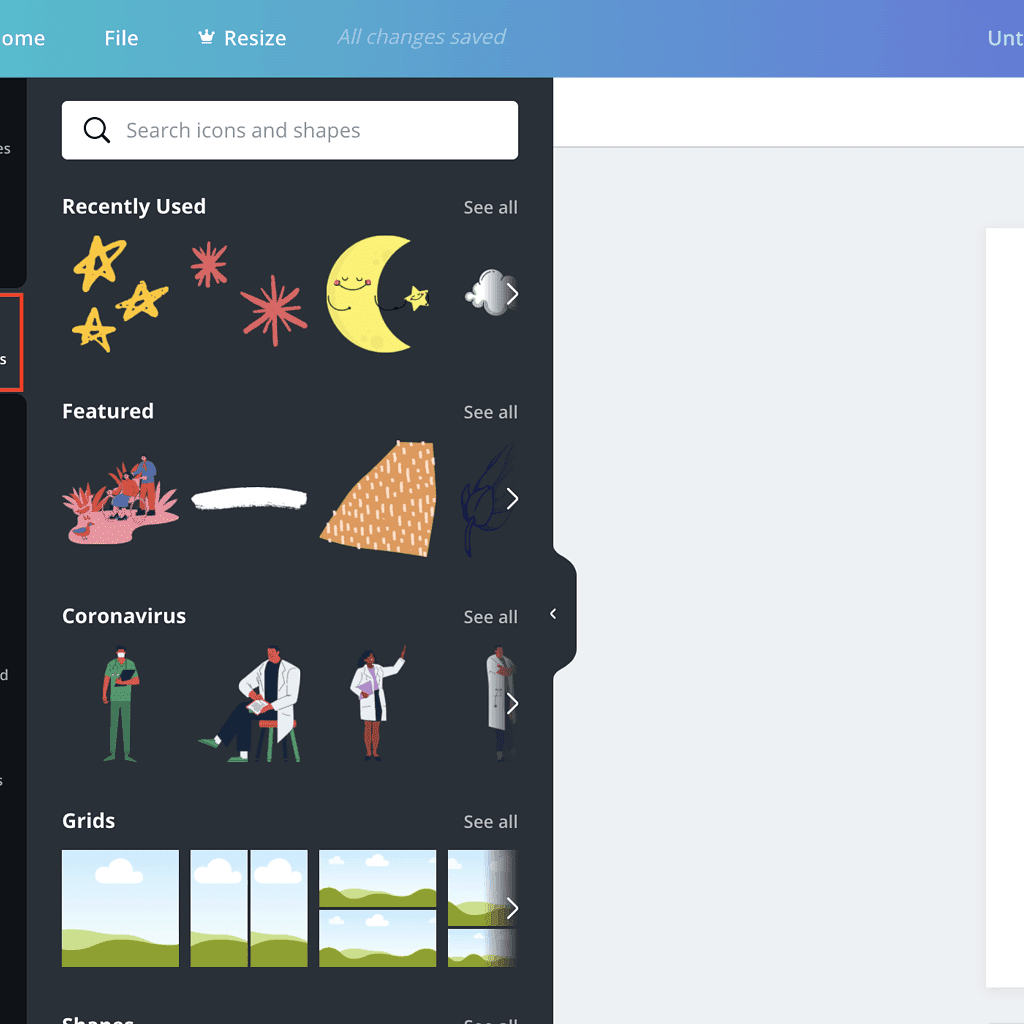
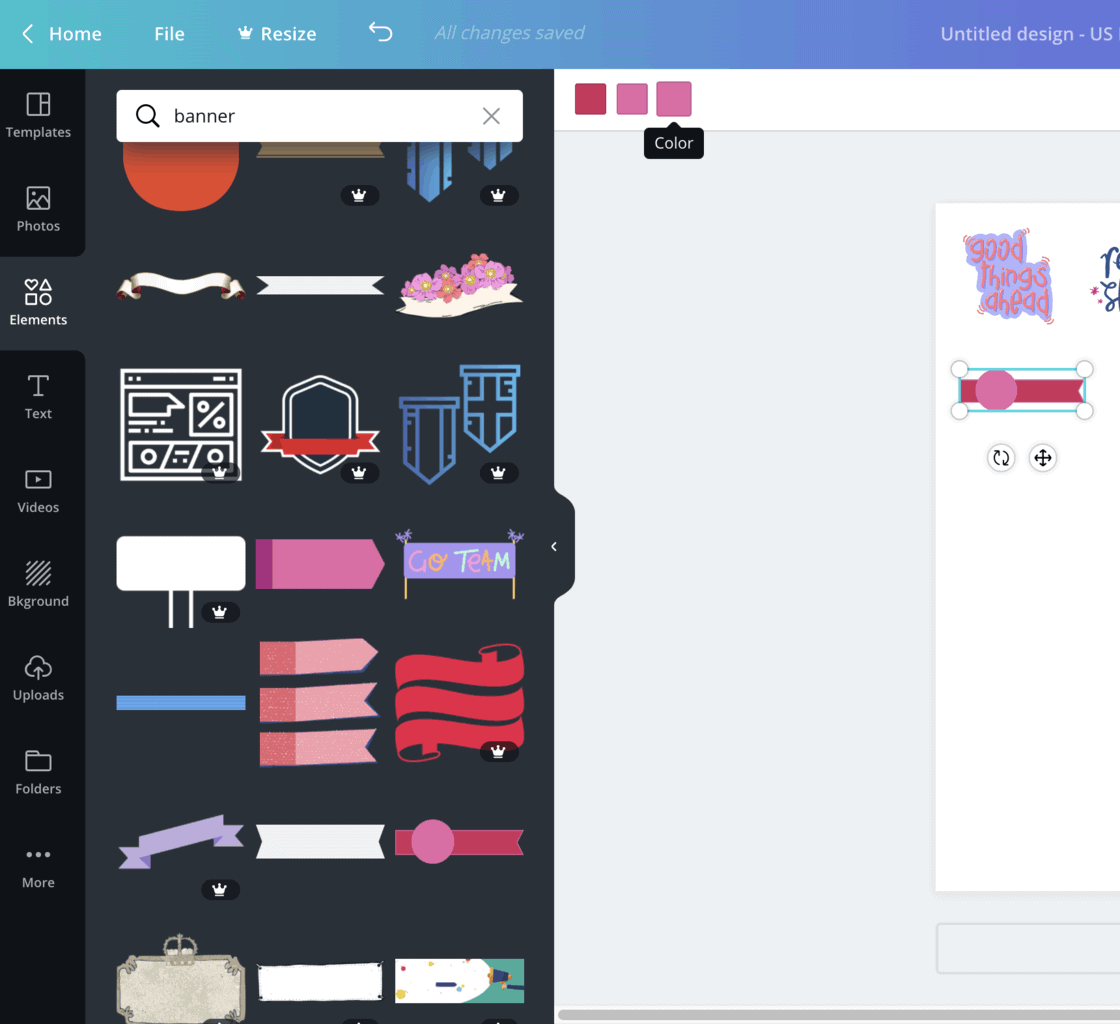
Once you decide what you want – go to “elements” on the left and type it in your search bar.
Quote Stickers
In this example, I decided to start with little quotes I like putting in the corners of my weeklies, so I just typed “quote” and went through the results to find the ones I liked.
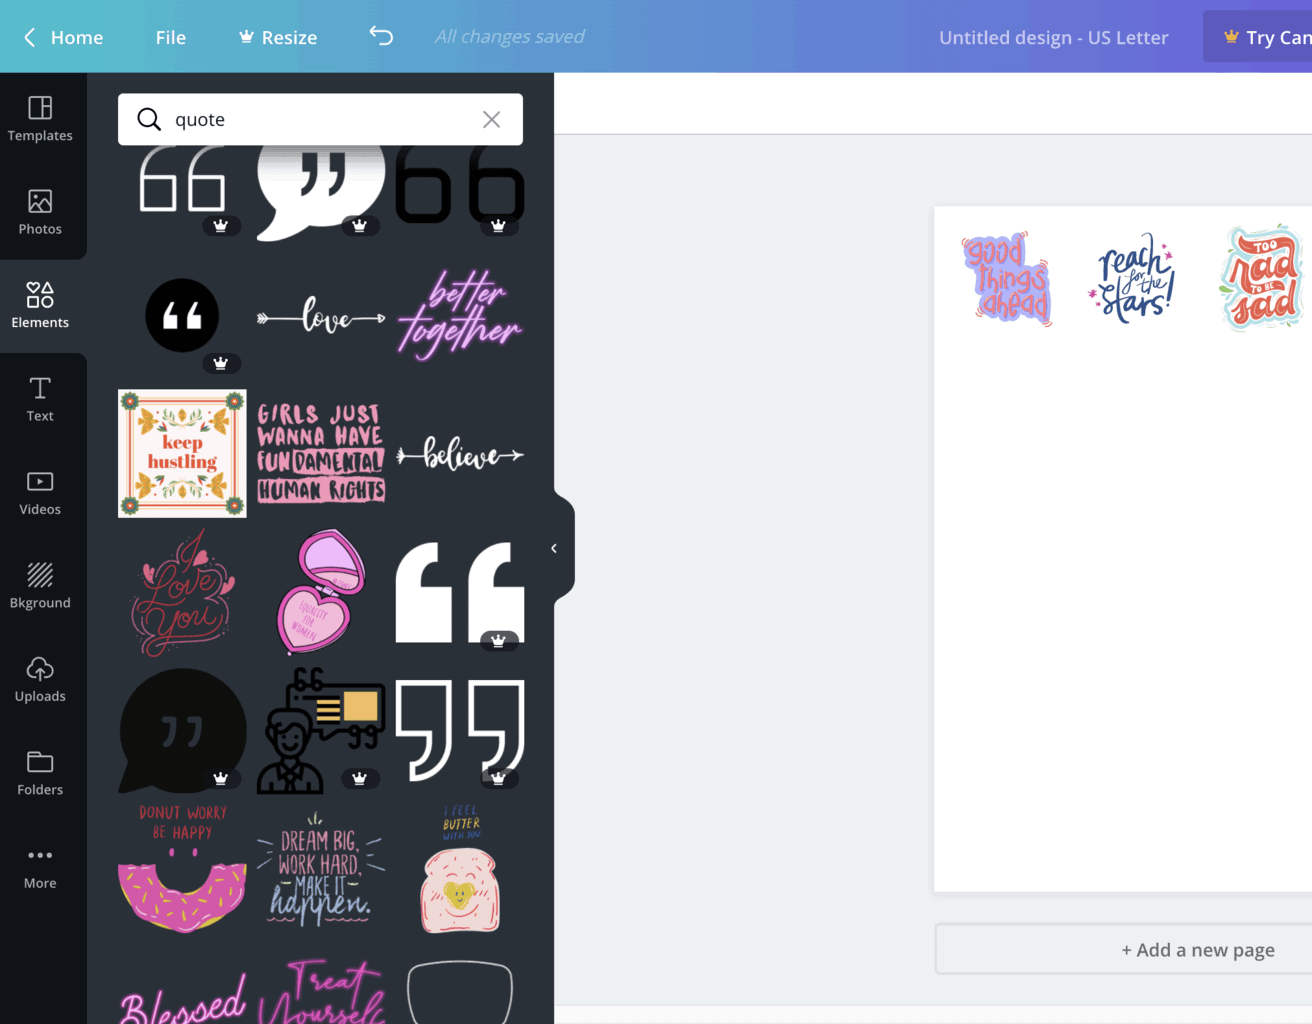
You’ll notice that some items are free, and some have a little crown – those are available on Canva Pro or can be purchased separately for a one-time payment.
I picked a few I liked and added them to the canvas. When doing that, first consider the size you want the sticker to be, and secondly – be sure you have enough space between the stickers so you can conveniently cut them out later.
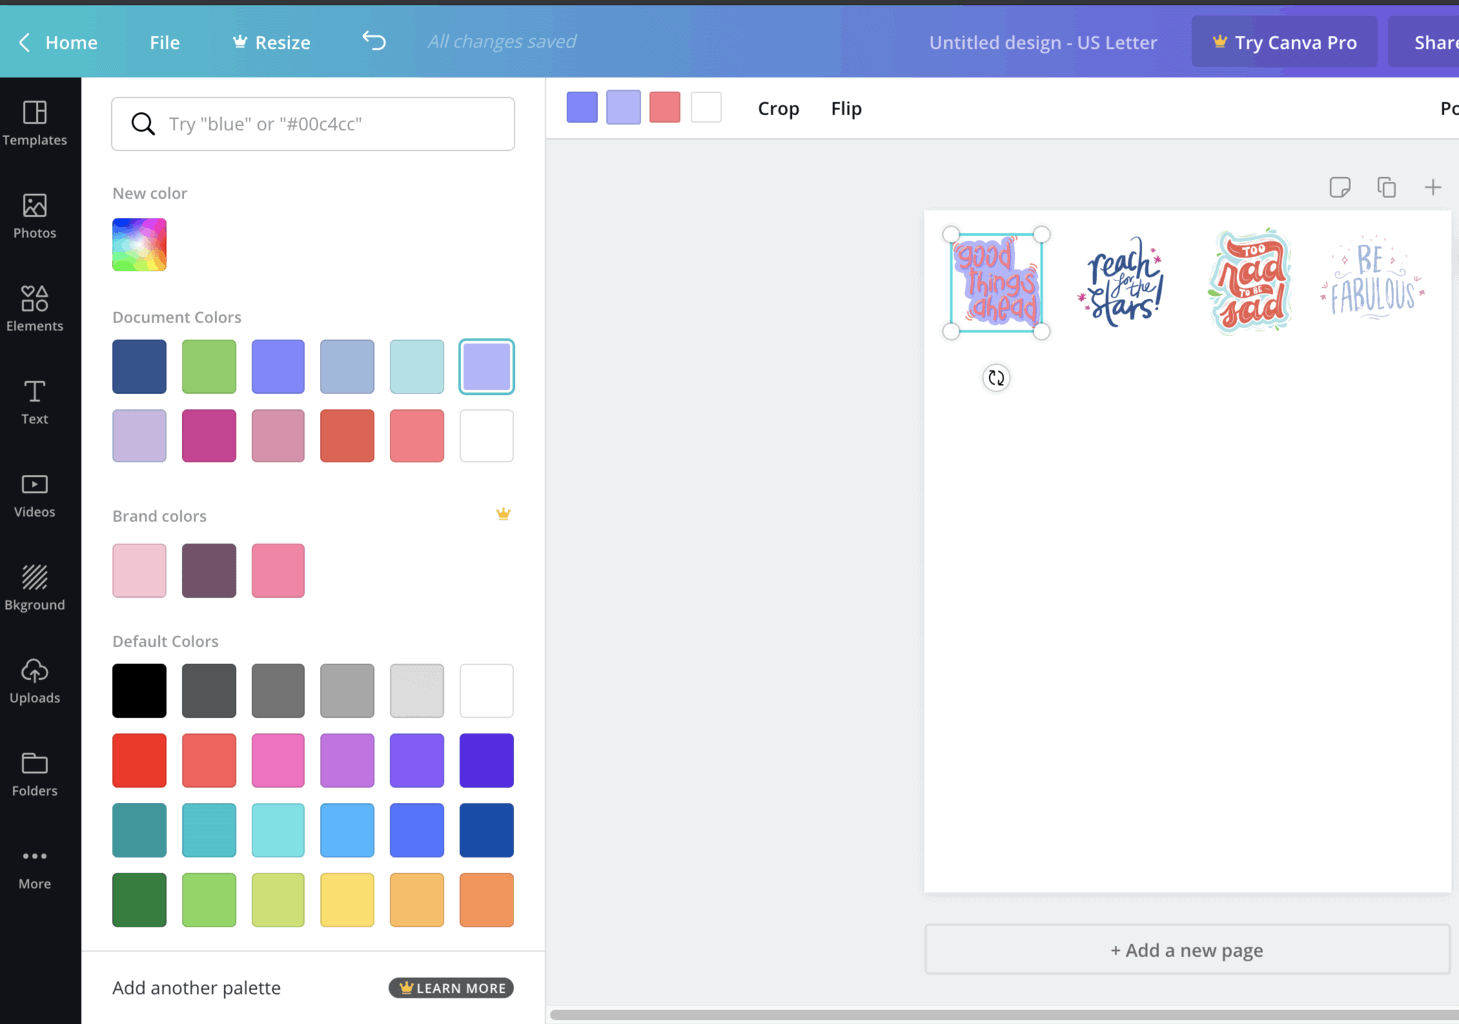
If you click on the design element, it will show you the colors used, and you can change the colors as you want. For me, these designs were perfect, so I left them as is.
Banner Stickers
Another thing I wanna show you is how to design banner stickers. These are so useful and will save you a lot of time when setting up your weekly spreads.
Start the same way – type “banner” in the search and choose from the banners they offer you.
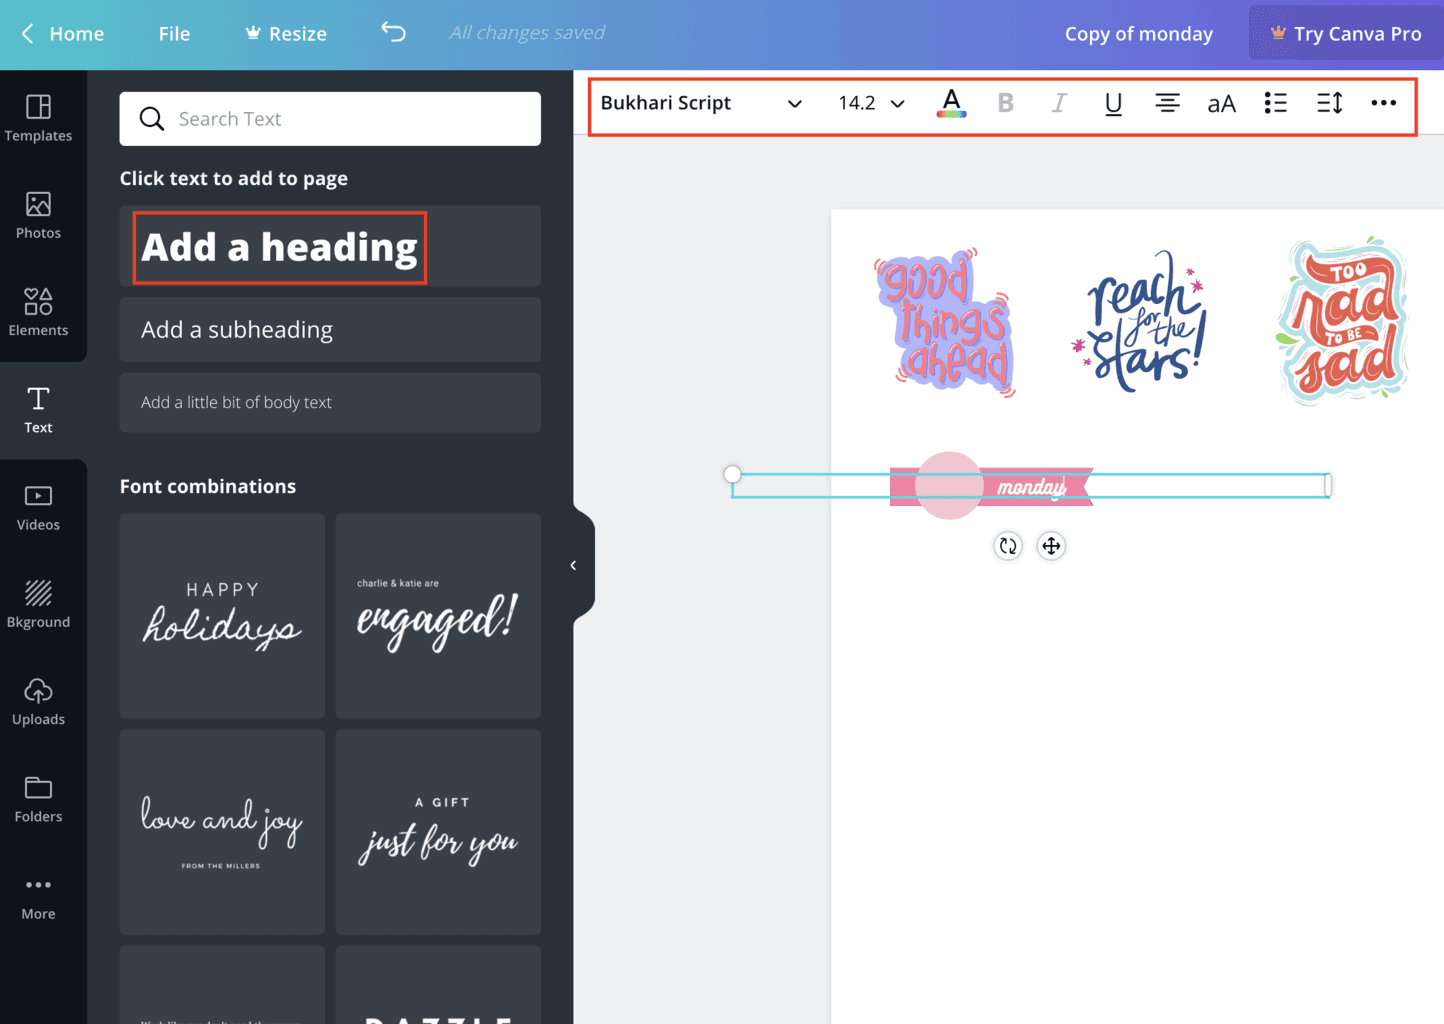
I chose a simple banner that will allow me to add both the date and day of the week. Next step – changing the color. I decided to go with a bit lighter colors so my dates will be better seen when I write them.
The next step is adding the day of the week test. Go to “text” and “add a header”.
Once the header is there, you can change the text as well as the font and text color – just check the panel on the top.
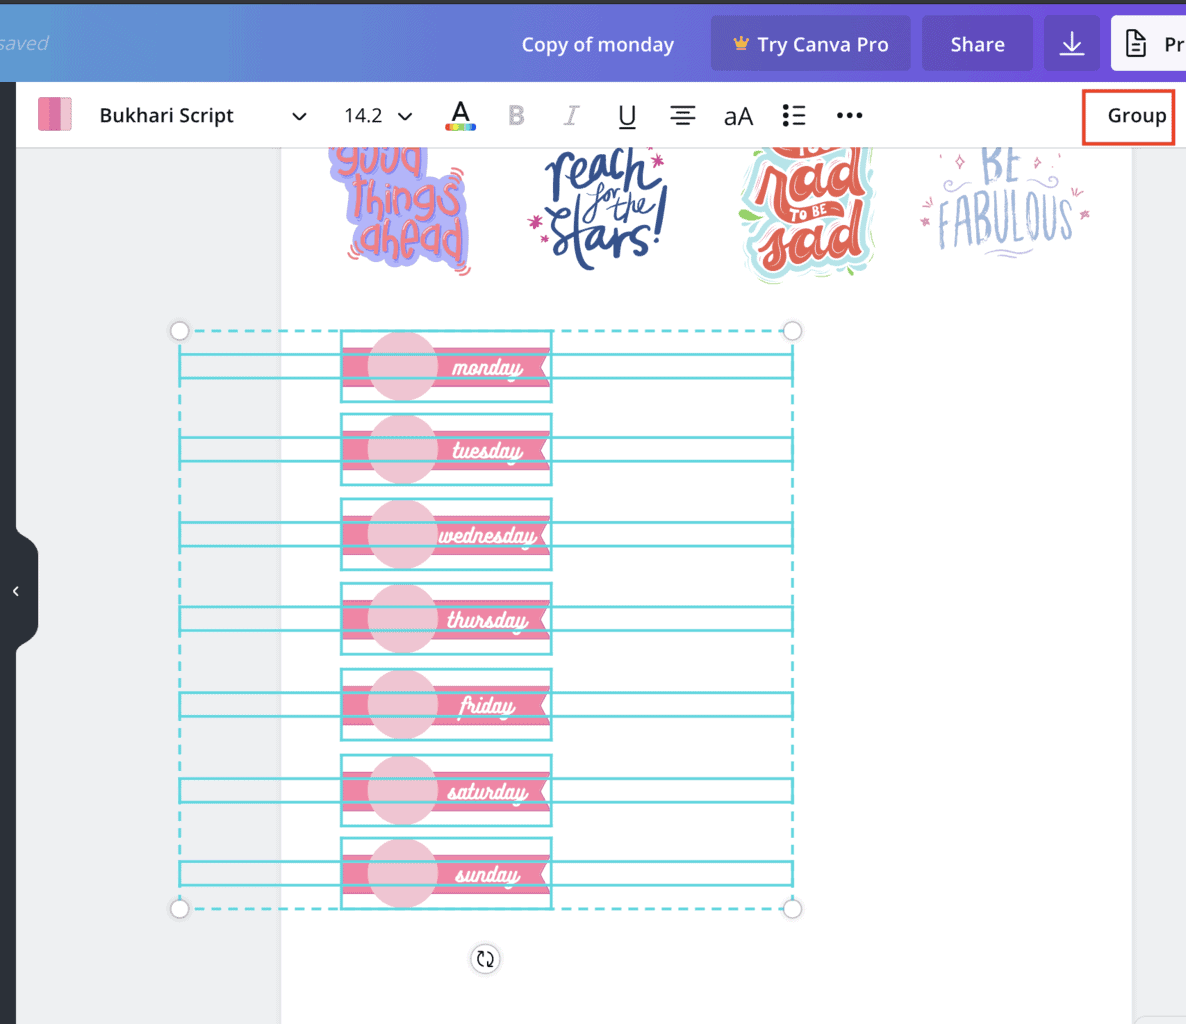
Select both elements, copy them as many times as you want, and change the text to create headers for every day of the week.
Once you’re happy with what you have – select all elements and click the group button on the top. Now, this is one element, and to create more, you can just copy-paste them and later change the text.
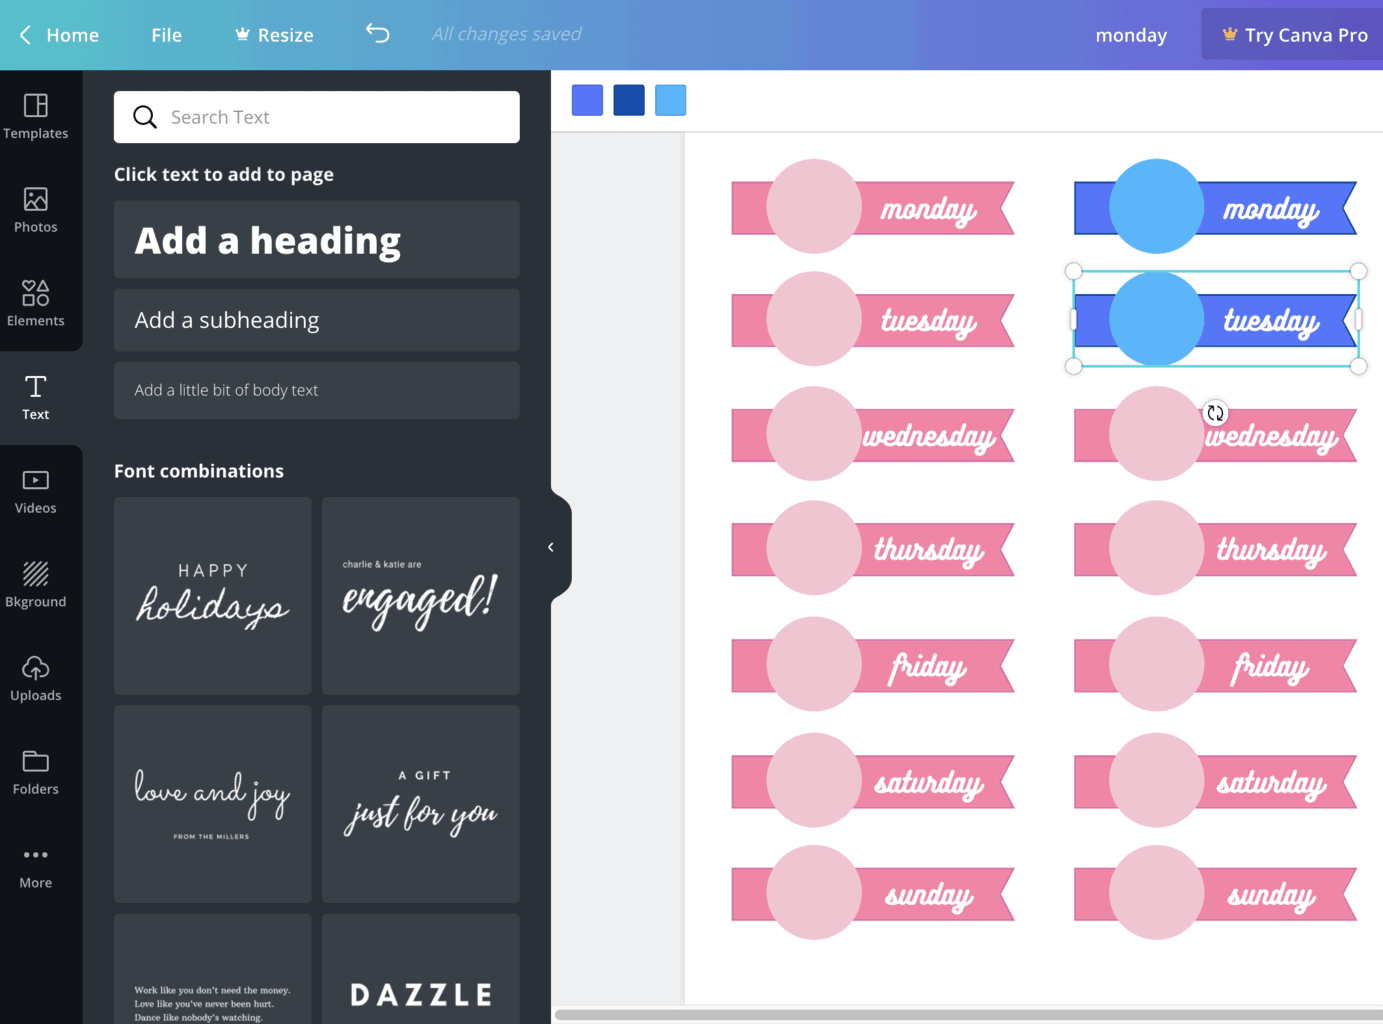
If you need to make some changes, like making the font smaller or moving the text a bit – just ungroup the element and make your changes.
Once you’re done and happy with how it looks, you can copy it, and create another set of banners, maybe in a different color.
Icon Stickers
Start by choosing a shape you want from your icon. I usually love my icon circles, so I search for a circle shape first.
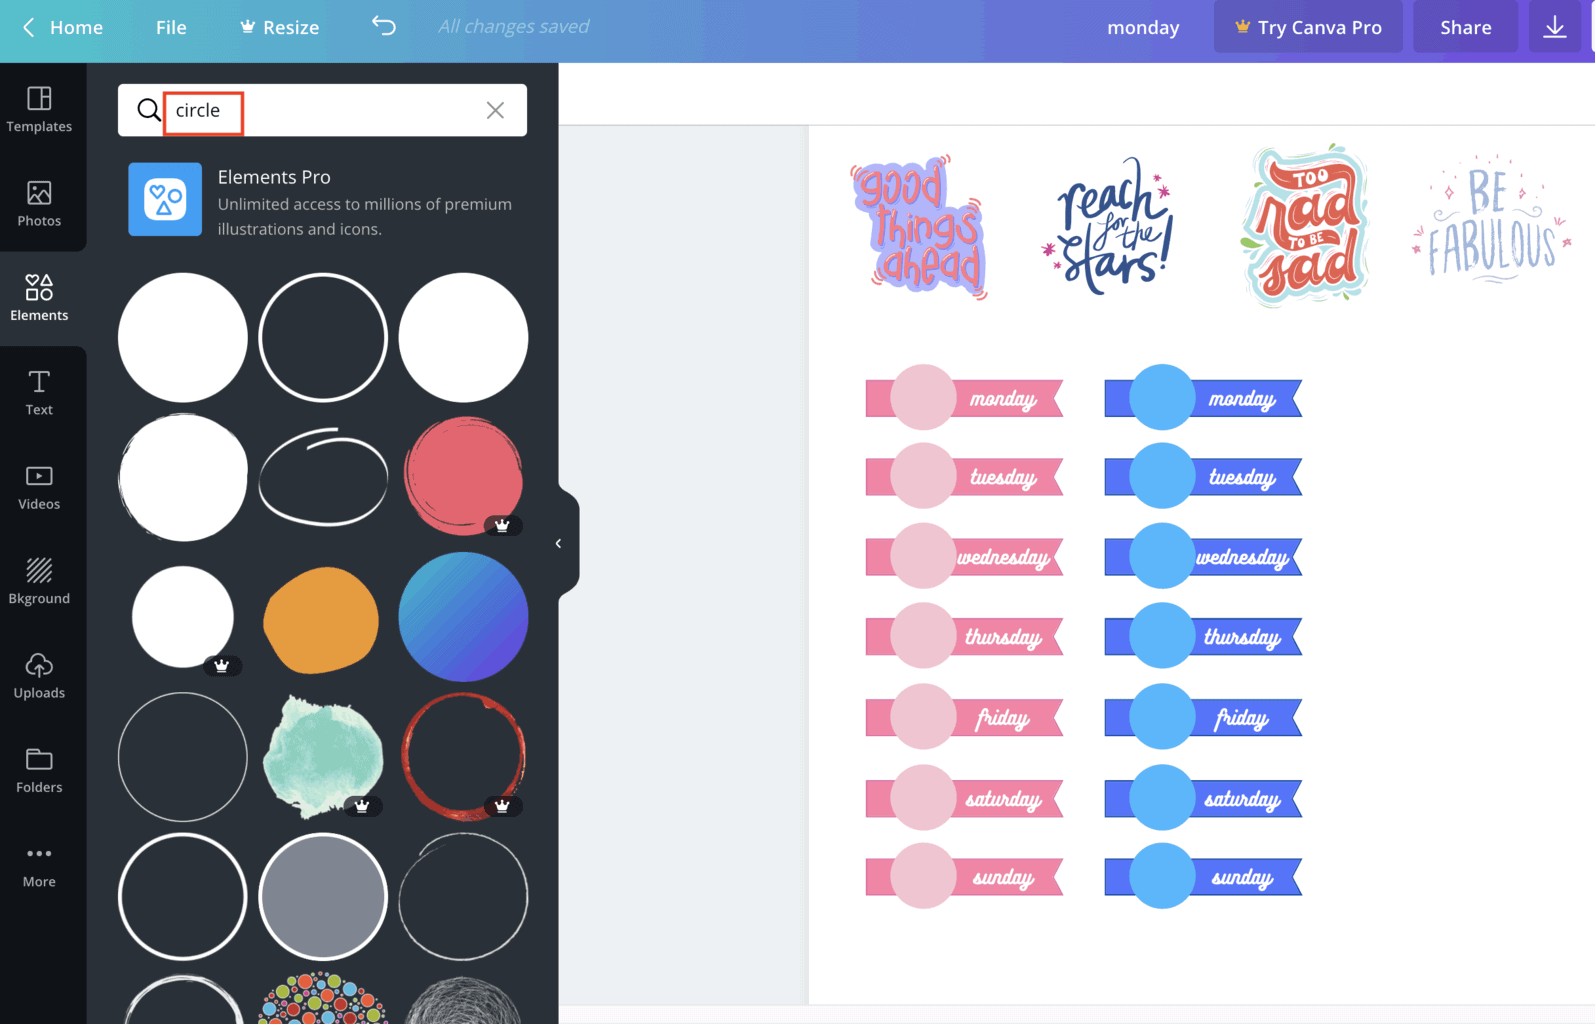
I choose the shape I like, resize it, and change the color to the one I liked.
The next step is to find the icon that matches your needs. In this case, I added “pills” to the search bar so I can create a little icon reminding me to take my vitamins.
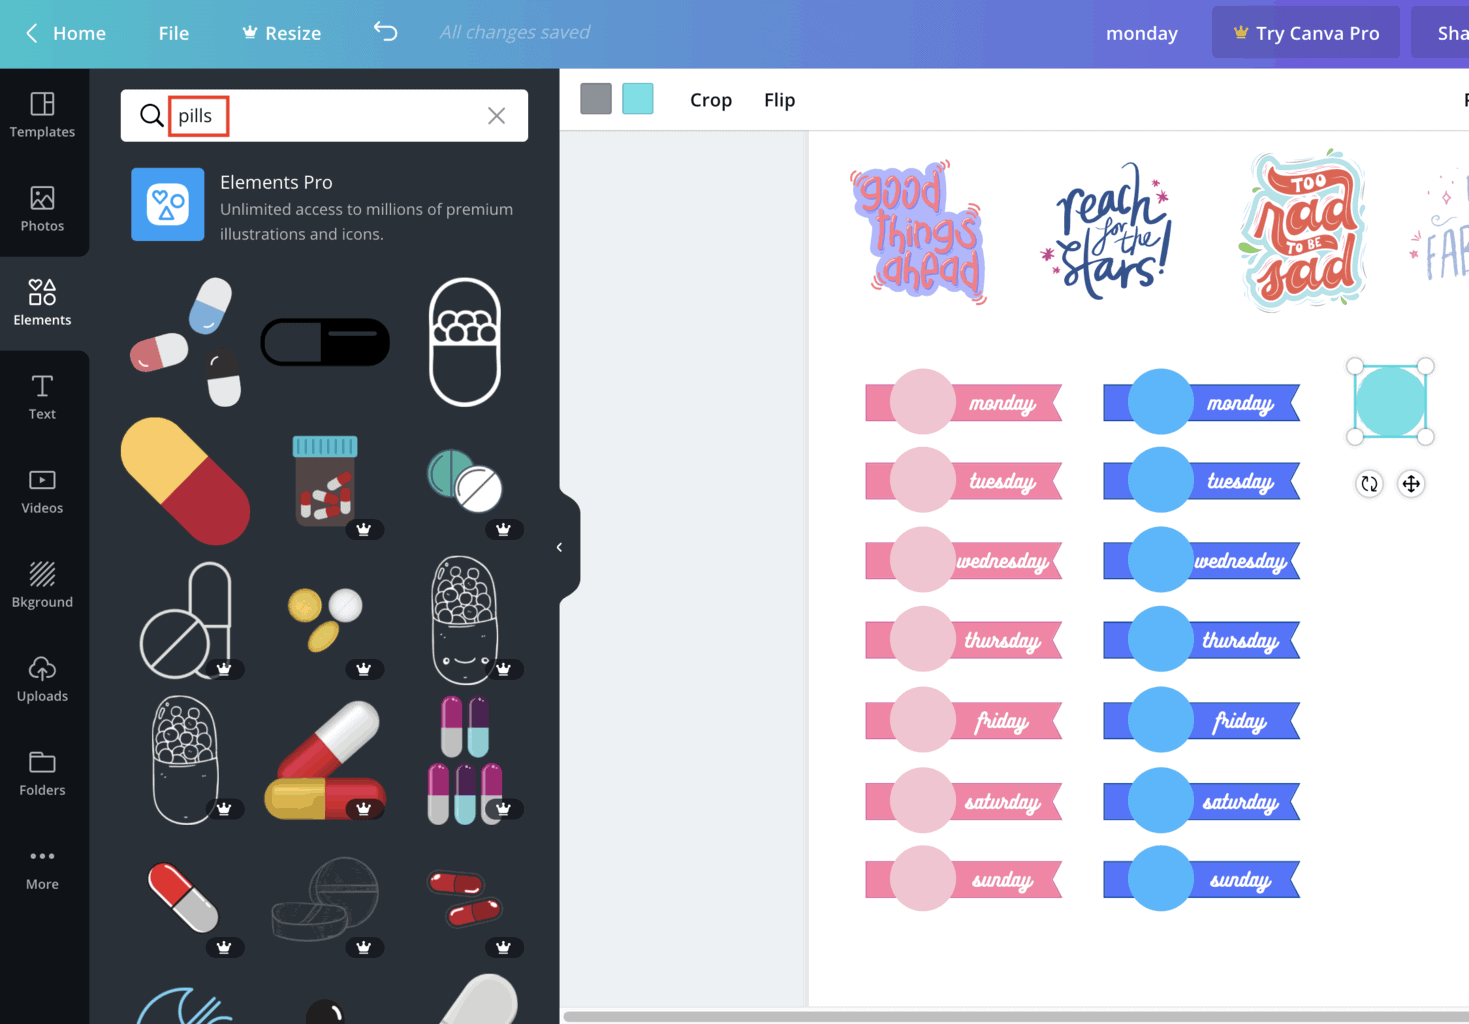
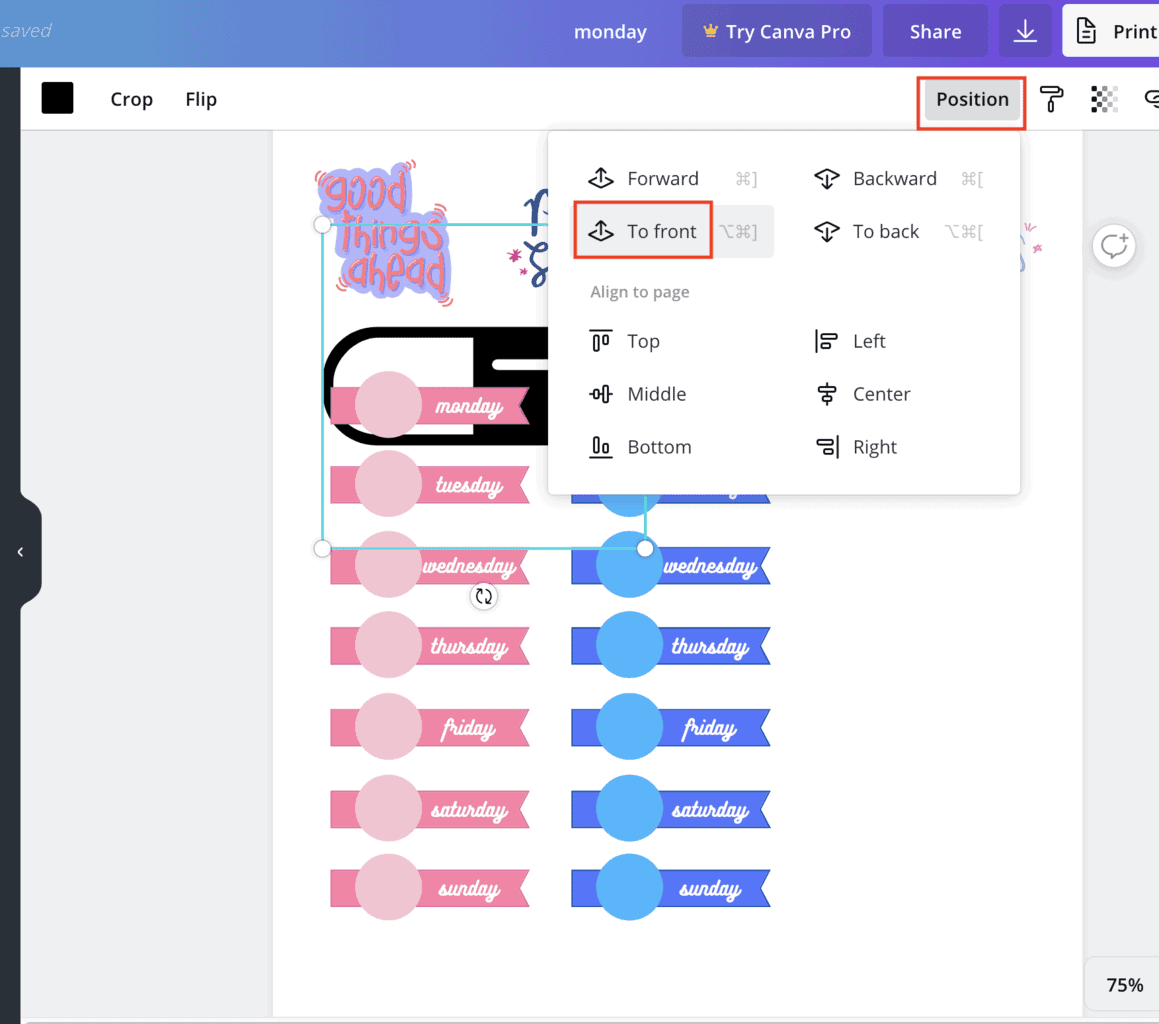
First of all, if your new image is behind the rest of the things on your page – select it, click “position” on the top right of the screen and choose “to front”.
This will bring the element in front of everything else.
Then just resize it and choose the color you like.
When you’re happy with how it looks, group and copy-paste it to create more icons.
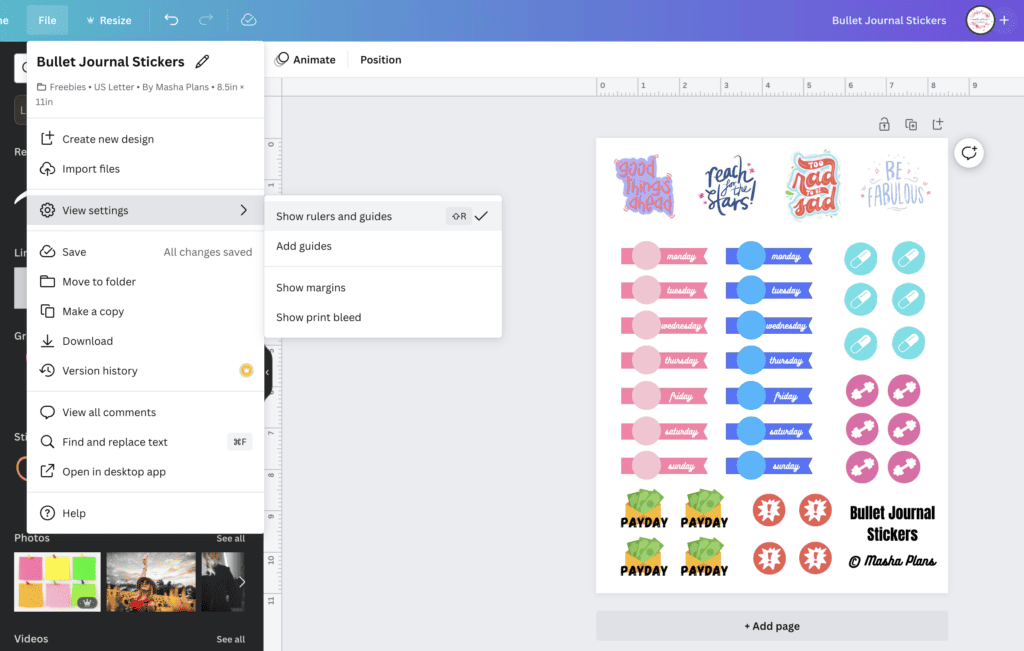
TIP: You’ll need to have a way to actually measure your designs so they come out the exact size you need, and with the latest Canva update, it actually became possible!
All you need to do is click File => View settings => Show rulers and guides, and the ruler will show up around your design in inches.
Step 3: Printing Bullet Journal Stickers
Now that you’re done with the design – time to save. On the top right side, click the icon for downloading and download it as a PDF.
Most likely, it will be saved in the Downloads folder on your computer.
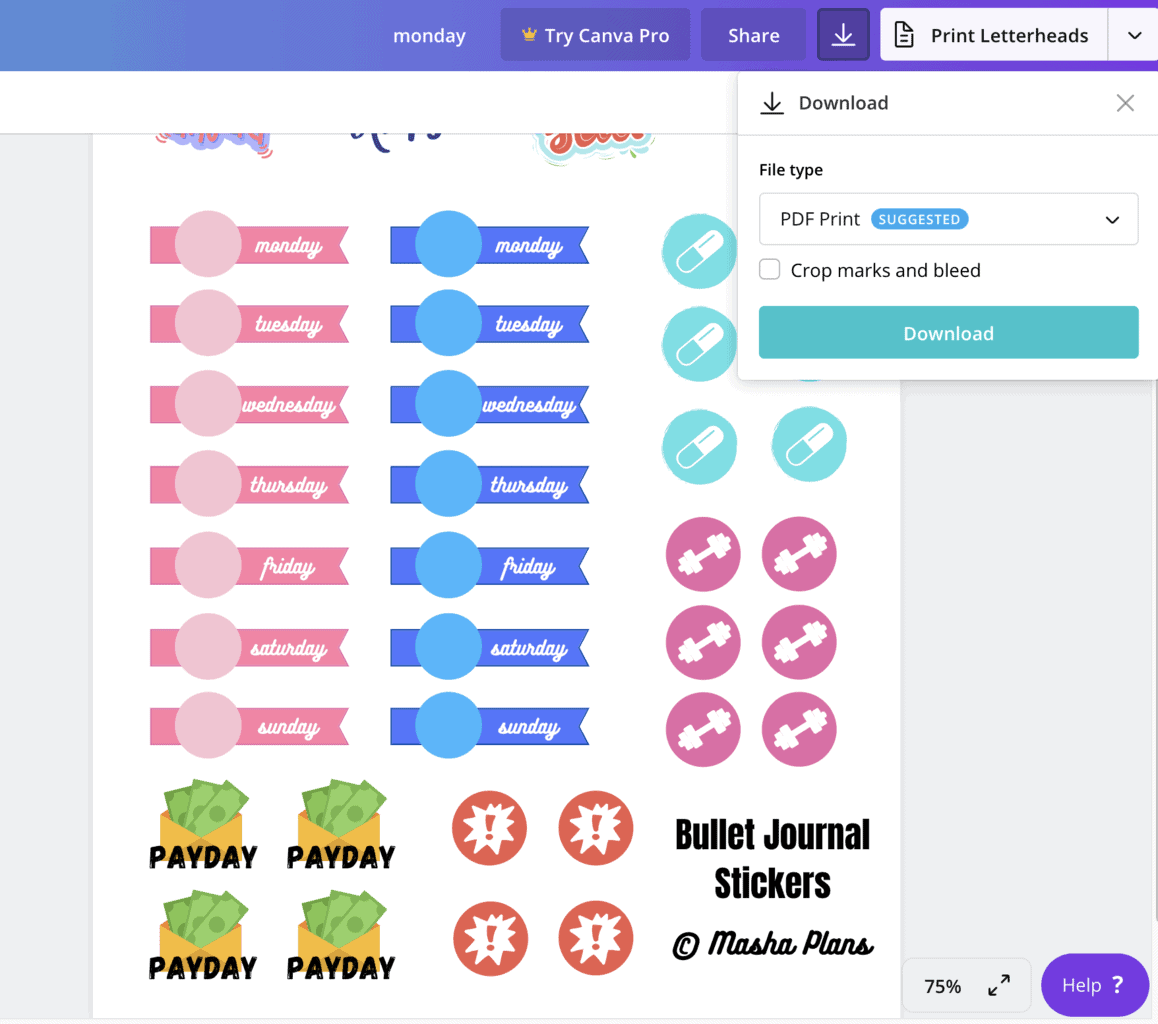
For printing those, follow the same instructions – open the document with a PDF Reader (such as Adobe Reader), click print and be sure to make it COLOR and ACTUAL SIZE.
Final step – cut them out with scissors or an Xacto knife. If you didn’t use sticker paper – use glue or adhesive tape to add the sticker to your journal.
UPDATE: Canva released a new service where through their Stickers and Labels page you can request them to print out your creations. So it’s also a good alternative to look into.
How To Create Stickers With iPad
Digital design has been my enjoyment, and it really became a possibility only after I got my iPad since it’s so much easier to design stuff that way!
All you need is an iPad, Apple Pencil, and Procreate app. It feels like drawing in your journal, only digitally!
So if you want to create amazing designs but can’t really do it in Photoshop – the iPad will be your best tool.
It still takes some time to get used to it, and there are several sticks, so I’d recommend you start with some basic classes.
For that, as always, I say – check out Skillshare; they have tons of classes on digital drawing there that will help you to go from Procreate basics to the advanced level.
Here are a few:
- Procreate Essentials: The Ultimate Guide
- Fun With Florals: Create Flowers with Dimension & Personality in Procreate
- Intro to iPad Lettering
- Doodles to Digital Design – Learn Procreate on the iPad
- Digital Illustration: Draw A Vertical Garden on iPad
Remember, you can get 2 weeks access to Skillshare Premium and all their classes for FREE if you follow my link.
If you’re looking for simple basics, here is how we can go with it.
Step 1: Design Your Stickers
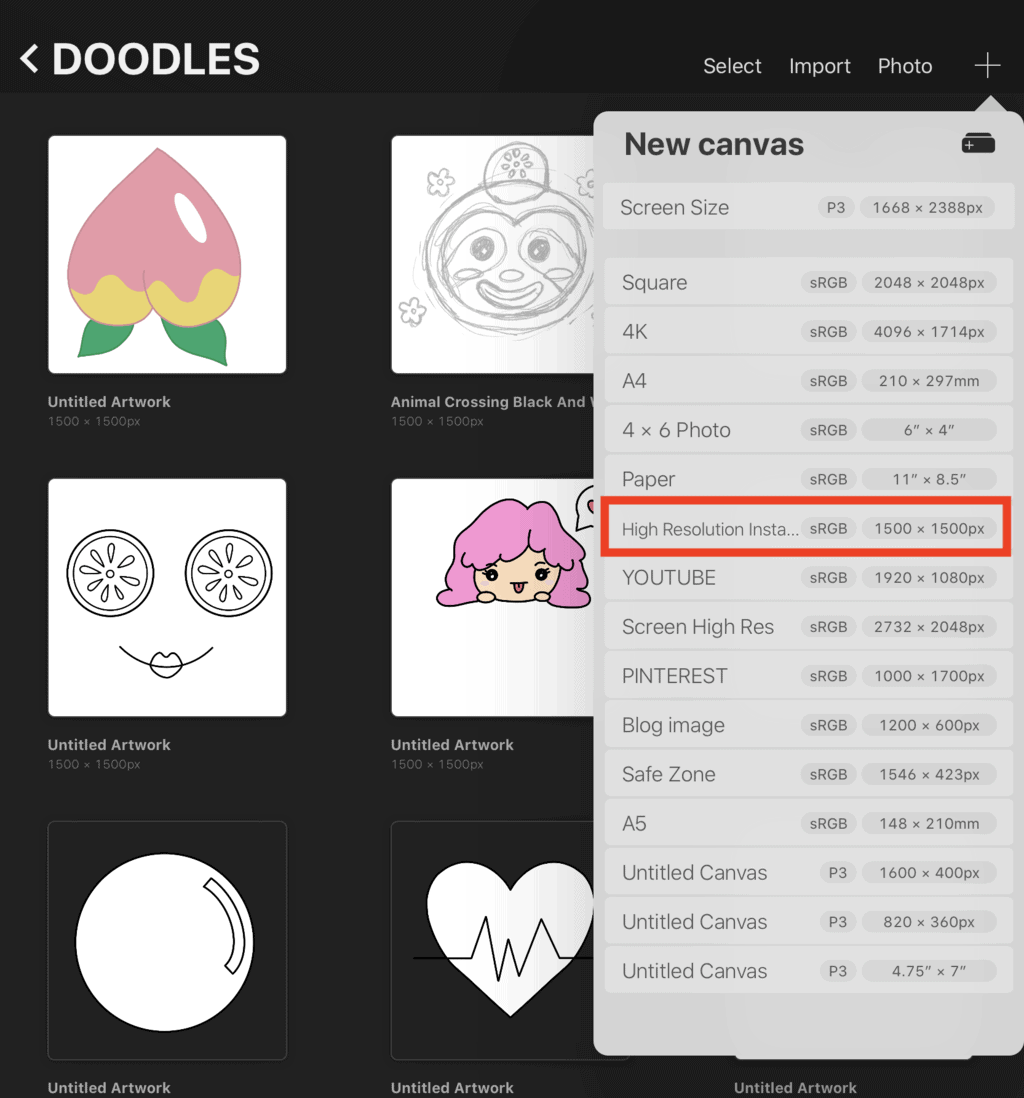
Open your procreate and create a new canvas by clicking the plus sign on the top right corner.
I like to doodle on a very big canvas and then move the doodles to the sheet I’ll be using. That way I can play with the size much more without losing the quality.
My preferred canvas size for doodling is 1500px by 1500px, simply because it’s easier for me to doodle on a square canvas.
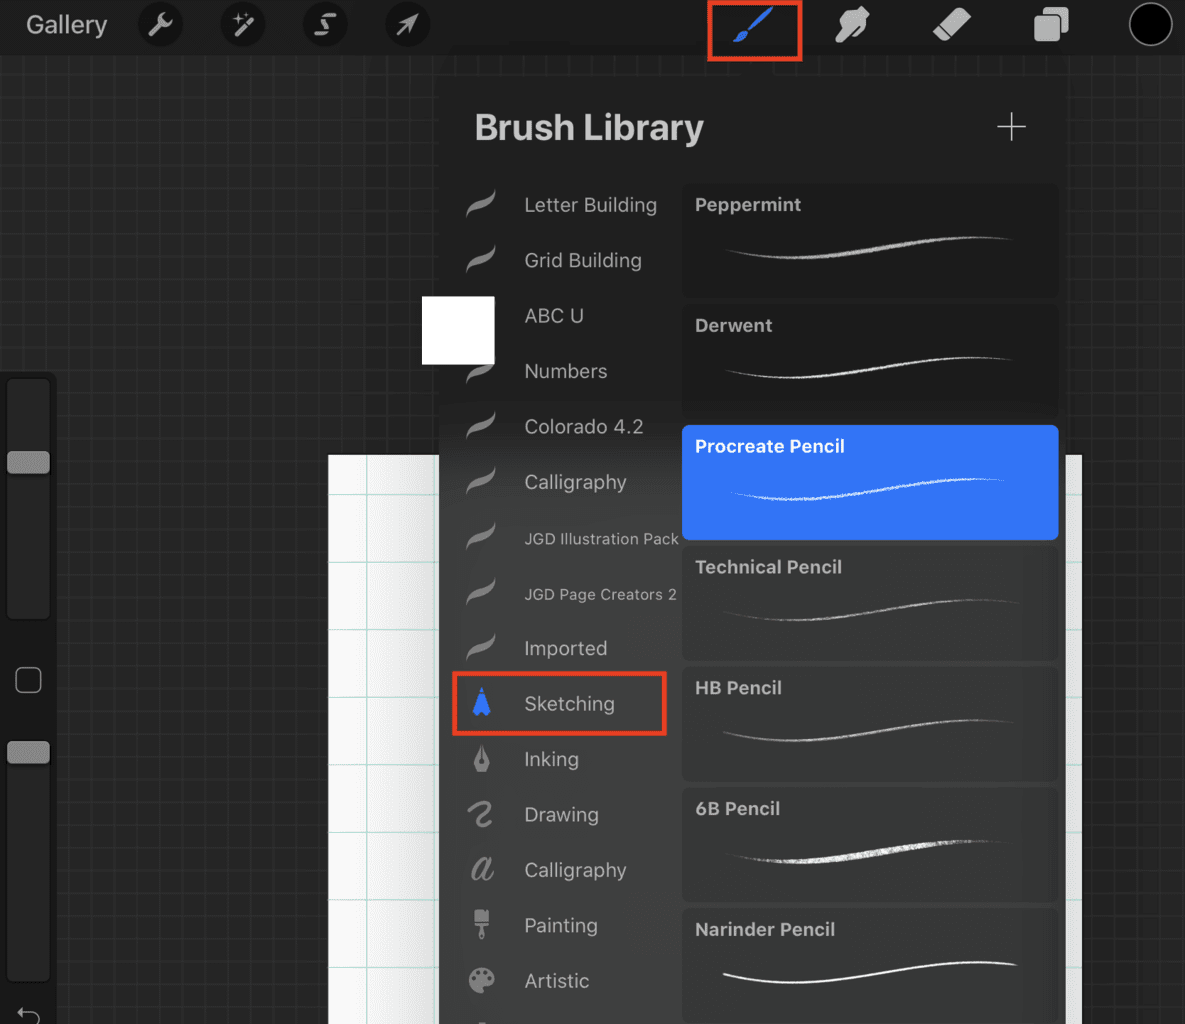
I prefer to start with a pencil, so go to brush-sketching and choose whatever pencil you like.
Then start sketching!
Once your draft is done, time to create the final look. Be sure you use a different layer for the design. I actually also prefer using a new layer for each new element of my drawing; that way, if I need to move elements after I’m done, it’s much easier.
I usually use one canvas for all the stickers I want to see in the set, so I’ll keep repeating this process until I finish all the doodles I set to design.
Once you’re ok with the final look of each doodle – be sure to merge the layers so that each doodle has just one layer for the final design.
Step 2: Organize Your Stickers
For printing, you’ll need a new canvas; you can choose one of the preset ones, “Paper”, which will print in US Letter size.
Now go back to your original file with doodles, copy a doodle, and bring them one by one to the canvas.
Once they all are there, all you need is to change the sizes, copy them and organize how you like the stickers to be printed. Remember that you can always make the size smaller, but if you try to make it bigger, you will lose the quality.
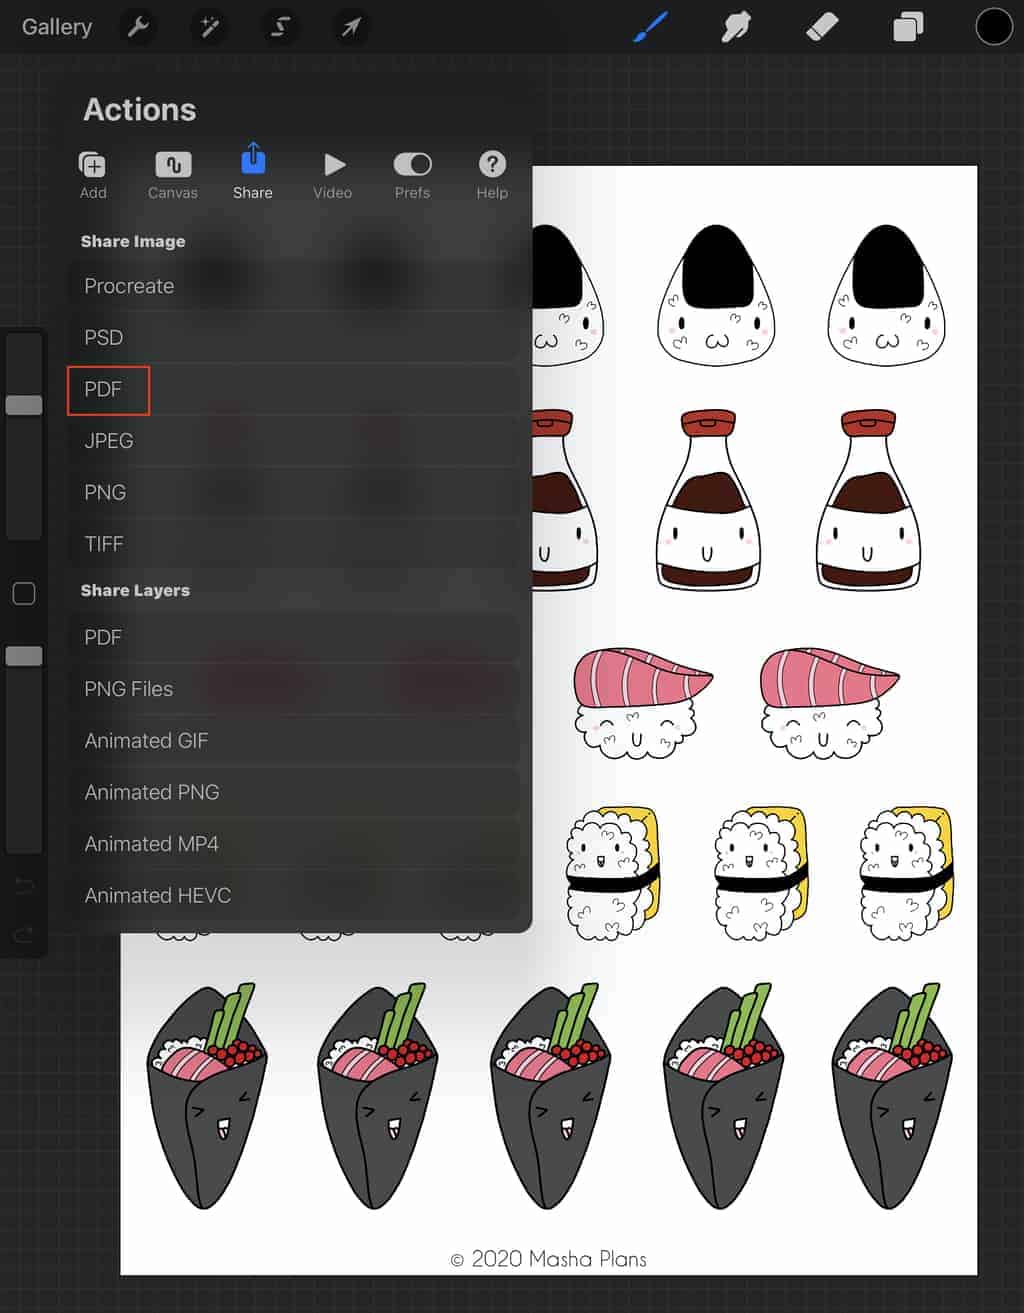
Once you’re happy with how it cools, click share – PDF – Best Quality. Save it on your iPad or send it to your computer for printing.
Step 3: Print Your Stickers
This step is the same every time.
Open your PDF file with PDF Reader like Adobe Reader (free and safe download) and send it into printing.
Be sure to tag COLOR and REAL SIZE so print it out properly.
Then just cut them out! If you used sticker paper, you don’t need to do anything else, but if you used the usual printing paper – use Tombow adhesive tape to add your stickers to your planner pages.
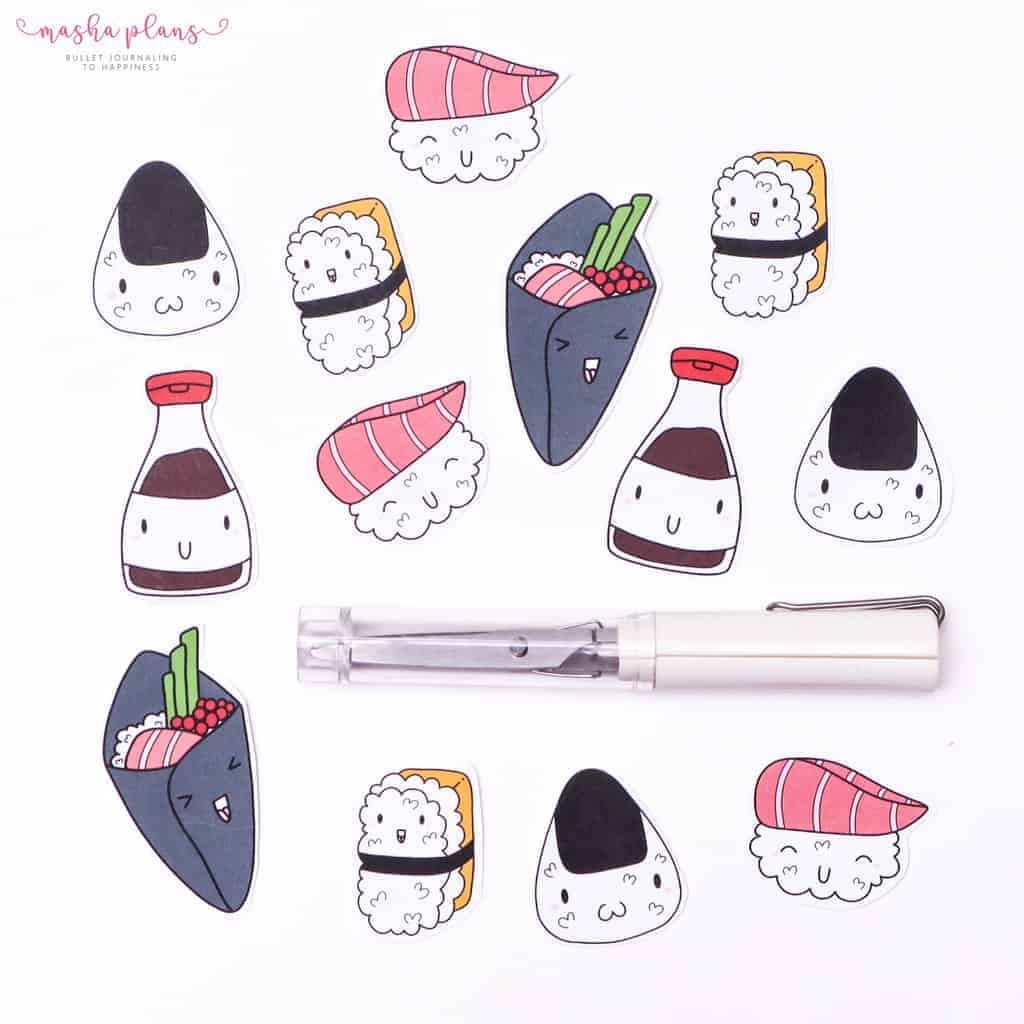
Free Printable Stickers
Remember that sticker sheet we designed together on Canva?
Well, it’s now a free printable in the Resources Vault!
Just sign up in the form below to get your password, and then go straight to the Resources Vault to download this and 50+ more amazing printables for your journal!
Free Course: How To Make Stickers
I hope you enjoyed this post and are ready to start creating your own stickers. But, in case you want more details and a video format – I found a free course for you!
This amazing free course from Creative Fabrica “Making Planner Stickers” is very helpful and super fun!
Who knows, it might even help you unlock a completely new hobby!
How To Make Bullet Journal Stickers: Part 2
This is just part one of my series of creating stickers. In the next post, I will be talking about using a Silhouette cutting machine to cut out the stickers in professional style!
So if you’re wondering how to do that or just became a happy owner of a Silhouette machine – head straight there, and I’ll walk you through the process step by step.
Printable stickers are amazing because you can easily reprint them as many times as you need, so you don’t really spend that much money on it.
That’s all for part one; I’ll see you in part 2!
Hope this post was interesting; if you find it so, please share! If you enjoy my content and want to show your appreciation, please consider supporting me with a cup of coffee.
And always remember! Keep Bullet Journaling, and don’t be a Blob!


Hi Masha!!
Thank you!!
This was so helpful for me!!
You are so inspiring :)
Have a Super day!!
Lisa
Hey Lisa! Thank you for your sweet comment, so glad you found this post useful =)