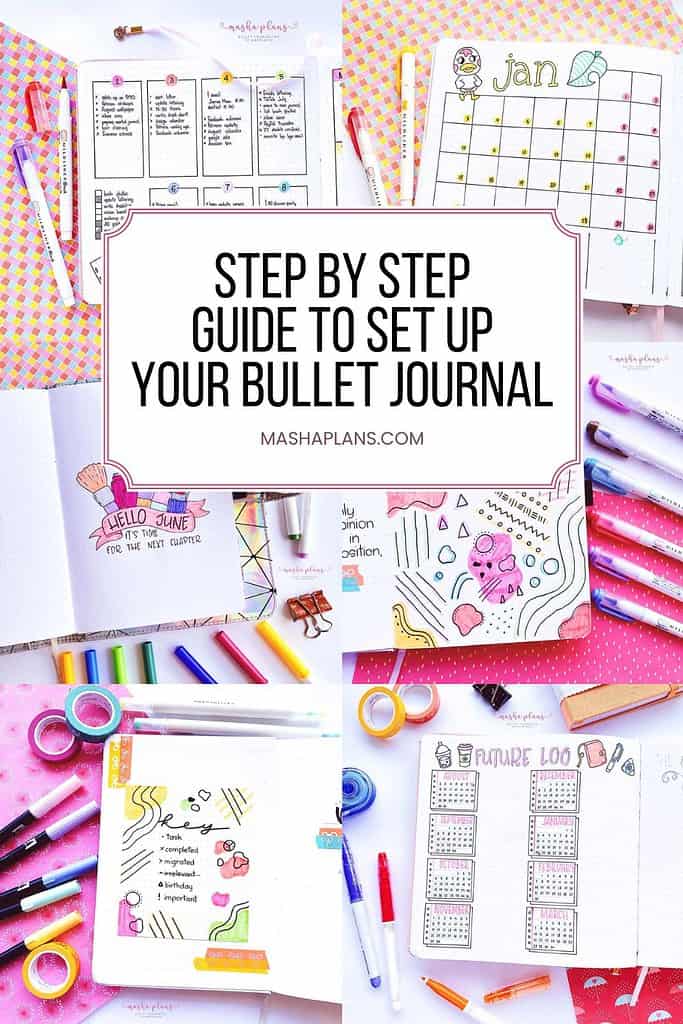
How To Set Up A Bullet Journal: Step By Step Bullet Journal Setup Guide
Looking for a simple step-by-step guide on how to start a Bullet Journal? You’re in the right place! We’ll talk all about Bullet Journaling for beginners and start with your first one.
I’ll walk you through creating a Bullet Journal setup with all the pages you need. So by the end of the post, you’ll have a ready-to-go journal to start planning right away.
And don’t worry, it won’t take forever. With the Bullet Journal, it’s up to you how much time you spend on each page; it can be as little as 5 minutes.
Bullet Journal is an amazing way to organize yourself and create a better life with more mindfulness and creativity.
Chances are, you already know this, as you’ve probably already been sold on the idea, and you’re looking for the final step of information: how to actually create a Bullet Journal setup.
Well, I’ve got you covered, as this post will guide you through setting up a brand-new Bullet Journal page by page.
Be sure to scroll until the end of the post to sign up for a FREE course on Bullet Journaling for beginners, as well as watch a step-by-step new Bullet Journal setup video.
This post may contain affiliate links. They will be of no extra expense for you, but I receive a small credit. Please see my Disclosure for more details. Thank you for supporting Masha Plans!
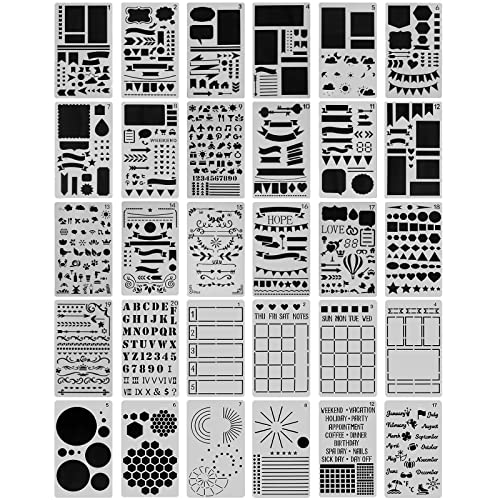
Bullet Journal Supplies
According to the original Bullet Journal method, all you really need is a pen and a notebook. No joke, this is all you need, so if you don’t have any fancy Tombows, don’t let it stop you from starting.
However, I can bet you’d want to add something else to your pages. So here are a few recommendations for the supplies you might like:
- A notebook. If you want to avoid markers bleeding through your pages or ghosting, invest in a high-quality notebook. Good doesn’t mean expensive by the way; there are many cheap options that don’t compromise on quality, like a Lemome Dot Grid Journal. My favorite journals lately are the ones by Archer and Olive, and if you want to try them, use my code MASHA10 for 10% OFF your order.


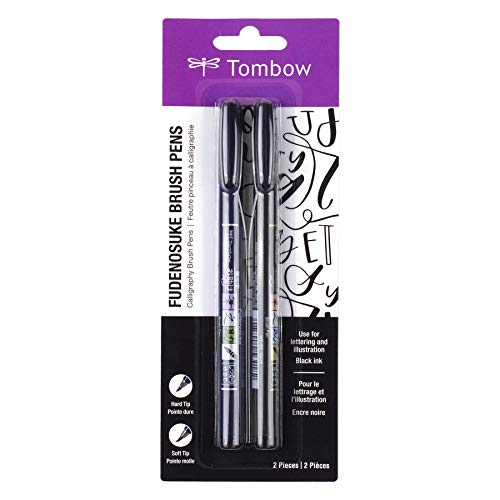
- A black fineliner. The black pen is the blood of your journal, and I recommend having several. Use fineliners of different sizes for drawing and doodling. My recommendation for these is Sakura Pigma Micron, which also comes with different nib sizes to add more variety to your lines.
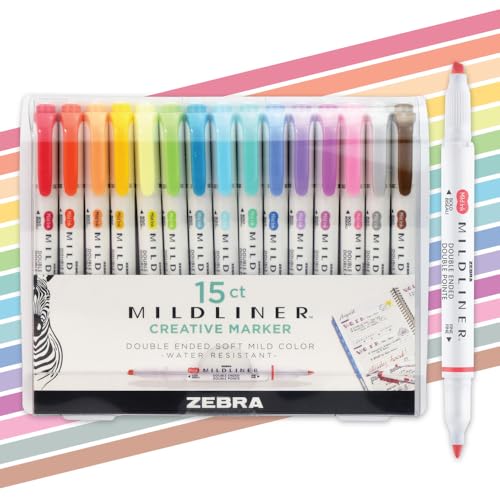
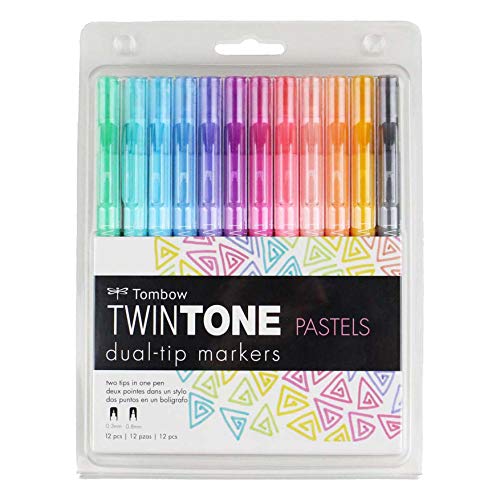
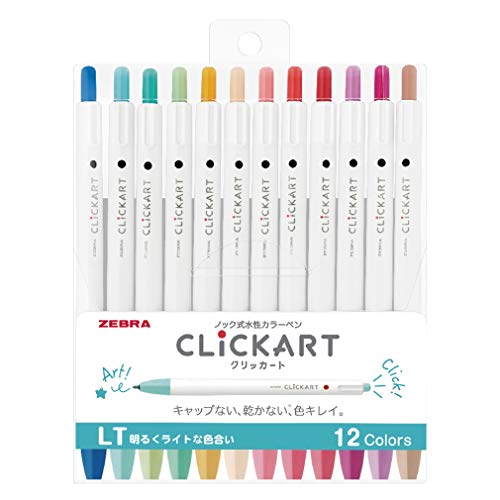
- Markers and brush pens. Personally, for most of my yearly pages, I go with the black-and-white color scheme since I always prefer to have them neutral and not really connected to any theme. But if you decide to use color, I’d recommend trying Crayola Super Tips or Tombow Dual Brush pens.
Of course, don’t forget about the other small things, like a pencil, a good eraser, and some rulers. My top choices are Pilot Dr. Grip pencil, Sakura Foam Eraser, and Helix Circle Maker.


Now that you have all the supplies at the ready, let’s dive into it and see how you can easily create a Bullet Journal that works for you.
The Difficult Part Of The Bullet Journal Setup
The best thing about Bullet Journal, though, is its flexibility; this planner is completely customizable for your needs. You can create any spreads you want for any imaginable purpose.
This is also the most difficult part of a Bullet Journal – to pick and choose spreads and setups. When you can create anything, how do you choose where to start? How do you make sure you use the best possible spreads for you?
The answer is …. By trial and error.
I’ll guide you today through the basic spreads you absolutely need to have in your Bullet Journal and how to set them up. However, there are many more possibilities with this system, and it’s up to you to discover what works best for you.
Check the end for more resources to help you learn about more pages and develop that perfect system that works for you.
Before You Start
Before you start, however, here are a few tips for creating these spreads:
- Don’t overthink it. You don’t need ALL the pages, and even if you forget something, you can always add it to your next empty page. Remember that, thanks to the index page, it will be very easy to find any collections whenever you decide to write them.
- Don’t forget to add your pages to the index. It might take some time to make it a habit, but it’ll really be useful in the future when you look back at your Bullet Journal desperately trying to find one particular collection.
- Don’t overdo the designs. Of course, if you want to get creative, please feel free to! But! Don’t let a creativity block stop you from starting a Bullet Journal. If you’re not feeling it, just go with something simple and functional; nobody will judge you. Plus, believe me, your first pages will never be the best ones in your journal.
Ok, I’m done sharing my wisdom; let’s dive in and start setting up your Bullet Journal.
How To Start A Bullet Journal: Step-by-Step Setup
In this post, we’ll be creating fundamental Bullet Journal pages that many consider to be essential in their Bullet Journal setups. But I want to clarify something before we dive right in: these aren’t mandatory.
That’s right, folks, there’s no Bullet Journal police out there who will come knocking if you decide to skip any of these pages. This is your Bullet Journal, after all, and its beauty lies in its flexibility and adaptability to your unique needs and lifestyle.
That being said, the pages we’re about to discuss are widely loved by the Bullet Journal community for good reasons. They’ve proven to be helpful in organizing thoughts, tracking habits, noting down important tasks, and much more. In essence, they’ve become popular because they work. And who knows? They might just work for you too!
If you want to see this in the video format – there is a Plan With Me video at the end of the post.
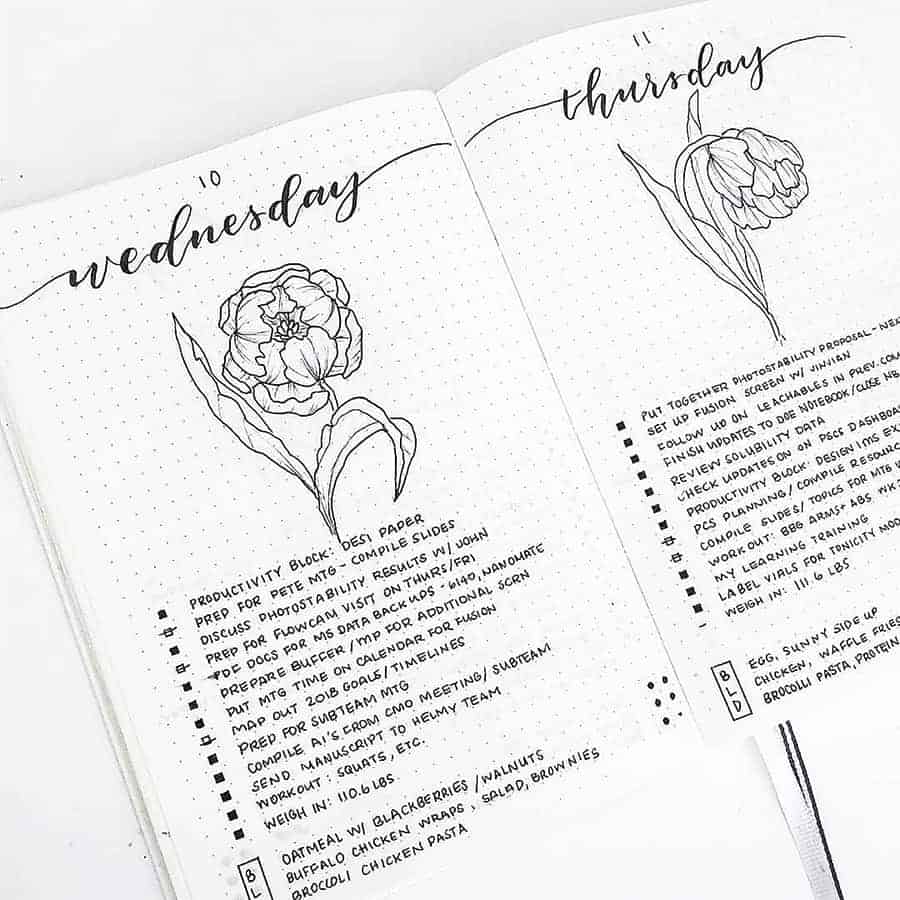
Step 1: Cover Page
Sure, you could bypass this step, but I’ve got to tell you, I find it incredibly handy. And let’s be real, who doesn’t love an excuse to get those creative juices flowing?
Setting up your Bullet Journal is more than just a task; it’s an adventure, an opportunity to express yourself, and your first step into the world of creativity that awaits you within those blank pages. So why not start that journey with a splash of fun?
I always use it to jot down the year I started the notebook. When I reach the end of the journal, I also note down the date of completion. This little habit transforms my Bullet Journal into a personal timeline, making it so much easier to look back on my past entries.
The cover page of your Bullet Journal doesn’t have to be a work of art. It’s not about crafting an intricate masterpiece that would make Van Gogh green with envy. Nope, it’s about making it uniquely yours.
In fact, in my latest Bullet Journal setup, I just scribbled down my name and the dates, and jazzed it up a bit with some colorful washi tape. It’s simple, it’s personal, and it makes me smile every time I open my journal.
Even though your cover page is really not something you’ll look at often, there’s something incredibly therapeutic about taking a few moments to yourself, letting your creativity flow, and personalizing your Bullet Journal.
Here are a few ideas for your cover page:
- The year when you start the notebook
- Zegtangle pattern
- Botanical doodles
- Work of the year
If creating a cover page is something that holds you back, like you keep on being afraid to make that page because you want it to be perfect – skip it, and come back to create it later when you’re more confident in your skills.
Another great tip is for you, before you sit to do the cover page, to do a pen text spread at the end of your journal.
First of all, you’ll want to know how your pens work in your current journal so you don’t have any unpleasant surprises.
But also – because by doing that, you kind of break in your new journal, and creating a cover page will be less scary.
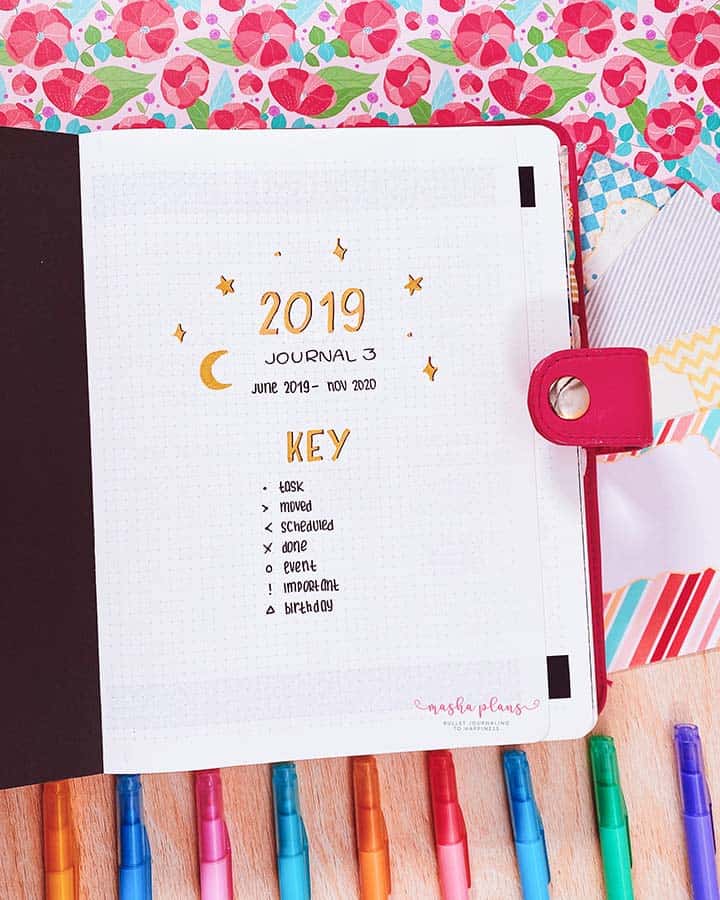
Step 2: Key
The key is the little guide that deciphers the unique language of your Bullet Journal.
Now, when I say ‘language,’ this is the language of rapid logging, a brilliantly simple system that will revolutionize how you log and structure information.
So, what exactly is rapid logging? With this system, you can quickly jot down tasks, events, and notes using a few simple symbols.
Here are a few of the basic ones:
“•” for task
“–” for note
“O” for event
But the beauty of Bullet Journaling is that it’s totally customizable. So, if you’d rather use a star for tasks, a smiley face for events, and a heart for notes, go for it!
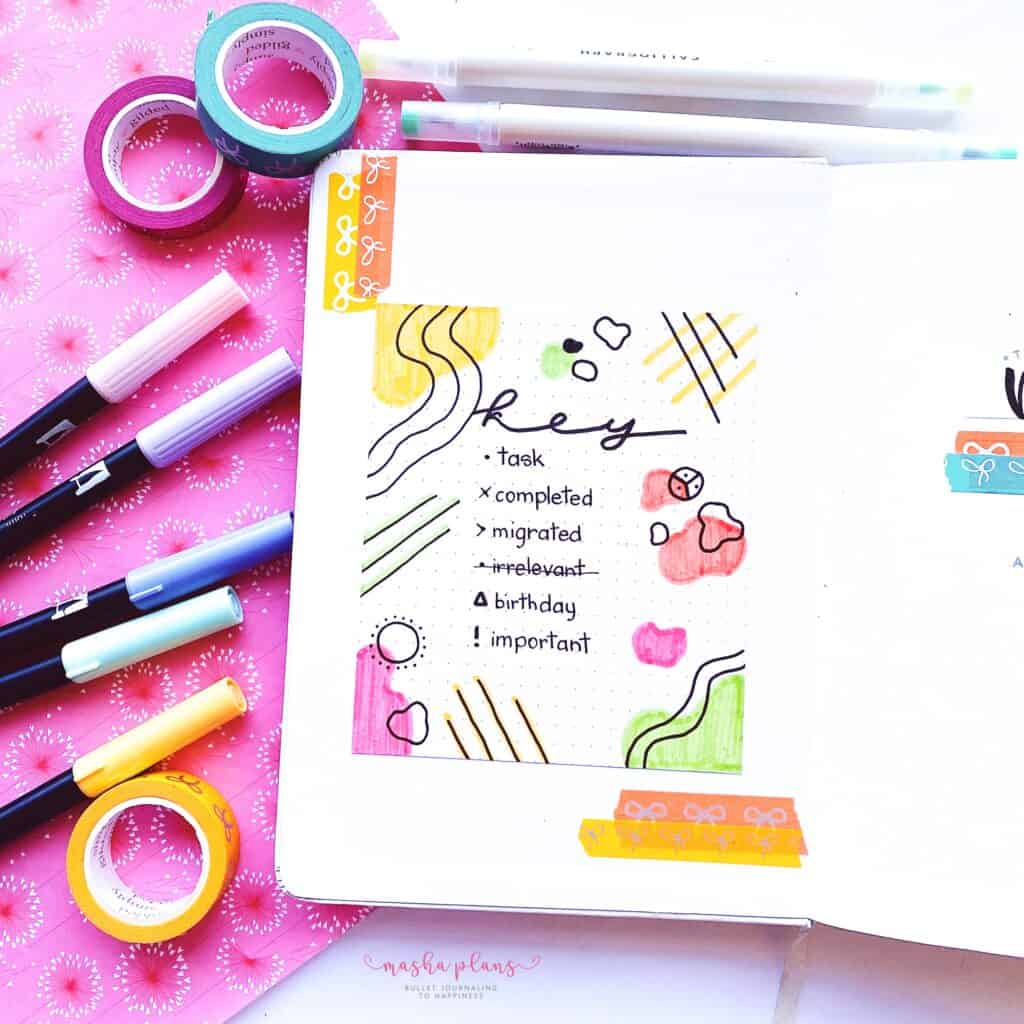
Use this spread to write down all the signifiers. As a beginner, you’re likely to look back at this spread a lot before you memorize it, so it’s more convenient to have this spread on the left side of the notebook.
Also, remember that you can customize symbols and even add your own – the ones above are just examples. Just make sure that you’re not overdoing it. The purpose of these symbols is to make things easier, not overcomplicate them.
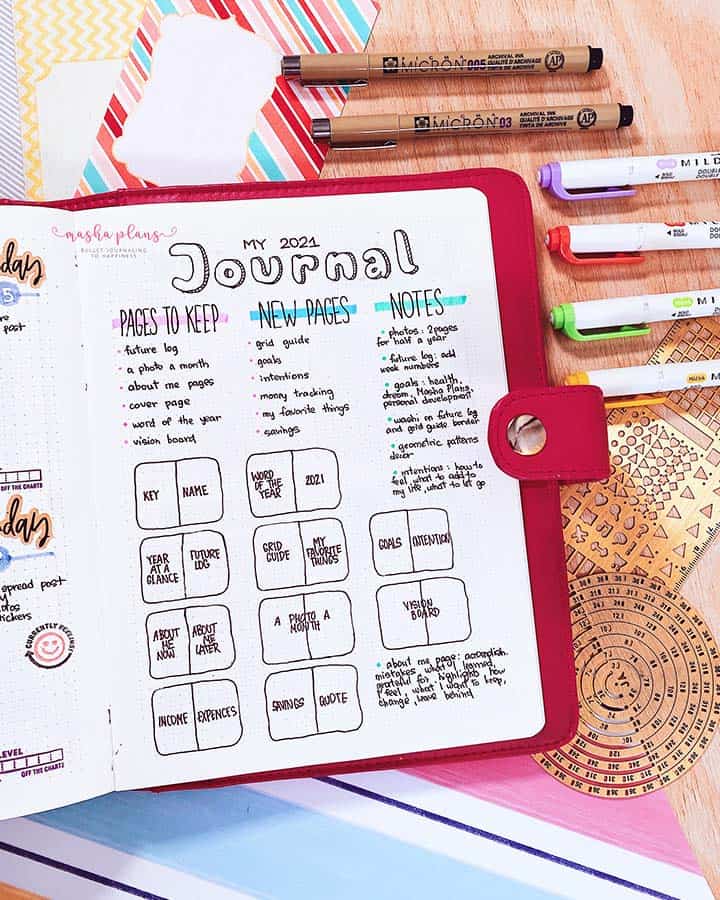
Step 3: Index
The index is like the GPS system for your Bullet Journal, guiding you to those nuggets of information that would otherwise be buried in a sea of pages.
Think of it as a table of contents, but way more personalized. It’s your very own treasure map, leading you to all those brilliant ideas, important dates, and random thoughts you’ve jotted down in your journal.
Now, when creating your index, I cannot stress this enough – leave ample space. Imagine you’re halfway through your journal, you’ve got a ton of great spreads and collections going on, and then…you run out of room in your index.
The horror!
To avoid such a catastrophe, I’d recommend leaving at least three pages for your index. Trust me, your future self will thank you.
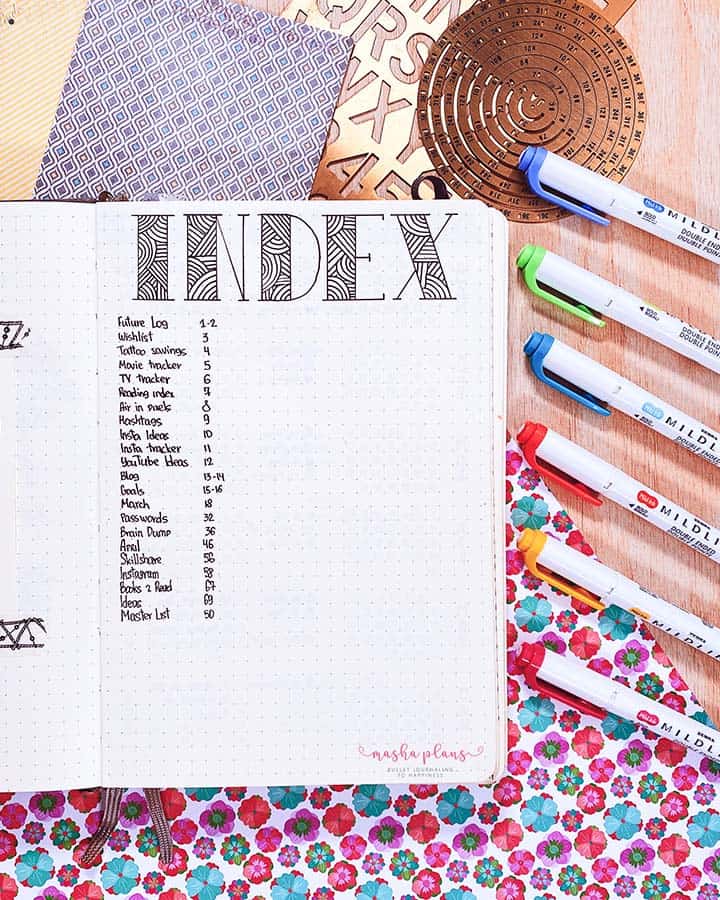
And speaking of things your future self will appreciate, let’s talk about page numbers. Yes, I know, it sounds tedious. But believe me, it’s a game-changer.
If your journal comes with pre-numbered pages, fantastic! Each time you create a new spread, just hop back to your index and jot down the page number.
But what if your journal (like my go-to Archer and Olive notebooks) doesn’t have pre-numbered pages? Well, my friend, it’s time to roll up your sleeves and number those pages yourself.
Now, here’s a little secret: not every Bullet Journal requires an index, and I actually don’t use one in mine. Gasp!
If you’re running a lean, mean, streamlined journal with no extra pages apart from your daily planning, an index might be overkill. You don’t need an index because most of the information there is not evergreen, and you probably won’t have an urgent need to find your plan from a specific day in the past.
Or perhaps you’ve devised your own ingenious system to mark essential pages, like adding colorful tabs or decorating the edges with washi tape. If that works for you, more power to you!
Remember, the beauty of Bullet Journaling lies in its flexibility. It’s like a choose-your-own-adventure book, but for productivity.
While I wholeheartedly recommend using an index, the decision ultimately lies with you. Give it a whirl and see how it fits into your journaling routine. If it works, fantastic! If not, no harm is done.
Step 4: Future Log
The future log is like a crystal ball for your Bullet Journal, offering a glimpse into the months ahead. This is where you can stash all those nuggets of information about future events that you don’t want to forget.
Here are a handful of ideas on what to include in your future log to get your creative juices flowing:
- Birthdays of loved ones
- Anniversaries, both personal and professional
- National holidays that you celebrate
- Business trips or conferences
- Upcoming vacations (because who doesn’t love a good countdown?)
By jotting down these events in your future log, you’re essentially creating a bird’s eye view of your year. It’s like having a personal assistant who always knows what’s coming up next. Plus, you’ll always have a spot to scribble down future happenings as they arise.
Now, let’s chat about the setup. The beauty of Bullet Journaling is that you can tailor it to your needs. So whether you want to map out the entire year, six months, or even just one quarter at a time, the choice is yours.

Take my midyear Bullet Journal setup, for instance. I kicked this one off in August, so I didn’t need to include the beginning of the year. Plus, I wasn’t sure how long this journal would last me, so I only created a future log for as many months as I could comfortably fit.
If this journal ends up being a marathoner and lasts longer than expected, no problem! I can always whip up a new future log when the time comes.
Now, before you panic at the thought of meticulously writing out all those tiny dates for each month, let me assure you, you absolutely don’t have to.
Although I personally love the sight of those cute mini calendars (they help me visualize the year ahead), you can definitely keep it simple. Just jot down the name of the month, and voila! Your future log is ready to go!
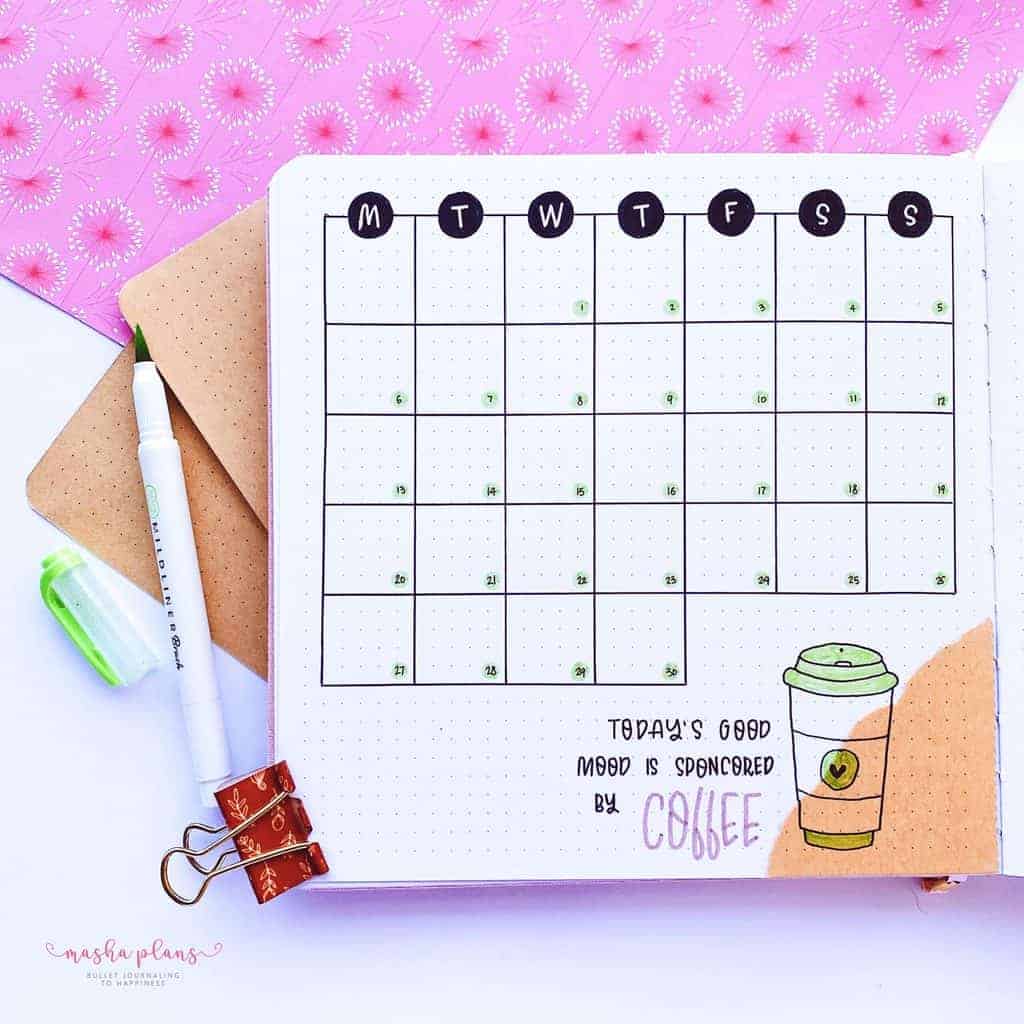
Step 5: Monthly Log
Next up is the monthly log, the heart of your Bullet Journal, the hub where all your plans, tasks, and events for the month come together. Picture it as the control center of your life for the next thirty-ish days.
Traditionally, the monthly log is accompanied by a trusty sidekick: the monthly to-do list. This is the master list, the big kahuna, the mother of all to-do lists.
It’s where you jot down ALL the things you need to tackle in the coming month. Whether you want to slip it right next to your monthly overview or give it its own dedicated spread for a more detailed breakdown, the choice is yours.
Now, speaking of ways to set up your monthly log, there’s no one-size-fits-all answer. Like I keep on saying, the beauty of Bullet Journaling is that it can be tailored to fit your unique planning needs and time constraints.
So whether you want a simple calendar layout, a vertical list of dates, or an elaborate spread filled with doodles and decorations, the world is your oyster.

Now, before we move on, I must confess: I have a soft spot for monthly cover pages. There’s something about turning the page to reveal a fresh, new month that fills me with anticipation and excitement.
Not only does it provide a clear demarcation between your monthly spreads, but it also sets the tone for the theme you’re using.
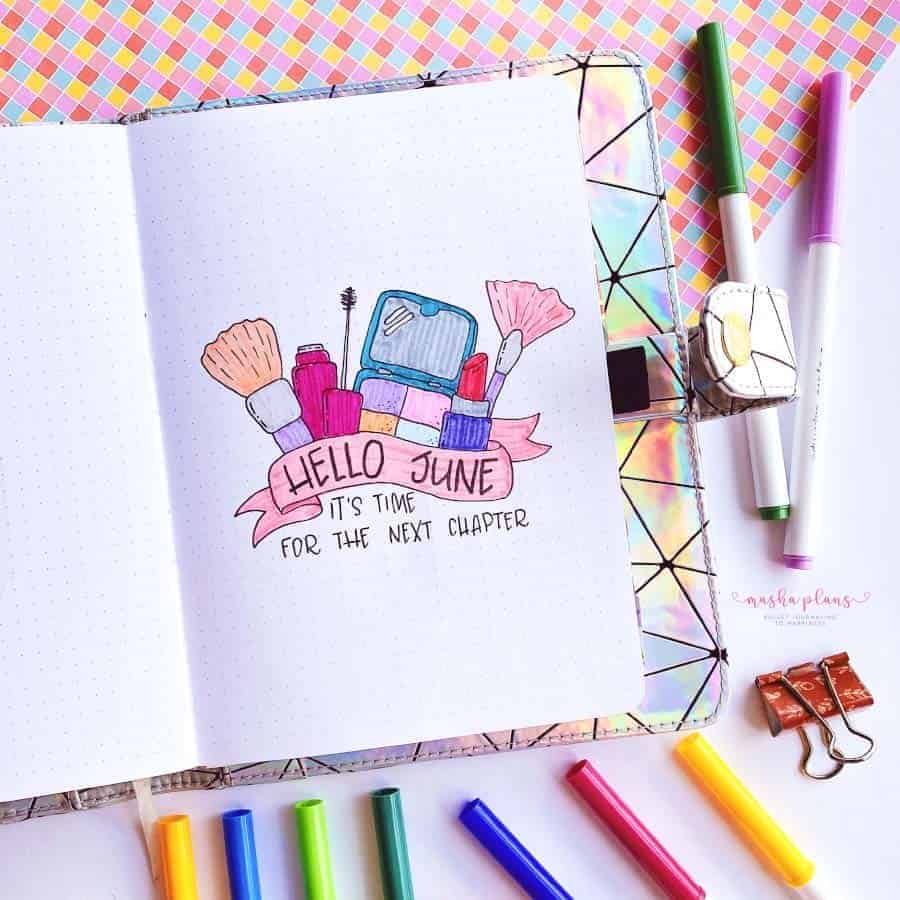
But that’s not all! Monthly cover pages are also a fantastic playground for your creativity. It’s your chance to unleash your inner artist, to doodle, draw, paint, or collage to your heart’s content.
Whether you want to sketch a detailed landscape, doodle cute little icons, or simply write the name of the month in fancy lettering, this page is your canvas.
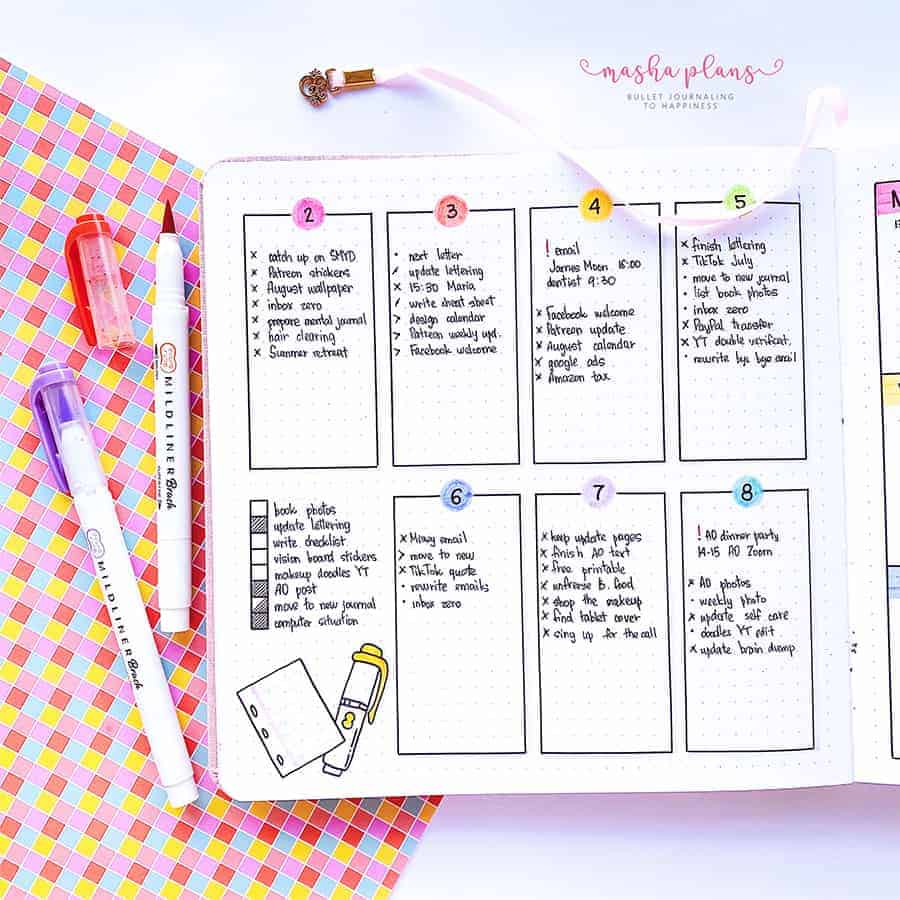
Step 6: Weekly Spread & daily log
And now, drumroll please, we’ve arrived at the pièce de résistance of Bullet Journal planning – the humble yet mighty weekly spread (or daily log if you prefer).
It’s like a bird’s eye view of your week, neatly divided into boxes for each day. Each box is a blank canvas, waiting for you to create a customized task list for each day.
Now, I know what you’re thinking, “But what if I don’t have much going on at the weekend?” Well, my friend, that’s the beauty of Bullet Journaling. If your Saturdays and Sundays are more about rest and relaxation than running errands and ticking off tasks, simply merge the two days into one section. Just like that, you’ve tailored your weekly spread to fit your lifestyle.


The beauty of the Bullet Journal system isn’t just in its simplicity; it’s in its flexibility. It’s like a chameleon, changing and adapting to suit your needs. This means you can have a ball experimenting with your weekly spreads and how you use the space.
Feel free to slide down the slide, swing on the swings, and play around until you find a layout that works for you. Remember, there’s no right or wrong way to Bullet Journal. It’s all about what helps you live a more organized, productive, and satisfying life.
Now, let’s dive into the other way to plan your days – the daily log. Each daily log is dedicated to just one day, which means you have an entire page at your disposal. It’s like having a blank canvas every single day, ripe for filling with whatever takes your fancy.
Think of it this way: your daily log is your personal assistant for the day. It’s there to keep track of your tasks, remind you of appointments, and even act as a sounding board for your thoughts and ideas.
If you’re someone who leads a busy life with a packed schedule, you can simply jot down the date at the top of the page and get straight down to business by listing out all your tasks.
But what if you’re not sure which type of planning works best for you? Here’s a nugget of wisdom from my own Bullet Journaling journey: try both a weekly spread and a daily log and see which one fits your lifestyle better.
The beauty of Bullet Journaling is its flexibility. There isn’t one perfect format that works for everyone, all the time.
Life is a rollercoaster, full of twists and turns. As your life evolves, so too will your planning needs. Always remember this golden rule: if something isn’t working, don’t be afraid to shake things up and try something new. Your Bullet Journal is a reflection of you, so it should adapt and grow with you.
What we’ve covered so far – the future log, monthly log, weekly spread, and daily log – are the basic building blocks of Bullet Journaling. They provide a solid foundation for you to start planning your life and witness the transformative power of this system.
But this is just the tip of the iceberg! There are countless other pages and elements you can incorporate into your Bullet Journal. Think habit trackers, mood boards, gratitude logs, goal-setting pages… the list goes on and on.
If I were to detail every single possibility, this post would turn into a novel! So, instead, I’ll point you in the direction of the resources section at the end of the post. It’s a treasure trove of inspiration and advice, so be sure to dive in and start exploring.
Meanwhile, here is the plan with me.
Plan With Me: Page By Page Bullet Journal Setup
Roll up your sleeves, grab your favorite pen, and get ready to dive into the wonderful world of Bullet Journaling with me! I’ve put together a special ‘Plan With Me’ video just for you, where I walk you through all the spreads we’ve discussed.
This isn’t just any old planning session, though. Oh no, this is a hands-on, step-by-step guide to setting up the fundamental spreads in your Bullet Journal. We’ll start with the big picture, mapping out our year with a future log. Then, we’ll zoom in to plan our month with a monthly log, followed by a closer look at our week with a weekly spread.
Now, if you’re picturing intricate doodles and elaborate decorations, let me stop you right there. This ‘Plan With Me’ session is all about simplicity. I’m keeping it as basic as possible, stripping back the frills and focusing on functionality.

Why, you ask? Well, my friend, there are two reasons. Firstly, I want to show you that Bullet Journaling doesn’t have to be complicated or time-consuming. You don’t need to be an artist or spend hours creating beautiful spreads (unless you want to, of course!). All you really need is a pen, a notebook, and a willingness to try something new.
Secondly, I want to make it as easy as possible for you to follow along and replicate these spreads in your own journal if you want to. By keeping things simple, you can focus on understanding the structure and purpose of each spread rather than getting tangled up in the details of decoration.
So, whether you’re brand new to Bullet Journaling or a seasoned pro looking to get back to basics, this ‘Plan With Me’ video is for you. Together, we’ll lay the groundwork for a more organized, productive, and satisfying life.
What’s Next: Moving To A New Journal
What happens next after you set up your brand-new journal and it runs out of pages?
First of all, review your previous journal. See what things worked for you, what spreads you liked, and which ones didn’t. Consider not using the ones that didn’t.
Think of the pages you don’t really need anymore. For example, the key isn’t really something I use these days because I already know all the symbols and what they mean by heart.
Analyze things that work and think about how they align with your current situation and intentions. Think about how you can improve the pages for your life at the moment.
Secondly, go through your collections and see which ones you don’t need anymore. The ones you need to have with you – move to the new journal. The ones that are ok to be kept at home – leave them in your current ones and reference them when needed.
Something else you could do is add a few new collections. Bullet Journal is a journey of discovery, so it’s always fun and useful to try new types of spreads or new designs for your favorite spreads. You never know when something will click and suddenly change your life completely.
Finally, a new journal means a new paper, so consider adding tons of swatch pages! You definitely ALWAYS want to make sure your materials are friendly to your notebook, so why not turn your swatches into cute, creative pages?
Free Bullet Journal Course For Beginners
Finally, I wanted to share with you a free course I’ve created to help you navigate through setting up your very first Bullet Journal.
All you need to get your access is to sign up in the form below, and once you confirm your subscription, you’ll get an email giving you access to ALL the goodies.
More Resources
If I know anything about embarking on a new adventure (and trust me, Bullet Journaling is indeed an adventure), it’s that you probably still have a few lingering questions.
Bullet Journaling isn’t just about jotting down tasks and ticking off to-dos. Oh no, it’s so much more than that! It’s a life-changing tool that can boost your productivity, increase your mindfulness, and even unlock your creativity. So it’s completely natural to want to get it right.
But here’s the best part: there are endless opportunities with the Bullet Journal system. It’s like a never-ending buffet of planning goodness. You can mix and match different spreads, experiment with various layouts, and even sprinkle in some personal touches that reflect your unique style and personality.
Here are a few additional resources that will come in handy as you progress along your planning journey.
- How To Overcome First Page Fear
- 300+ Bullet Journal Page Ideas
- 11 Bullet Journal Layouts For Beginners
>>> Where in your journey are you? What are some of your favorite spreads? Let us know in the comments!
Hope this post was interesting. If you find it so, please share! If you enjoy my content and want to show your appreciation, please consider supporting me with a cup of coffee.
And remember: Keep Journaling, and Don’t Be A Blob!


I like the idea of a BUJO, but I never knew how many pages to have in between catrgories. I always felt overwhelmed for decorating, but you really make it simple. Thank you.
Happy to be of help! Hope you’re now fully enjoying your new BuJo =)
This one is very clear and effective to begin with. Thank you☺️
Glad it was helpful!
I have been trying to start a bullet journal for years and knowing I didn’t have to go in all fancy at first, and knowing just what the main purpose of a Bu Ju is for helped me so much. I also found it funny that she forgot to color the inside of her R in the video on the Future Log page! :)
So happy it helped and hope you’re enjoying your BuJo right now! And yeah that r hahaha Glad at least I remembered by the end =)
Thank you so much for this post! I just purchased two binder journals due to the amount of space, and setting up two let alone one is difficult!
So happy to hear it was useful! And yeah binder journals are great.
Hello this article was super helpful and I’m really looking forward to starting my BuJo journey! Btw before I read this article I had no idea BuJo meant Bullet Journal 🤦🏽♀️
Welcome to the world of creative planning! And happy that I managed to introduce you to some lingo ;)