June In My Digital Planner: Plan With Me
Today we are jumping into a whole new world (by the way, now I have the Aladdin song stuck in my mind) – the world of digital planning!
And we’re creating a monthly setup with under the sea Bullet Journal theme. And I do say Bullet Journal because even though it’s digital it’s still journaling.
In this post, I’ll walk you through my process and the tricks I learned so far from my experiments with digital Bullet Journaling.
I’ll be also showing you my June digital planner spreads. And there’ll be a Plan With Me video at the end, so be sure to check that out! As well as some freebies, which you can use for both your physical and digital planners.
First, a little behind story and a disclaimer – I’m not switching to digital planning!
Thing is -as many of you might already know- I’m stuck here in the USA and kind of going crazy with this quarantine. I thought it might be a cool idea to get distracted by being more creative and trying new things.
I always recommend people to do so but I realized I haven’t been experimenting much myself. Yes, I started using more washi and stickers in my Bullet Journal (check my June PWM post to see me going washi crazy!), but that was not really a very big deal. I wanted a challenge!
That’s how I decided on trying out digital planning! I know it’s a whole new game and a completely different skill, so I thought why not give it a try while I have time?
Plus I can film my digital Plan With Me video with what I have here with me, so it might be interesting for you guys to watch how I approach the process.
And here we are. Since it’s a new thing, I’d really appreciate your opinion – should I keep this series up monthly? Let me know in the comments!
This post may contain affiliate links. They will be of no extra expense for you, but I receive a small credit. Please see my Disclosure for more details. Thank you for supporting Masha Plans!
Supplies
First, of course, let’s go through supplies and why I used them
My basics are iPad pro 11” and 2nd generation Apple pencil. I’ve been using these for designing my printables and stickers for a while so I knew they’d work well for digital Bullet Journaling.
For my apple pencil, I also got a soft grip holder. This makes it so much more convenient to use, especially for me since I tend to grip my pens as if it was my life-saving straw.
No products found.
There are a few more tools I really love, but they’re totally skippable and not essential to the process. Still, In case you’re wondering, I’ll share them below.
First, I use a paperlike screen protector on my iPad. It makes it so much easier to draw, especially if you’re like me and coming to it from paper planning. With this cover, it just feels more natural when you draw on the iPad or write for that matter.
No products found.
My second favorite thing is an iPad drawing stand. It seems like such a simple and unnecessary thing, but it was a total game-changer for my design process.
This stand helped me to keep a better posture while designing, which is worth so much! Ultimately it also improved my designs because it became much more comfortable to draw while using it.
No products found.
Now let’s talk about software – I went for bare basics here.
I’m using an app called Goodnotes, which is perfect for digital note-taking or planning. It’s not created specifically for planning, so don’t expect here any special features and pretty decorations.
It’s actually one of the reasons why I decided to start with this app – I wanted to recreate the complete Bullet Journal experience where I design everything myself.
Goodnotes don’t really have a lot of design capabilities, so for that, I use an app called Procreate.
Procreate is all over the place now so I bet you heard about it. If not – it’s a design app, an iPad Photoshop if you will. But much much easier because you do everything with your Apple pencil so it’s not that big of a learning curve.
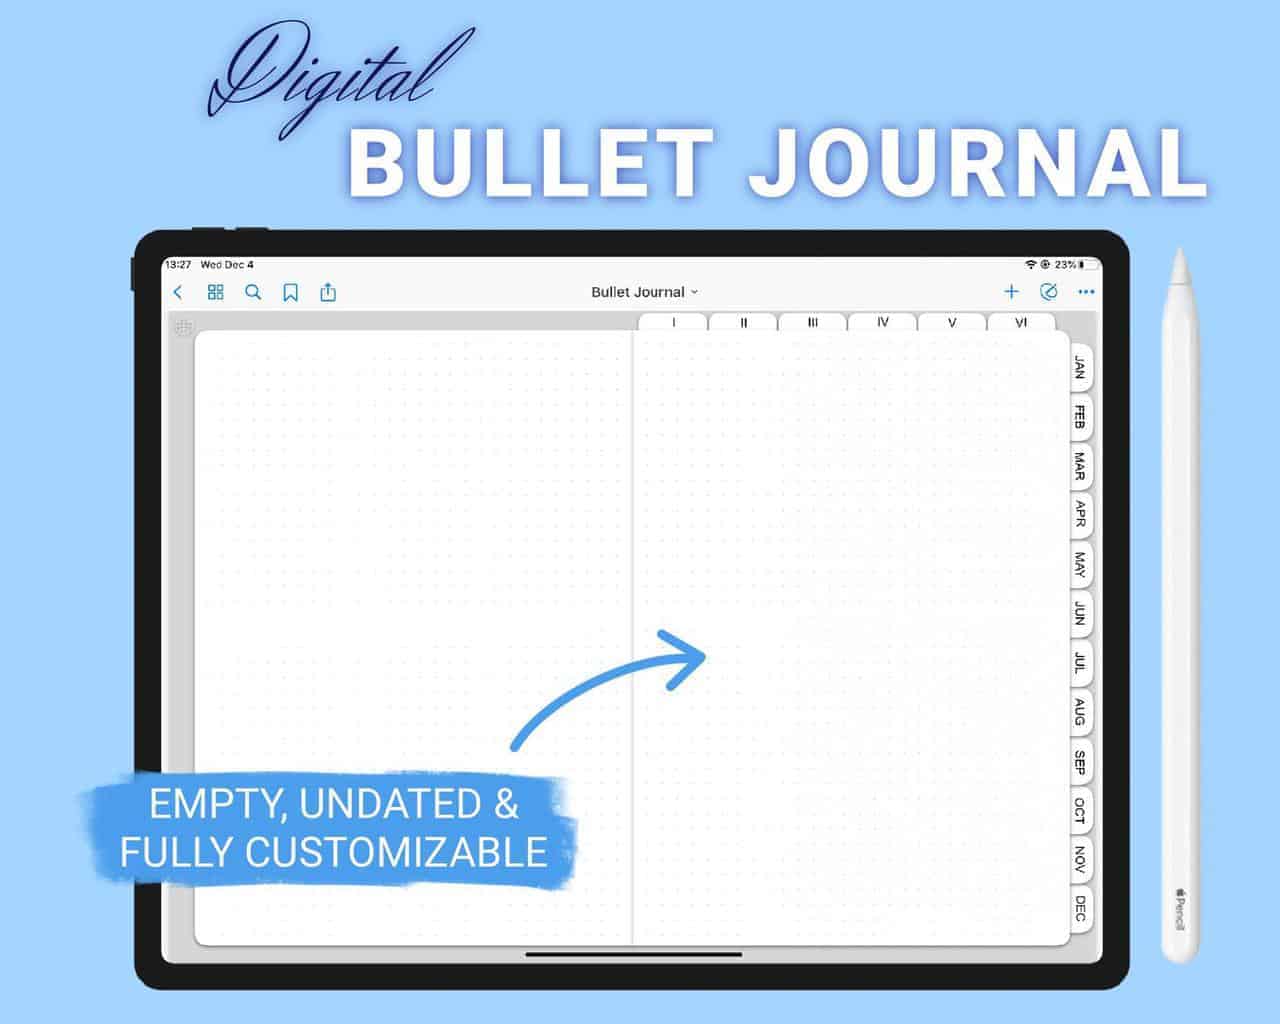
Finally, for digital planning, I needed a digital planner. Since I wanted to go very minimal and create everything myself, I chose a very simple dot grid journal. The only thing I needed is for it to be interlinked, and this planner worked perfectly.
By the time I started, I had an empty digital dot grid notebook ready to be filled with my ideas. And it already had a pre-made index, meaning that pages were interlinked.
This meant that all the hard work I didn’t really know how to do was already done for me! All I needed to do was to be creative!
How To Plan With Goodnotes and Procreate
Before we look through all the pages, here are the basics on how to plan with these two apps.
Start by opening the page you need in your planner in Goodnotes. Then press the share button and choose export this page. Export it as an image.
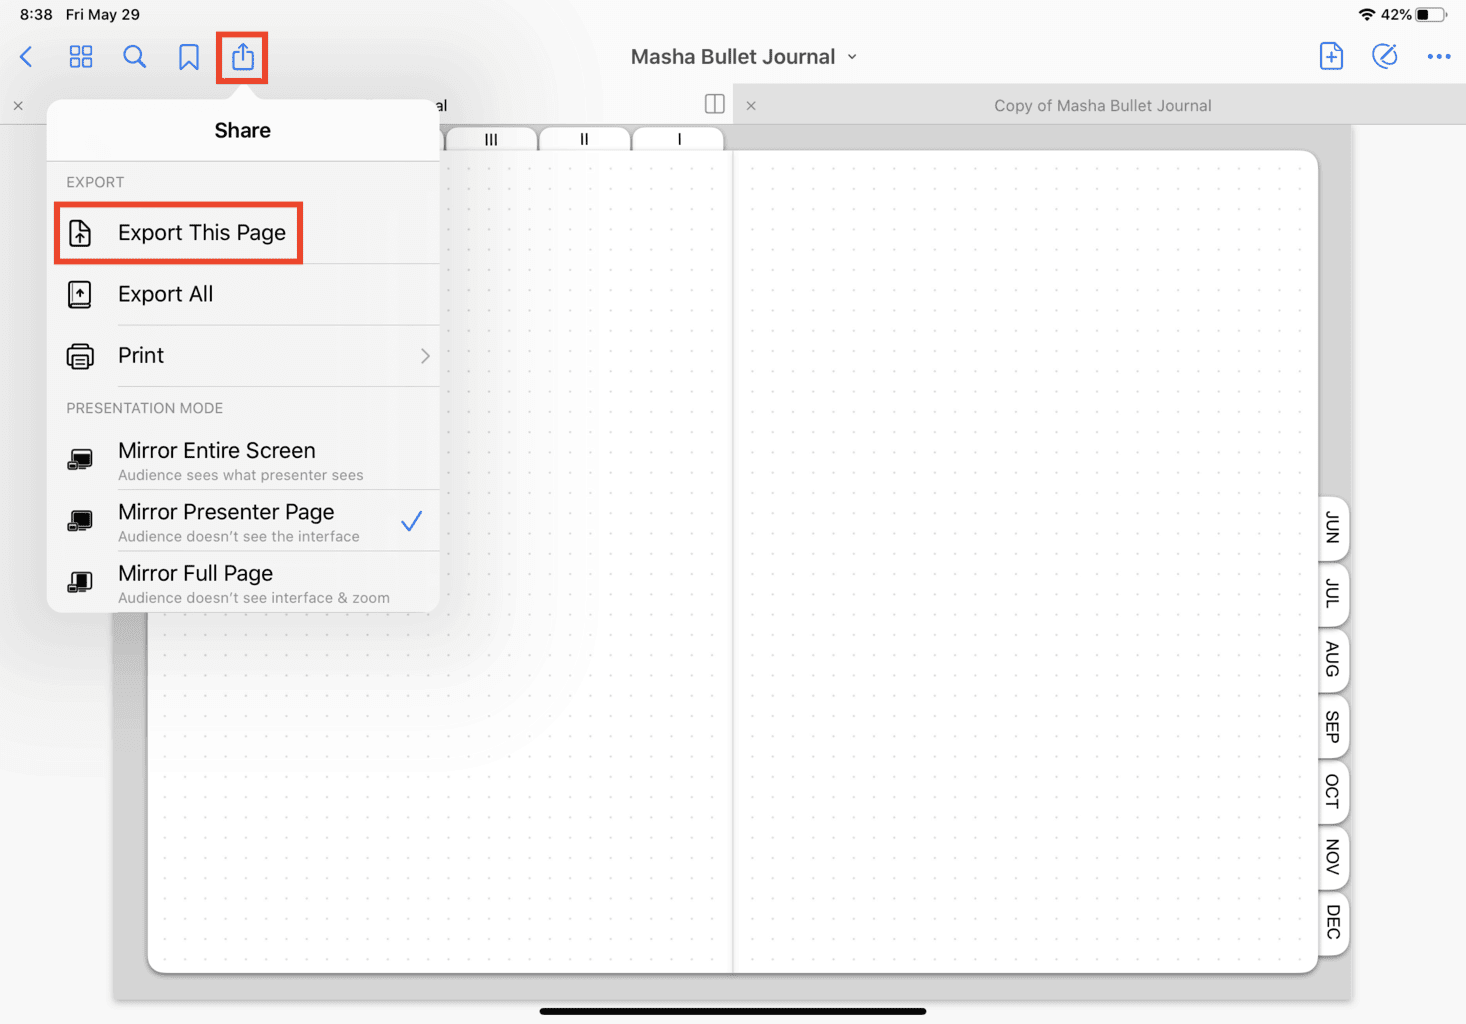
When you have an option, choose export to Procreate.
Once you open Procreate, you’ll see the page is imported. Use it as your canvas and set it up as you would any page in your physical Bullet Journal.
A few tips:
- Start from pencil sketch
- Be sure you add color drawings on a different layer
- Try having a separate layer for each drawing so you can move them around easier if needed
If you’re new to Procreate and digital drawings, here are a few resources to help you get comfortable with it.
As always, I’m recommending my absolute favorite resource – Skillshare. It’s a learning platform with thousands of classes on all the topics you can imagine.
As a new user, you’ll be able to get FREE access to ALL their premium classes for 2 weeks.
When it comes to Procreate, here are some classes I’d recommend you check out:
Intro to Procreate: Illustrating on the iPad [UPDATED for Procreate 5]
Procreate Fundamentals: Everything You Didn’t Realize You Wanted to Know
Botanical Illustrations on Your iPad in Procreate + 15 Free Procreate Brushes
Digital Illustration: Learn to Use Procreate
As with everything remember, that this is just another skill to work on. It won’t look perfect for the first time, but you’ll never get to perfect if you won’t try again and again.
But back to digital planning.
Once you’re happy with the result – crop your canvas. Go to settings => canvas => crop and resize.
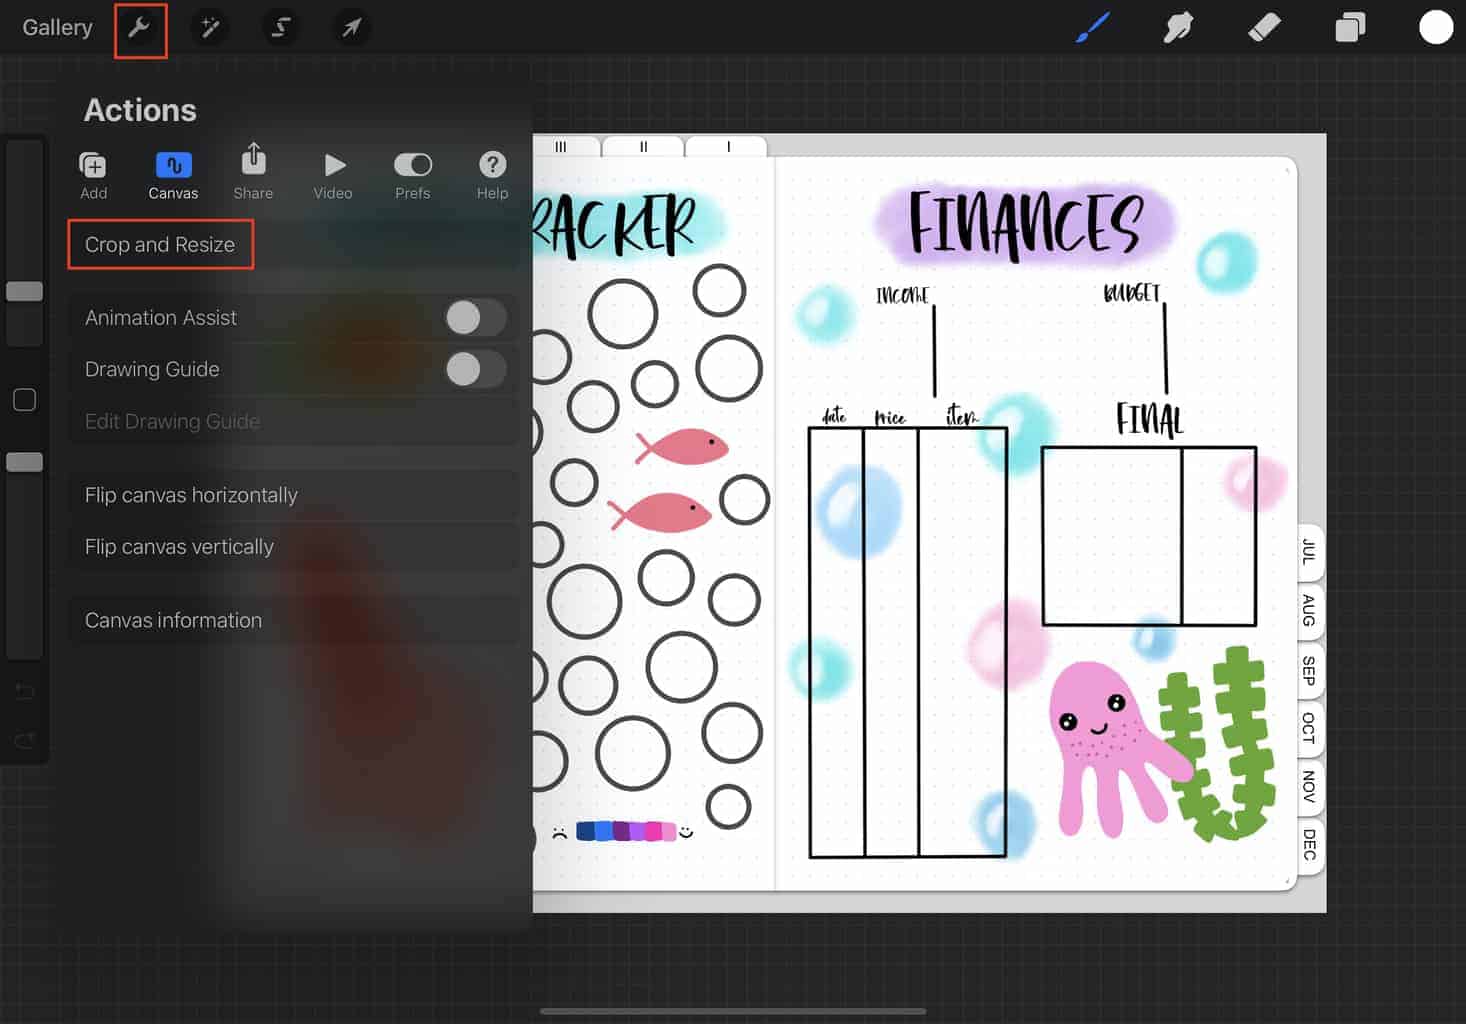
When you crop, be sure you crop out all the tabs. They are the ones that help you move through your digital journal, and they need to be original ones, not the picture.
If you add an image as it is – your links won’t be working!
Then just save it as a PNG or JPEG file in your Camera Roll.
Final step – open Goodnotes on the page you need, click the image icon, choose the design you just saved and place it in the notebook.
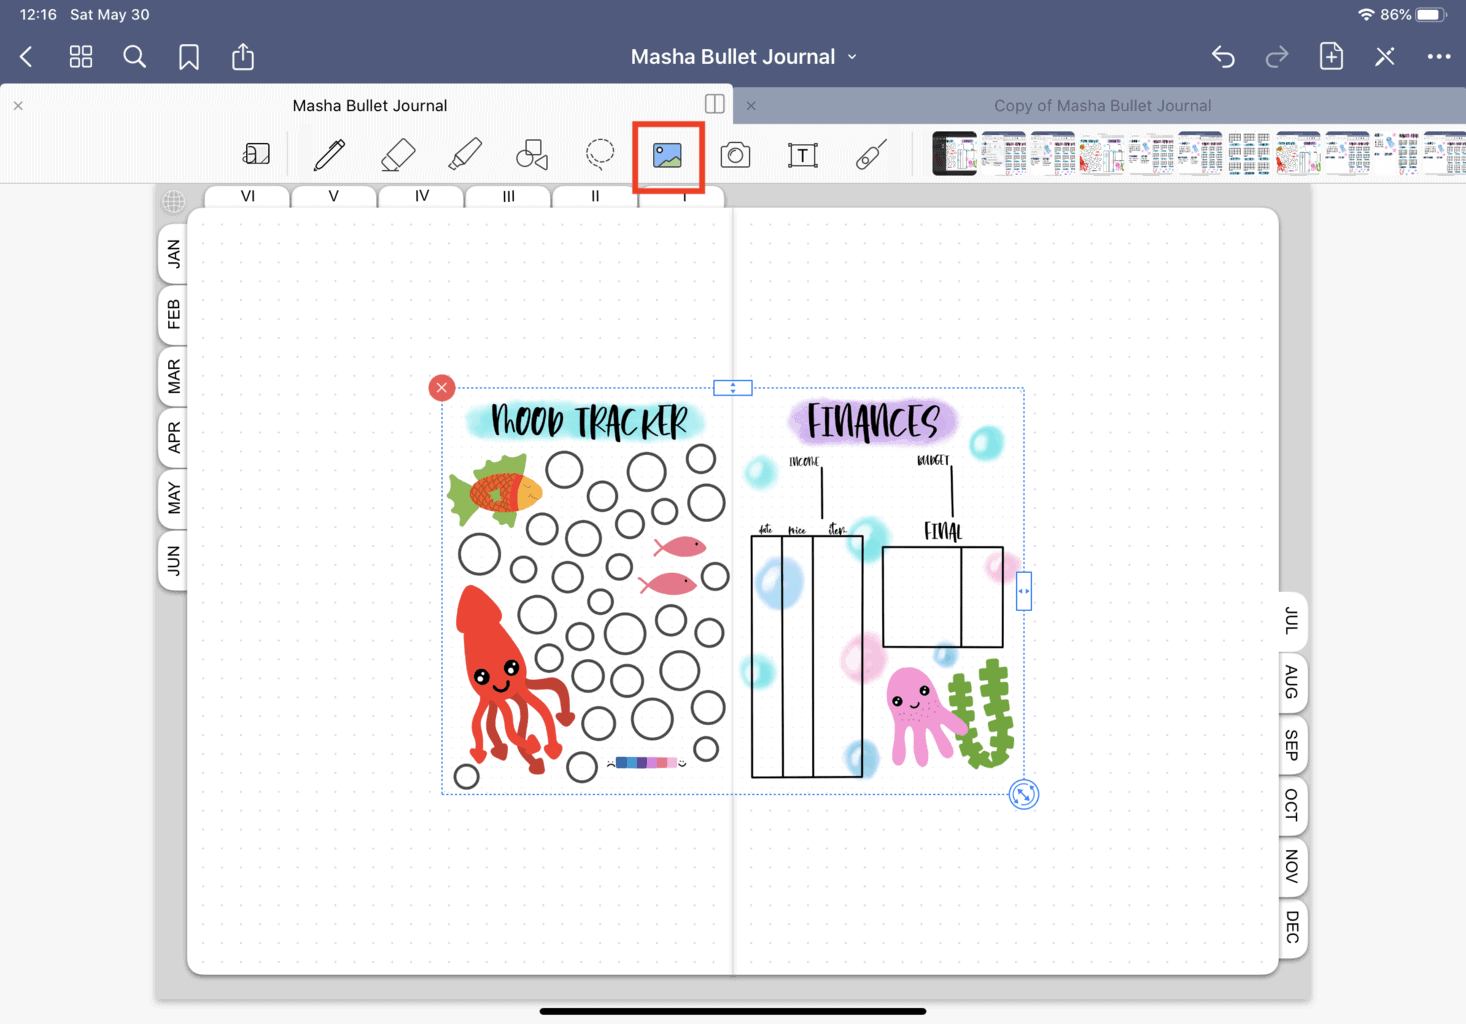
Plan around to make sure it’s the right size and placed properly and when you’re happy with it – just click away!
Now let’s dive into the pages themselves.
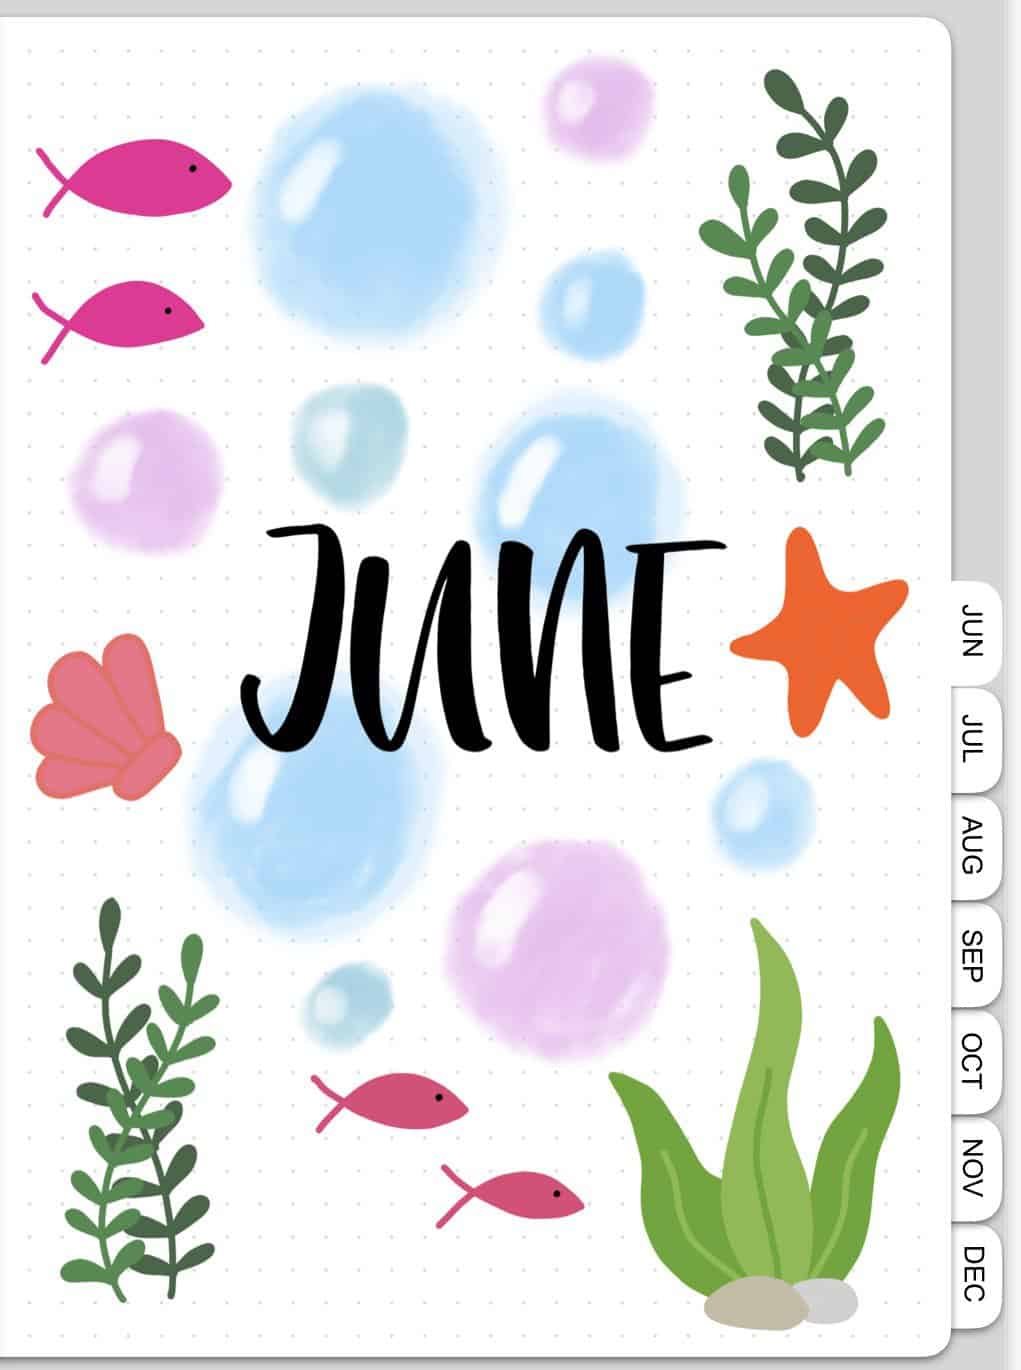
Cover Page
I went with Ocean theme for June digital planner, and I tried to recreate some of my fun ocean doodles I drew before in my journal.
The fun thing about digital journaling though is that you can easily use so many different brushes and textures without being afraid to ruin the page!
So I decided to use it and use my watercolor brush to create colorful bubbles.
Another great thing about digital planning – you can always use premade fonts, and since my digital writing still leaves a lot to wish for, I decided to use this feature.
If you want to use some more unique fonts Procreate doesn’t originally have – just download a font file and open it in Procreate, that way it’ll be automatically added to the list of available fonts.
Monthly Log
I went for the same format I’m always using. Why ruin perfection, right?
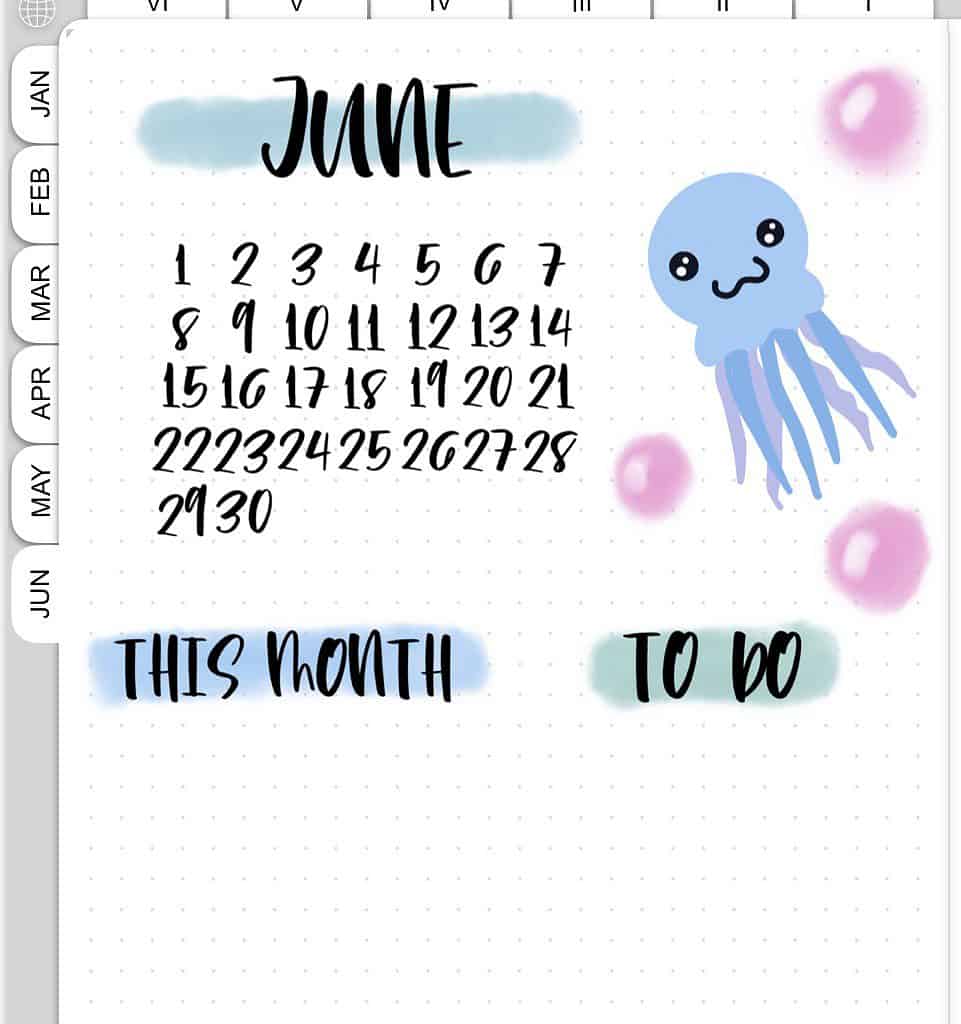
As you can see, I played a lot with watercolor brushes, and I really love this watercolor background I created for my headers. I should try it in real life!
Or maybe create stickers with this effect. I actually did – check the end of the post for more information on freebies!
Habit Tracker
I went with my favorite format here. And only now, when I write this post, I notice that my calendars have 7 weeks in June…..
No biggie! It’s all digital, so I can simply correct it in Procreate, and it’ll look brand new! I might even have some space at the bottom to add more fun doodles.
Here is what I came up with eventually, much better if you ask me!
Oh, and a little trick here – in Procreate in you draw a line and hold it – it will automatically be straightened for you. So creating those grids isn’t such a big deal.
Mood Tracker
For my mood tracker, I wanted to go with something bright and fun, so I had to add these happy fish there.
Drawing straight circles isn’t that hard in Procreate either – use the same trick and just hold the line once you’re done drawing the circle.
It will allow you to choose what shape you prefer and correct it as much as you want.
Tip for mood tracker – don’t waste your time selecting mood colors in Procreate as I did. Goodnotes don’t have the same tools to work with colors, so it will be a huge pain in the butt to find the same color.
Instead, just create a little grid for your mood colors to go and add the colors directly in Goodnotes. This will make it that much easier to fill out later.
Financial Spread
Finally, my new page for June is the monthly finances. I added this to my paper Bullet Journal as well, and you can check my Bullet Journal Budget Trackers to learn more about managing your finances.
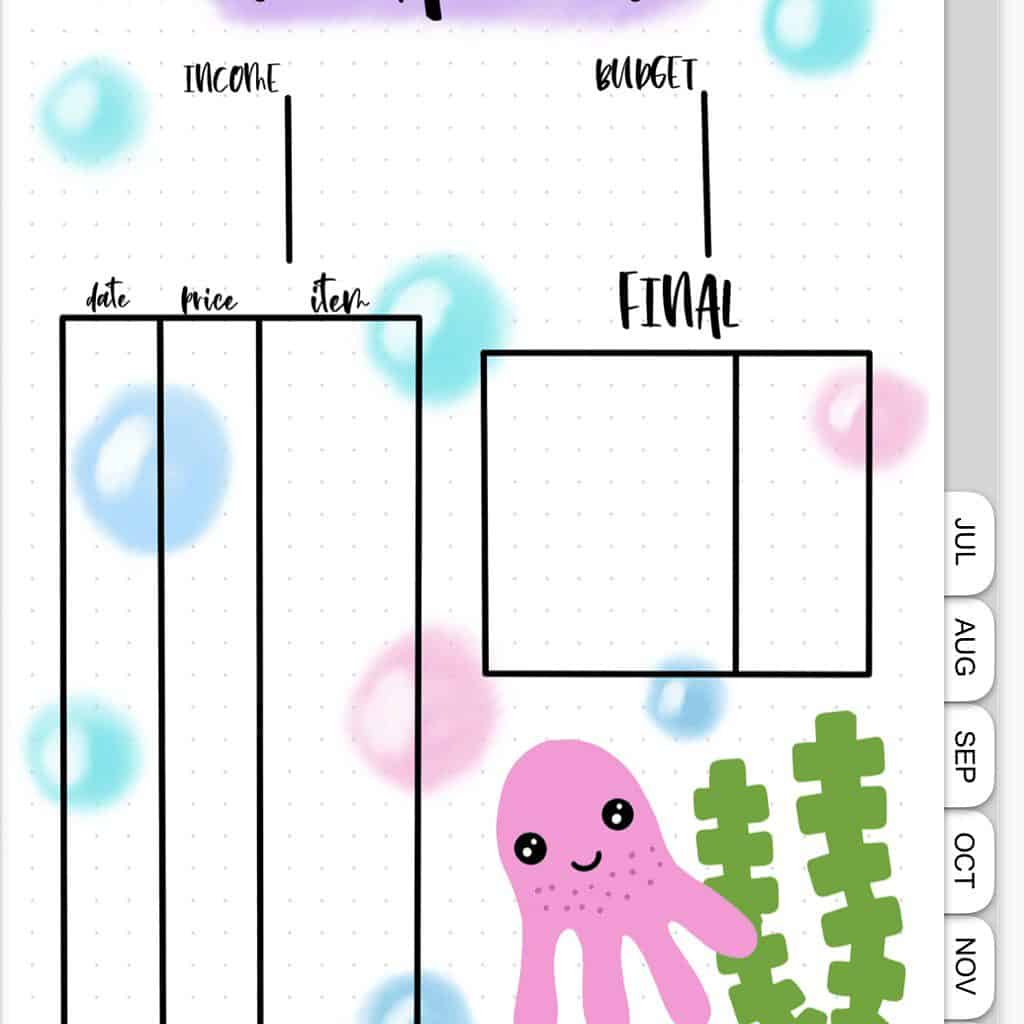
This page also got better from being digital. I started it by adding a little corny quote in the corner instead of the doodles, and once I colored it in – I realized it just didn’t look that good.
It was really a relief that I could just erase it and add these cute doodles instead.
In my paper journal this month, I wasn’t that lucky, and I had to redo the entire page! Gotta love planning digitally.
Filling Out Your Planner
Writing in your digital planner is pretty much the same as in your paper planner. Just be sure you click the icon on the top left to switch to writing mode.
You don’t get much pen choice with Goodnotes – it’s a fountain pen, a ball pen, and a brush pen. It seems enough for me since I do all the designs in Procreate, where I can play around more with the brushes I use.
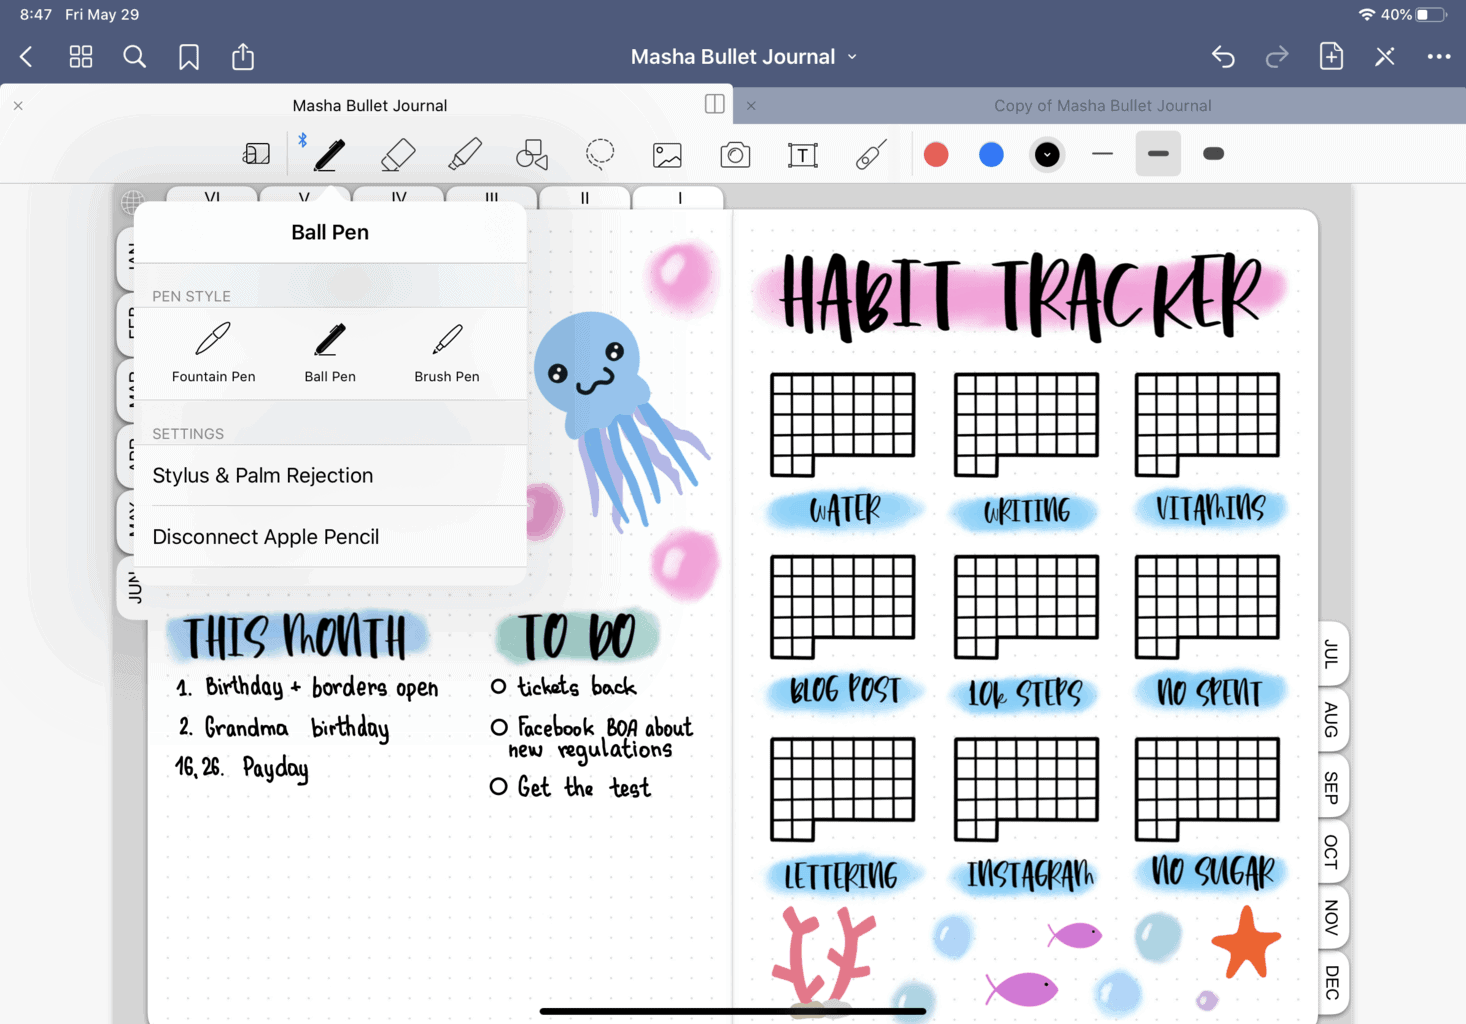
Writing digitally with your Apple Pencil is going to be a whole new experience; you will see at the end of the video me struggling to make my letters look good.
Just be sure to play around with pens and thickness to figure out what settings work better for your writing style.
Final tip – if you’re a BuJo gal (or boy) you probably used to signifiers. Well, you can create them pretty easily here if you use a shape tool.
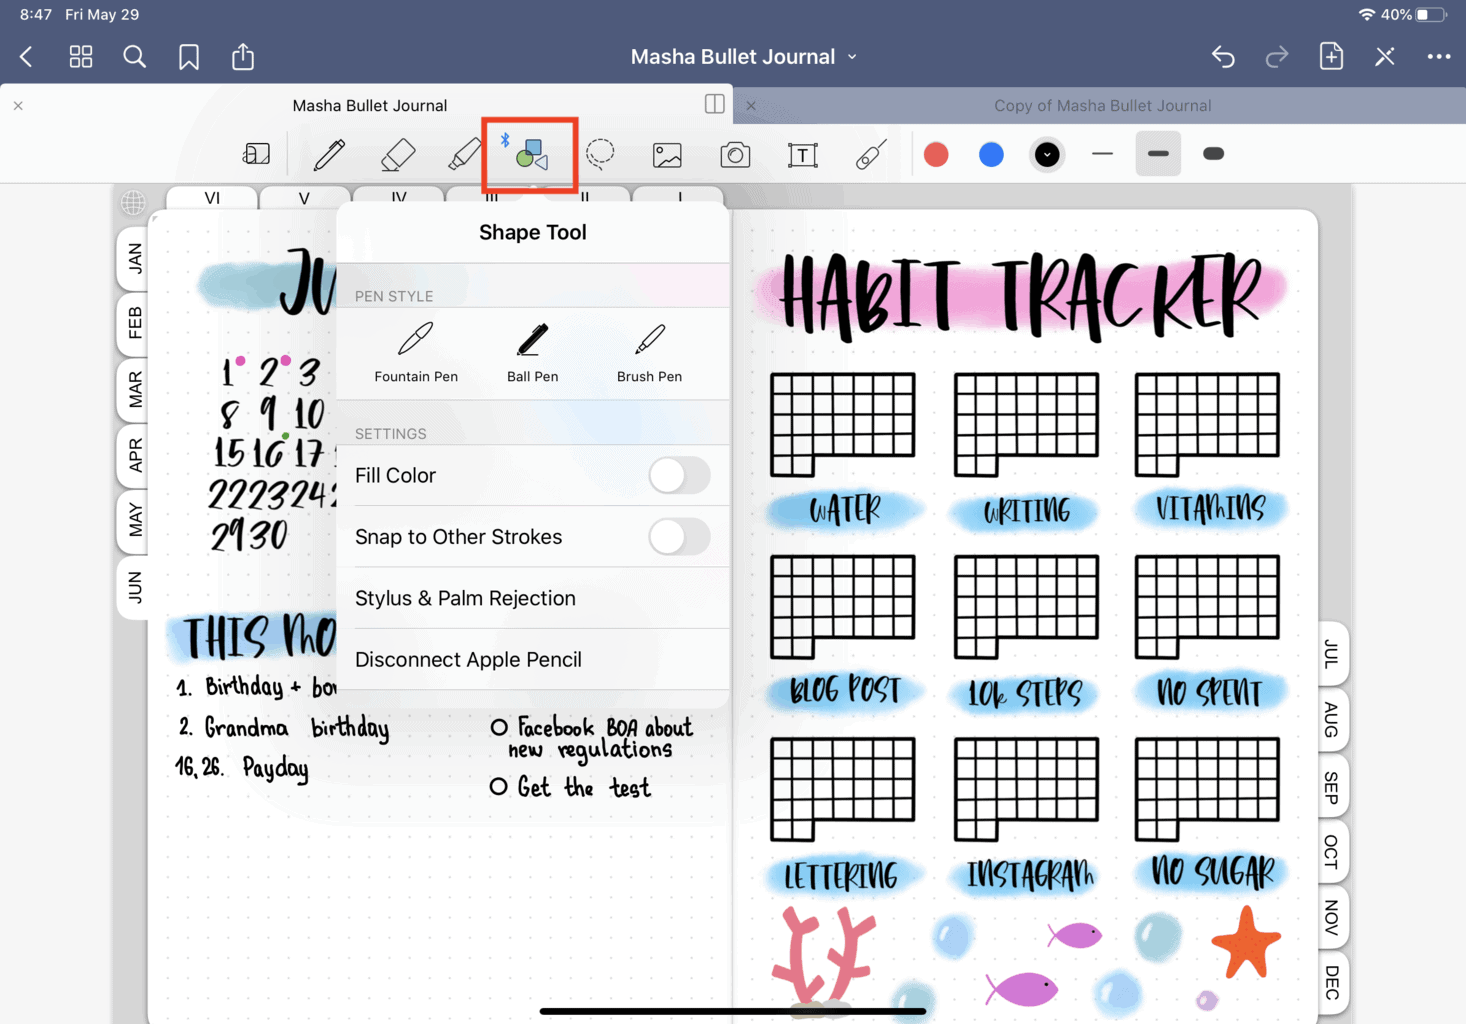
They might be a little bit different in size when you draw them, but that’s quite the same as you would on your paper planner.
Plan With Me
Hey, I’m back on YouTube! It’s been what seems like forever, and I missed creating videos. That’s why I was so extra happy to do this one!
So if you missed my cute face and wanna see some digital planning – this video is for you!
Ocean-Themed Bullet Journal Setup
Did you like this theme? Would you want to have it in your paper Bullet Journal?
I got you covered!
On my Patreon, one of the tiers gets a complete monthly setup every month, and our theme for June is the ocean!
Every monthly setup includes a cover page, monthly log, habit tracker, and a surprise page, in June, it’s a mood tracker.
Come join us on Patreon, get this monthly setup as well as access to all the previous rewards!
You can join for as little as $1, help support Masha Plans and get tons of cool stuff, such as weekly spreads, printable stickers, lettering worksheets, and more!
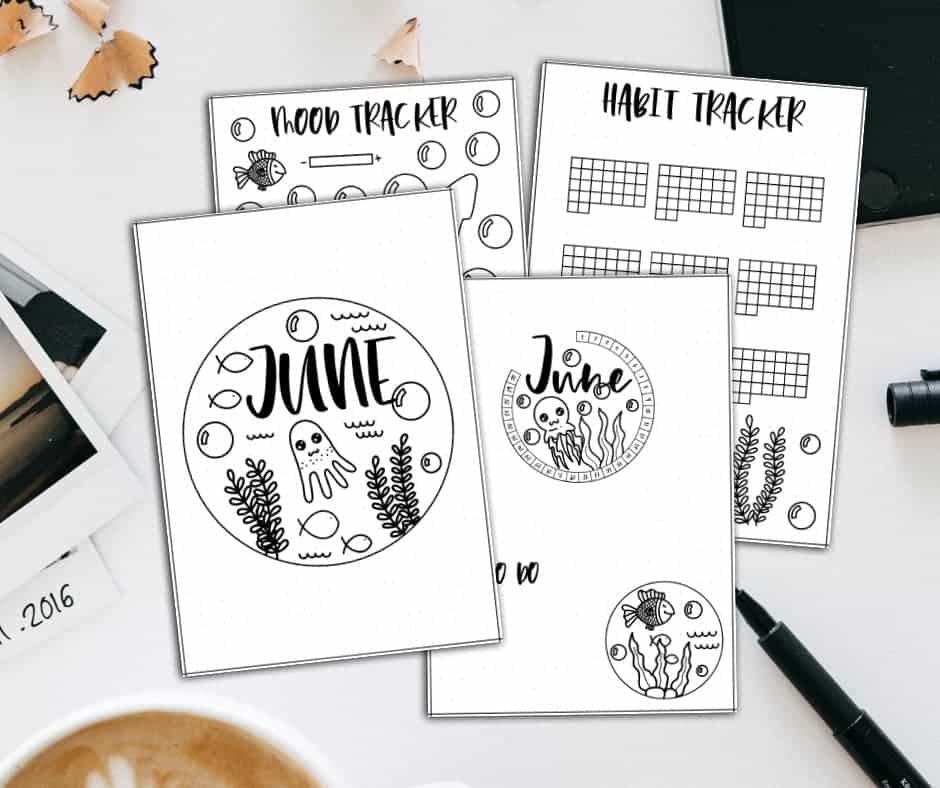
Freebies
I also had to create some freebies out of this!
I decided to create printable headers you can use in your weekly spreads or monthly logs.
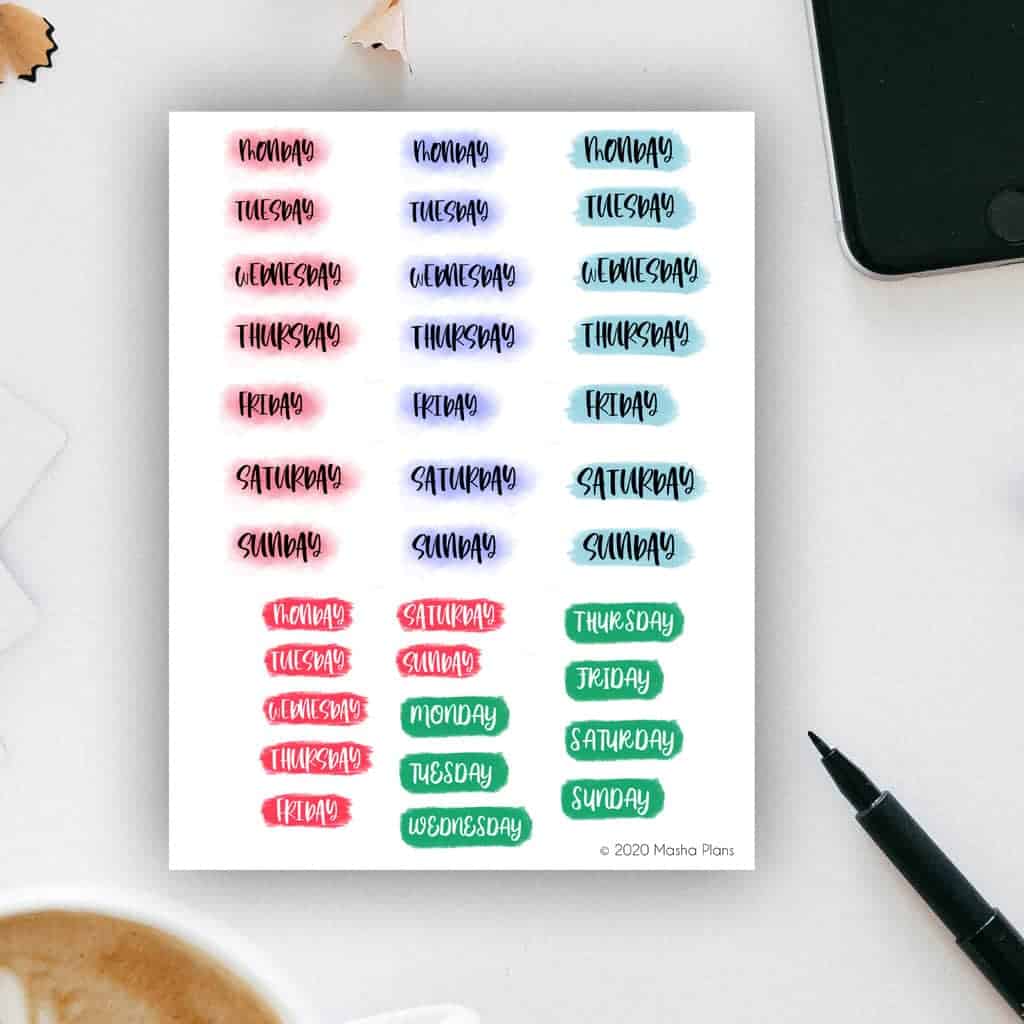
They come in different colors and are in two documents – PDF and PNG, so if you want to you can cut the PNG file and use the headers in your digital planner.
These will be available in the Resources Vault; you can sign up in the form below. You will find it in the “Stickers” section.
So now that we are done, would you like me to continue this series and do monthly digital Plan With Me posts and videos? Let me know in the comments!
I hope this post was interesting; if you find it so, please share! If you enjoy my content and want to show your appreciation, please consider supporting me with a cup of coffee.
And remember: Keep Bullet Journaling, and Don’t Be A Blob.


