9 Types Of Bullet Journal Weekly Spreads You Need To Try
Bullet Journal weekly spreads are some of the most popular ways to plan your day in the community. It’s no wonder, then, that the design of your weeklies is only limited by your imagination!
As with the whole Bullet Journal system, your weeklies are like a set of Legos – you can play around with different elements and create something of your own.
To give you some pointers, I’ve compiled here 9 different types of Bullet Journal weekly spreads to try out in your BuJo!

I love a change in my Bullet Journal, so every week, I’m trying to do something different in terms of my weekly setups. As you can guess, it means that I’ve already tried plenty of layouts to plan my weeks. Plus, I always try to guess my weekly needs and create planning pages that would fit the particular week.
So, after doing all that searching and experimentation, in this post I’ll be sharing with you some of the basic types and structures of weekly spreads.
These are kind of like the bare bones of your weekly layout, and once you have those, it will be very easy to customize and build the rest of the weekly log around it.
So let’s dive in and let me help you build the weekly spread perfect for your day-to-day planning.
Oh, and at the end of the post you’ll get some more resources and isnpirations for your weekly spreads, as well as FREE printable weekly pages you can start using right away!
Weekly Bullet Journal Spread Tips
Before we dive into the weekly spread formats, I wanted to share with you a few tips on how to create a BuJo weekly spread that will work for you.
Bullet Journal is a flexible system, which means you can create any type of weekly spread you’d like. These tips will help you to figure out what format to use.
- Think Of The Upcoming Week
Each week is different, and you can always create a weekly better suited for the week you anticipate having. So, before you sit down with your Bullet Journal, think of what the next week will look like.
Maybe there is a deadline coming up so you expect to be swamped with tasks. Then create a weekly schedule that would give you plenty of space for your daily to-do lists.
It might not go as you plan, but more often than not it does fit.
- Think Of Your Needs
Think about what do you need from your weekly. Do you need to have a habit tracker? Maybe you need to plan your meals? Think of your current struggles and priorities, and add elements to your weekly spreads to help you.
- Use Pencil First
This is my tip number one for setting up any Bullet Journal spread. Creating your spread in pencil first will help you avoid so many mistakes!
You still might make mistakes – I do everything in pencil and still, sometimes, have 8 days a week or two Tuesdays. But it will help you lower the amount of these a lot!
This post may contain affiliate links. They will be of no extra expense for you, but I receive a small credit. Please see my Disclosure for more details. Thank you for supporting Masha Plans!
Stationery Recommendations
Of course, I can’t have a post without a little section of supplies. After all, they are great too, to help you make your weekly setups more fun and fast.
So here are just a few of my favorites:
- Fineliners. These are the basics for every Bullet Journal page, perfect for drawing and doodling. I recommend Sakura Pigma Micron, which also comes in a set with different nib sizes, allowing you a variety of line thicknesses.
- Markers. If you want to add color to your pages, you’ll need some markers. Your choice will depend on what colors you like. My top choices are Zebra Mildliners and Tombow Twin Tone.
- Brush pens. To add beautiful brush lettering to your weekly spreads, you need a good set of brush pens. I recommend Tombow Fudensuke since they are smaller tips and pretty easy to master. If you’re looking for a larger brush pen and something with tons of colors, you can’t go wrong with Tombow Dual Brush Pens.
- Stencils. These little helpers are great to allow you to set up your weekly spreads faster. I recommend these weekly spread stencils that are built specifically for your weekly pages.

Now that you have all your supplies and are ready to start creating, let’s dive in and look at the different weekly spread formats you might consider using.
Vertical Boxes Weekly Spread
In this layout, I put all my content into boxes. There are 7 boxes for 7 days, plus a space for notes and a list of my chores. I love this layout for how organized it is: all the information is super easy to find.
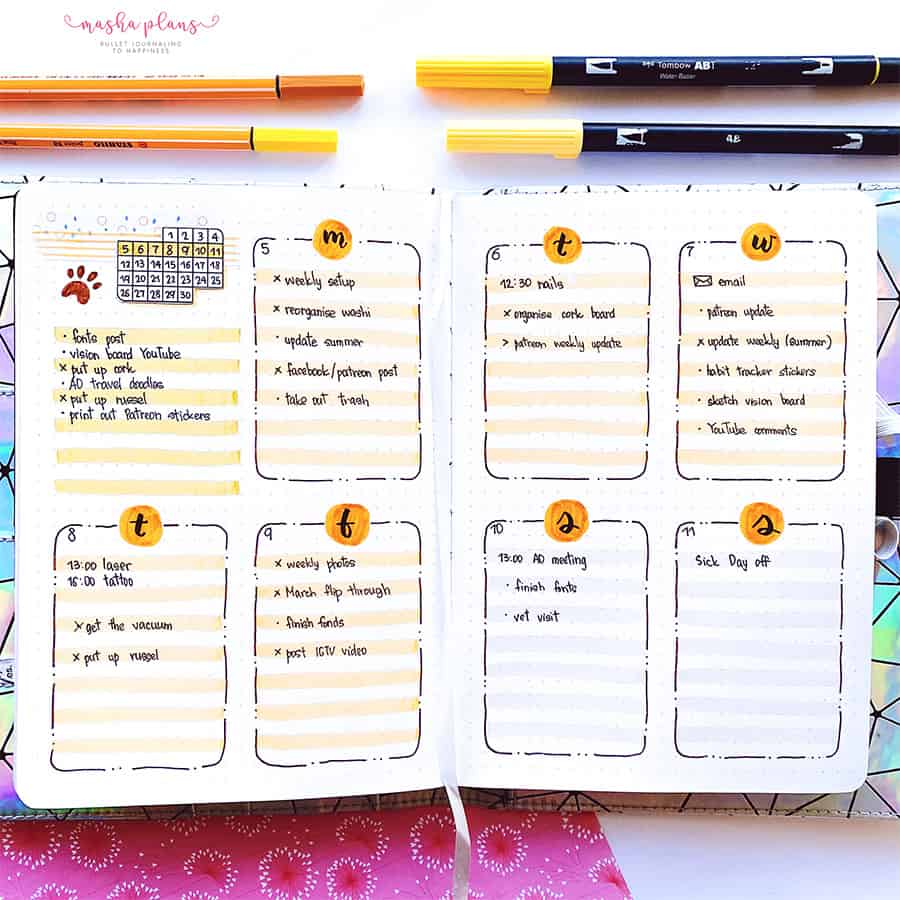
The advantages of this layout are that it’s pretty easy to set up (especially if you have a stencil for your boxes), and it looks very clean because all the information is distributed by groups.
Another great thing about it is you can play around with decorations: add a bunch of doodles or stickers, or just create headers for each box and transform it into a stylish minimalist spread.
I found this spread very useful when you need a clear view of the week. It’s definitely my favorite weekly setup.
Horizontal Weekly Log
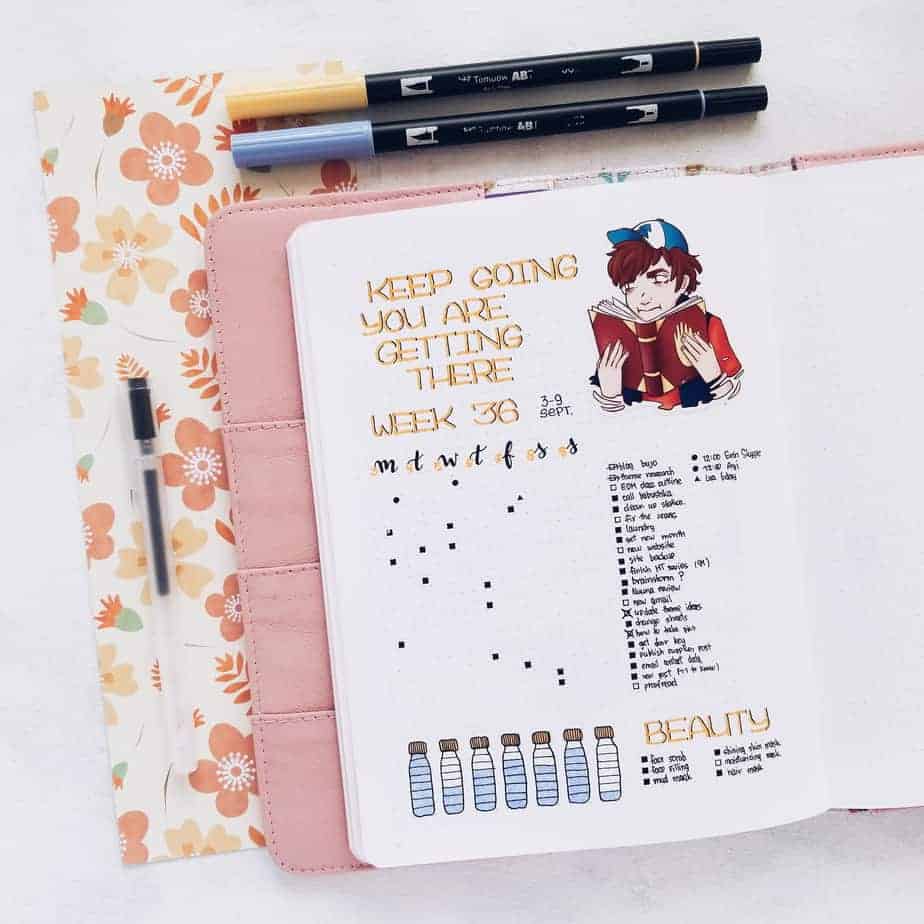
I love this layout, and it came to be in October when I was experimenting a lot with my habit trackers.
The layout is horizontal boxes but without boxes – at some point, I just wanted a freer look.
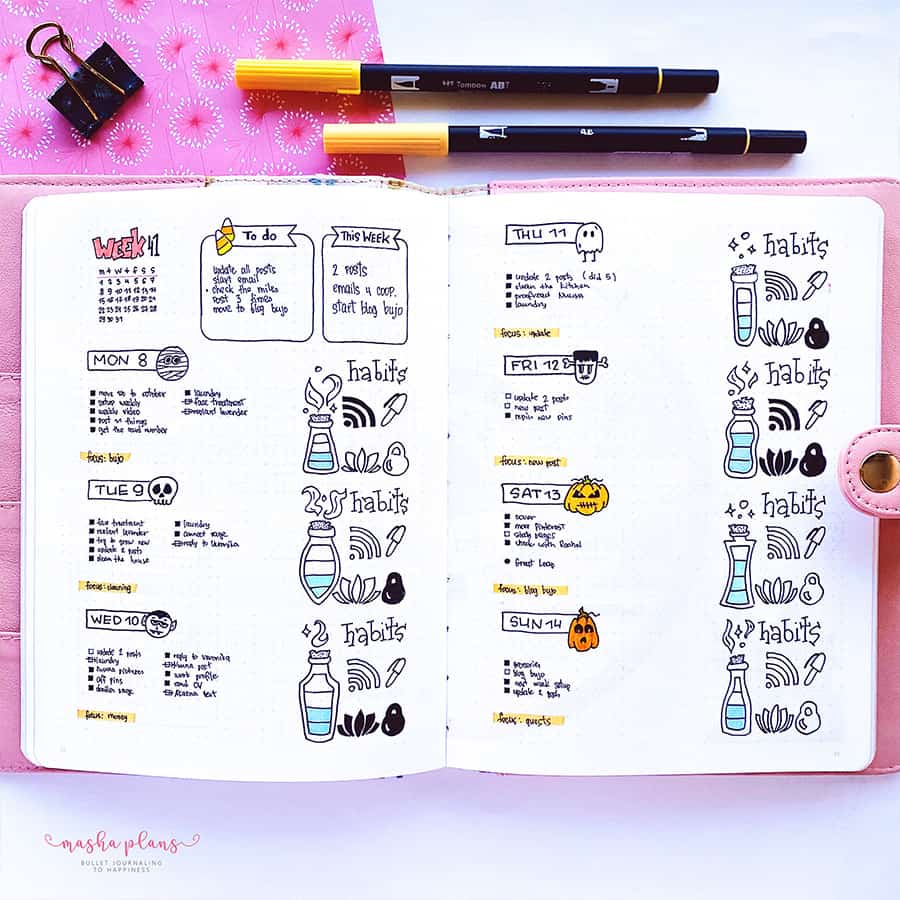
I divided each page into 4 parts, so I had enough space for 7 days and a weekly review, and a weekly to-do list. Each day also has a huge doodly habit tracker: the bottles are for water intake, and other little doodles are for publishing a post, writing, doing yoga, and cardio workout.
This spread is very useful if you’re more focused on your days and need more space for your daily entries. You could modify it by simplifying the habit tracker or maybe changing it to a meal plan or whatever you might need.
This is a very simple layout since all you need to do is to add some headers, so I think it’s great for busy days! For me, this really reminds me of the original Bullet Journal system approach, but this time, framed into a two-page weekly.
Long Vertical Boxes Weekly
I divided the page into four equal vertical parts and created eight columns for each day of the week and a weekly to-do list, all extremely minimalistic. The only thing that took some time was the flowers on the bottom.
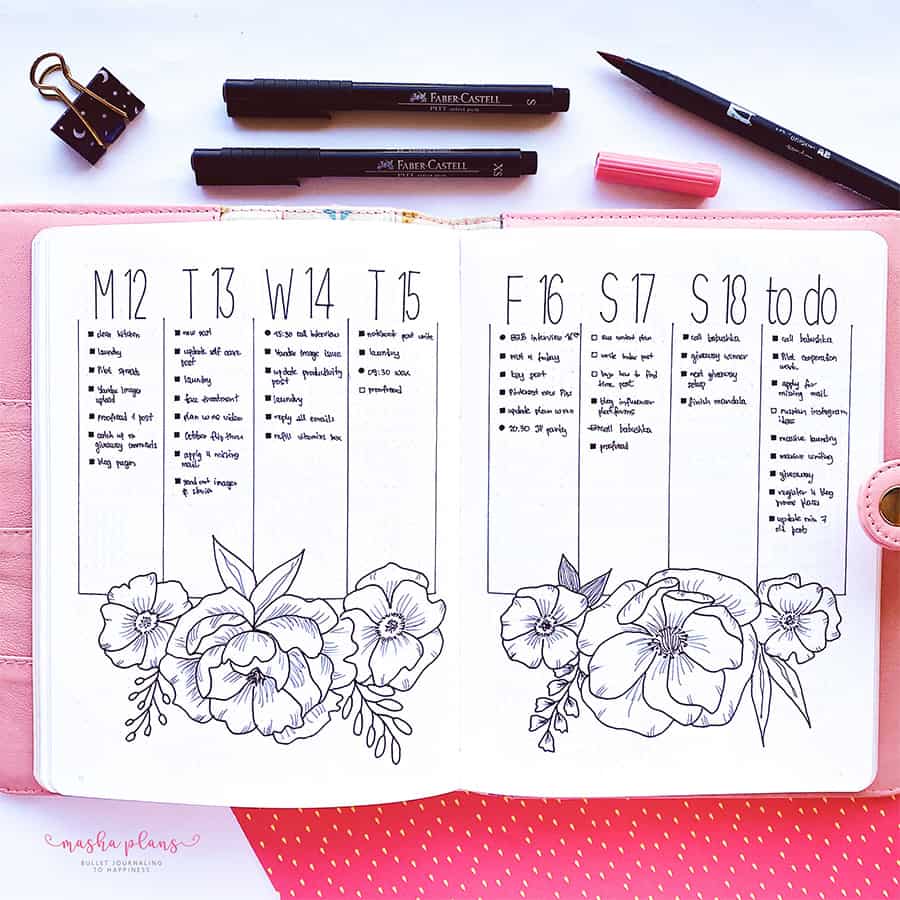
This page works perfectly if you have very busy days – it allows you to have much more space for each day. You’re free to fill it all up with tasks or maybe add some different elements on the bottom of each box, like weather or daily water tracker.
I drew my flowers following a tutorial from this book.
If you take away the flowers, you’ll see there is plenty of space there for you to fill. You could include there a weekly meal plan, a weekly habit tracker or even your weekly review if you do one on a weekly basis.
One Page Weekly
This type of weeklies is my absolute savior when I’m short on time. I divide the page in two, on the left side is a big to-do list and whatever else I might need, such as a habit tracker and small weekly review, and on the right side are my daily boxes.
There is enough space in each daily box for anything else you want to add, like a daily water tracker, even if you use a notebook smaller than the square one I used in this picture.
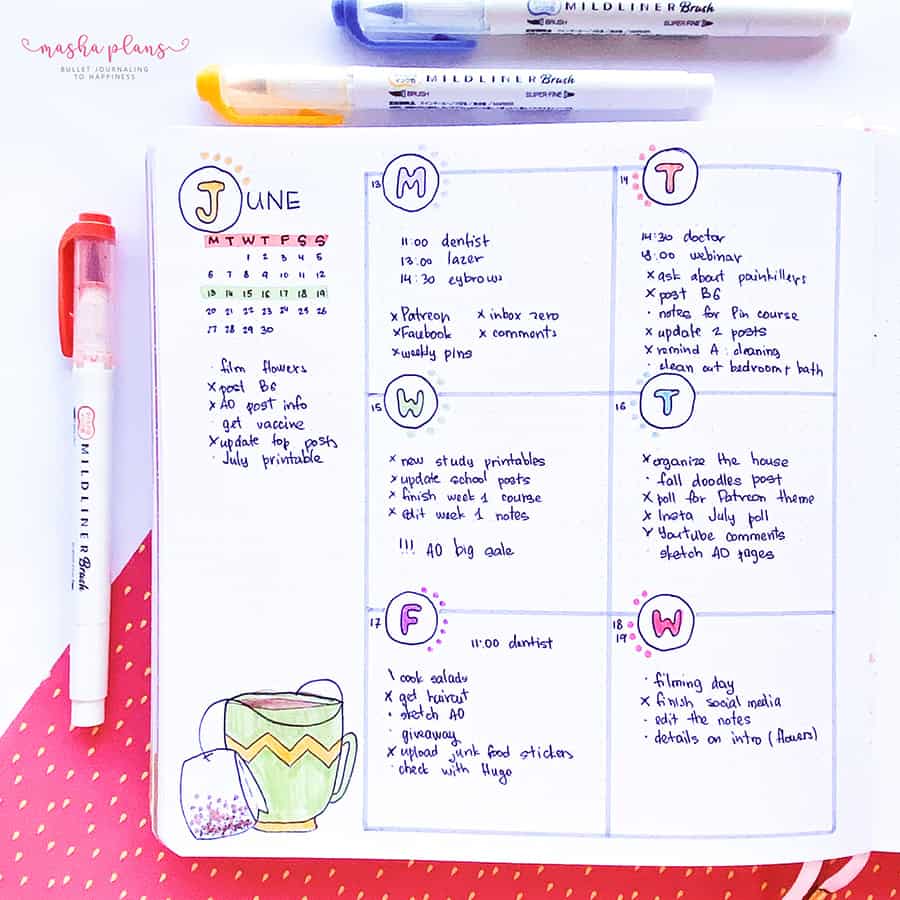
I find this setup very useful because it allows for a big to-do list and writing down what is the focus task for each day. It’s perfect for when you’re very busy and have a lot of responsibilities, but also want to keep track and decide what will be your priority that day.
I find that when I have a lot of tasks, I often end up checking out the easiest things, just to shorten my list. This setup helps me to set a goal for each day, so I do what’s important first rather than just what’s easy.
One Page Weekly Spread With A Tracker
Ok, I say tracker, but I actually used it for my to-do list and weekly review.
The idea is very simple – use one side of your spread for your weekly layout, and the other one for a habit tracker or any extra elements you might need, like a big to-do list I have in this spread.
This works perfectly if you need a detailed meal plan, a workout plan, weekly habit trackers, a list of house chores, or anything else really.
I’d say it’s especially beneficial when you’re working on some projects, and you need to write down results and statistics daily, like if you’re training for a marathon or track results of the latest SEO changes on your website.
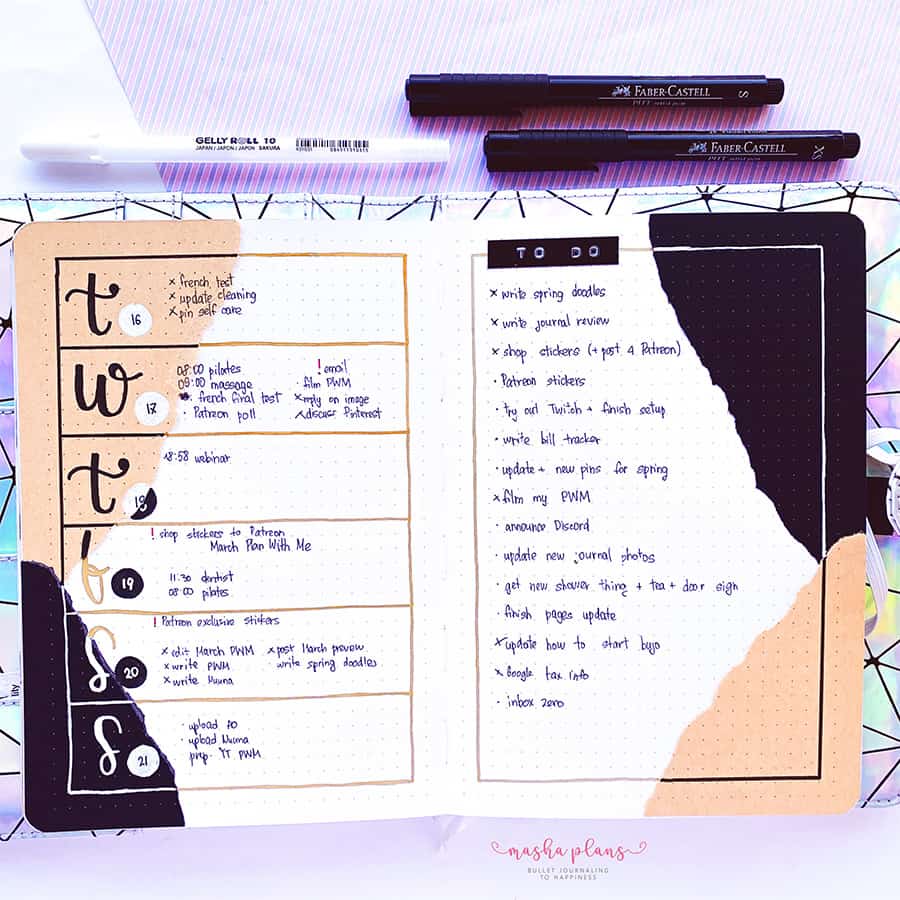
Running To Do List Weekly
This spread is a Running List. The way it works is on one side, you have a to-do list, on the other side, you have 7 columns for each day of the week. Once the task is completed, you mark it in the day’s column when it was done.
When I used it, I actually modified it a bit. My column for each day is two squares wide, and my to-do list has two columns. One column is a to-do list, and the other one is events. If it happens so that I have a task completed and an event on the same line, I’ll be able to add them both on the same day.
Did you ever use a Running List? Would you like me to have a separate post just about this setup? Let me know in the comments section below.
This setup is great when you have certain things to do during the week, but can’t really assign a special day for it just yet.
I had enough space to add my water tracker there, but if you need more space, you can always try out “one page weekly with a tracker” way and have your running list on one side and your trackers and other elements on the other.
Circle Weekly Log
This is something I just wanted to play around with, and it was super fun! The circle includes all I need from my weekly – space for each day + weekly to-do list.
Each division has a daily water tracker on the bottom. The circle allowed for plenty of space, which I used for the monthly calendar, weekly habit tracker, and weekly overview.
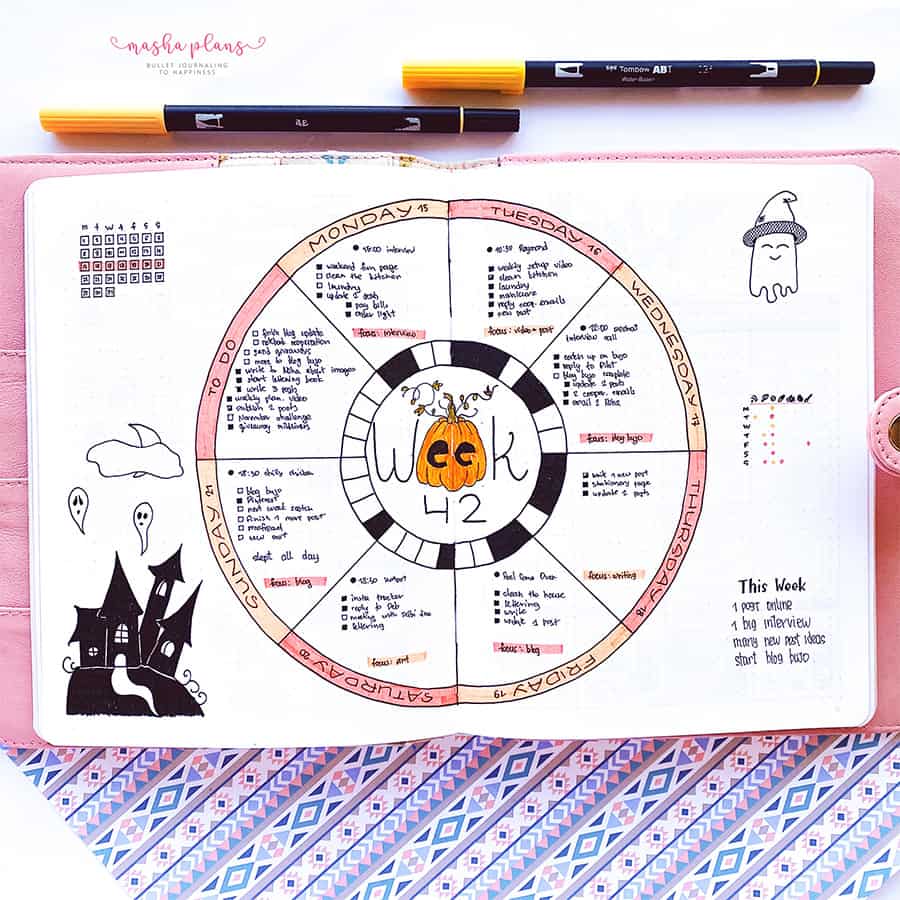
This weekly spread is fun, and you can play around with it a lot. It gives you plenty of space for your tasks, but also a lot of space around, which you can fill out with whatever elements you might need.
Definitely give this layout a try when you feel creative and want to add a little something to your usual weekly setups.
Done List
Ever felt like you’re so swamped in work that the whole week goes by, but you look back and don’t even know what exactly you did and how far you went?
I had this problem some time ago, and that’s when I came up with the idea of a “done list”, which turned out to be not my original unique idea, but something people have been using for ages already.
Oh well, I was still proud of coming up with it by myself. Too bad I can’t claim all the fame and glory I was already dreaming about.
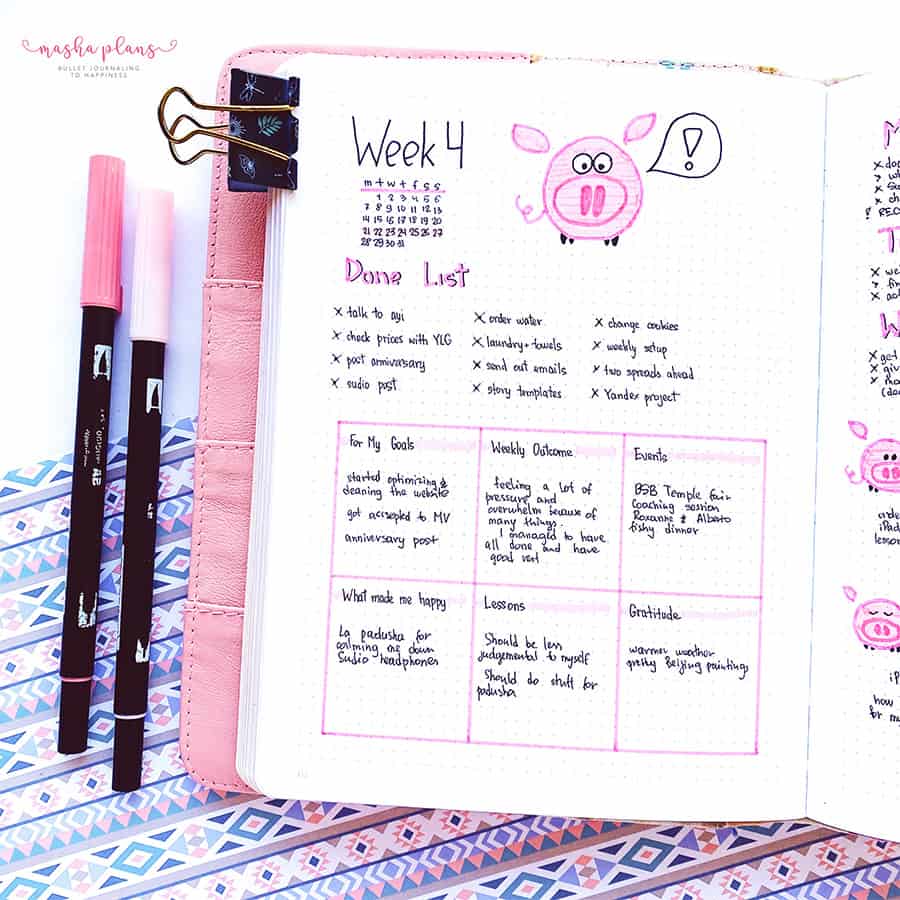
Anyways, the “Done list” is, well, a list of things you have accomplished during the day. First of all, guys, the effect it can have on you is amazing! And it requires just a few minutes. You’ll feel more accomplished, and less overwhelmed, and most of all, you’ll see again where you’re going.
Mind Map Weekly
I’m absolutely obsessed with mind maps and how they allow putting everything in its place. A mind map is basically a way to record things by dividing them into categories and writing them down in the form of a diagram.
This really allows you to structure the information and make it visually easier to understand.
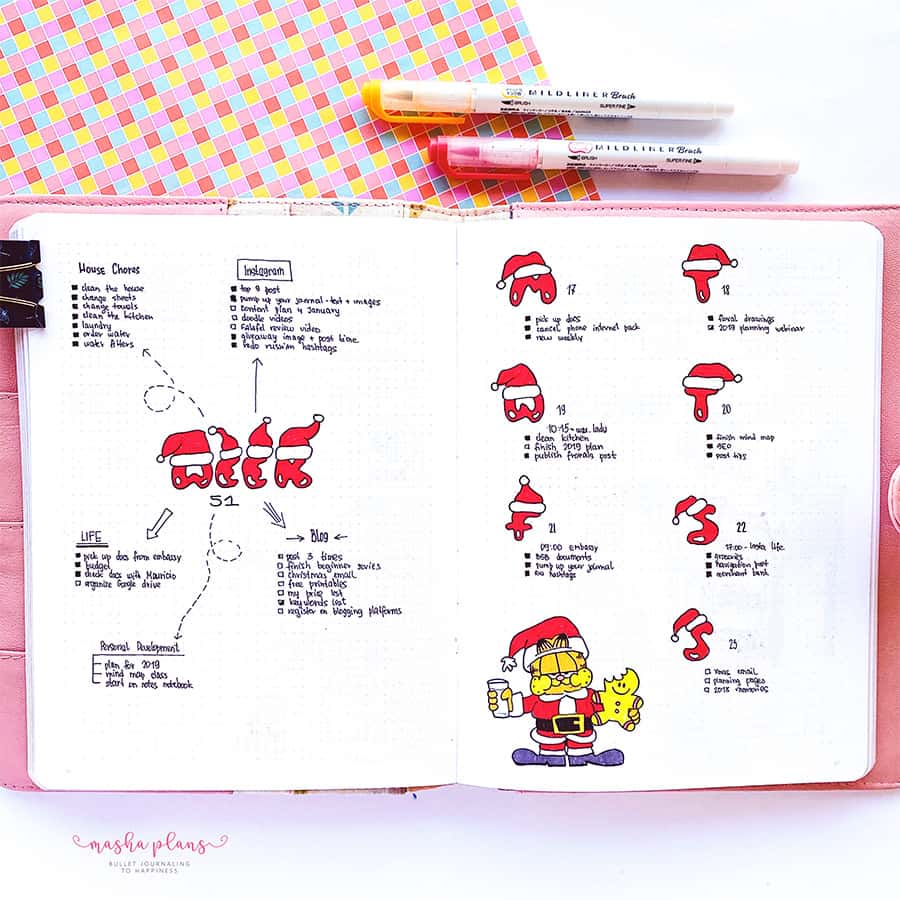
I love this technique, and once I decided to use it in my weeklies I wasn’t disappointed! So in the center, I have the number of my week.
Then I started thinking about my tasks and creating different branches. Like, first I started with chores, but while thinking about these, another thing came to my mind, so I immediately created other categories and kept going until I categorized and wrote down all the tasks.
My mind map of weekly to-do’s on one page was completed by my weekly setup on the other. Now that I had my extensive to-do list, it was pretty easy to drop them into daily boxes.
This setup is very simple and extremely useful. I’d recommend giving it a try, especially when you have a week full of responsibilities. Sorting everything in this visual way will help you see the big picture, plan it properly, and generally feel less overwhelmed.
Not sure which one fits your needs better? Just try them all and see! Remember what I said, your spreads are like Lego toys, you have lots of different blocks and you can play around, including only what you want. They are equally as fun too!
Free Bullet Journal Weekly Spread Printables
As I mentioned at the beginning of the post. I have some FREE printables weekly spreads that you can already find in the Resources Vault.
Simply print them out and start using them right away, so you get an idea of what format works for you right now.

If you don’t have access yet, you can always sign up in the form below.
Once you confirm your subscription, you’ll get the password to get 50+ free Bullet Journal printables, stickers, and worksheets to use right away.
If you’ve never used printables before, be sure to check my post How To Use Printables In Your Bullet Journal.
It’s pretty basic, and you can find all the supplies you need in my post Supplies For Using Bullet Journal Printables.
If you want more, I have several different weekly spread bundles in my shop, so you can try even more varied styles and formats.


More Resources
Are you looking for more information and inspirations for your bullet journal weekly spreads? I’ve got you covered.
Check out these blog posts next:
- 15 Minimalist Weekly Log Bullet Journal Inspirations
- 13 Fun & Unique Weekly Log Bullet Journal Ideas Just For You
- Finding Your Style Of Bullet Journal Weekly Spread
>>> Which one of these spreads sounds like the best for you? Share with us in the comments!
Hope this post was interesting. If you find it so, please share! If you enjoy my content and want to show your appreciation, please consider supporting me with a cup of coffee.
And remember: Keep Journaling, and Don’t Be A Blob!


