Brush Lettering For Beginners: Tools, Tips, And Techniques
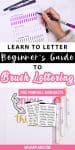
In this post, we’ll explore practical techniques for learning and improving your brush lettering skills. From choosing the right tools to practicing different styles, these tips will guide you toward developing your own unique and beautiful brush lettering style and leveling up the creative part of your Bullet Journal pages.
This is your go-to post to dive into brush lettering for beginners, get comfortable with your creative skills and have fun doing it! So grab your pens, let’s get started on this creative journey!

Ok, first of all, BIG DISCLAIMER: I’m not a professional letterer, and I don’t have any art education. I’m just like you guys – learning it all as I go, from zero.
BUT! I think THAT’S A GOOD THING!
I can totally relate to your grieves and pains because I was in your exact same position at some point, and that makes me a great source of help to get you where you want to be.
Just like you guys, at the moment, I’m working hard on improving my lettering skills and learning all I can about it.
It’s a fantastic and creative hobby that has so much to offer! And since I myself had to go through a process of finding all the good resources and mostly learning from my own mistakes, I’ve compiled this post to ensure that you have a much easier time on your journey.
Be sure to scroll until the end to get some lettering freebies and more resources on brush calligraphy!
Ok, I believe we’re ready to get started! Abd the first thing we’ll have to talk about is the supplies.
This post may contain affiliate links. They will be of no extra expense for you, but I receive a small credit. Please see my Disclosure for more details. Thank you for supporting Masha Plans!
Best Brush Lettering Supplies
Lettering is not all about the tools, so you don’t need to buy tons of expensive pens and inks to start learning bush lettering. Don’t go crazy buying all the pens you can find.
Still, you’d want to have a few good ones to help you practice. I had no idea about any of the things we’ll be talking about, and it took me money, time, and nerves to figure it all out.
Thankfully, you found this post, so we can ensure you aren’t making any mistakes. There are basically two things you really need – a brush pen and a piece of paper.
So here are some of my recommendations:
- Brush Pens
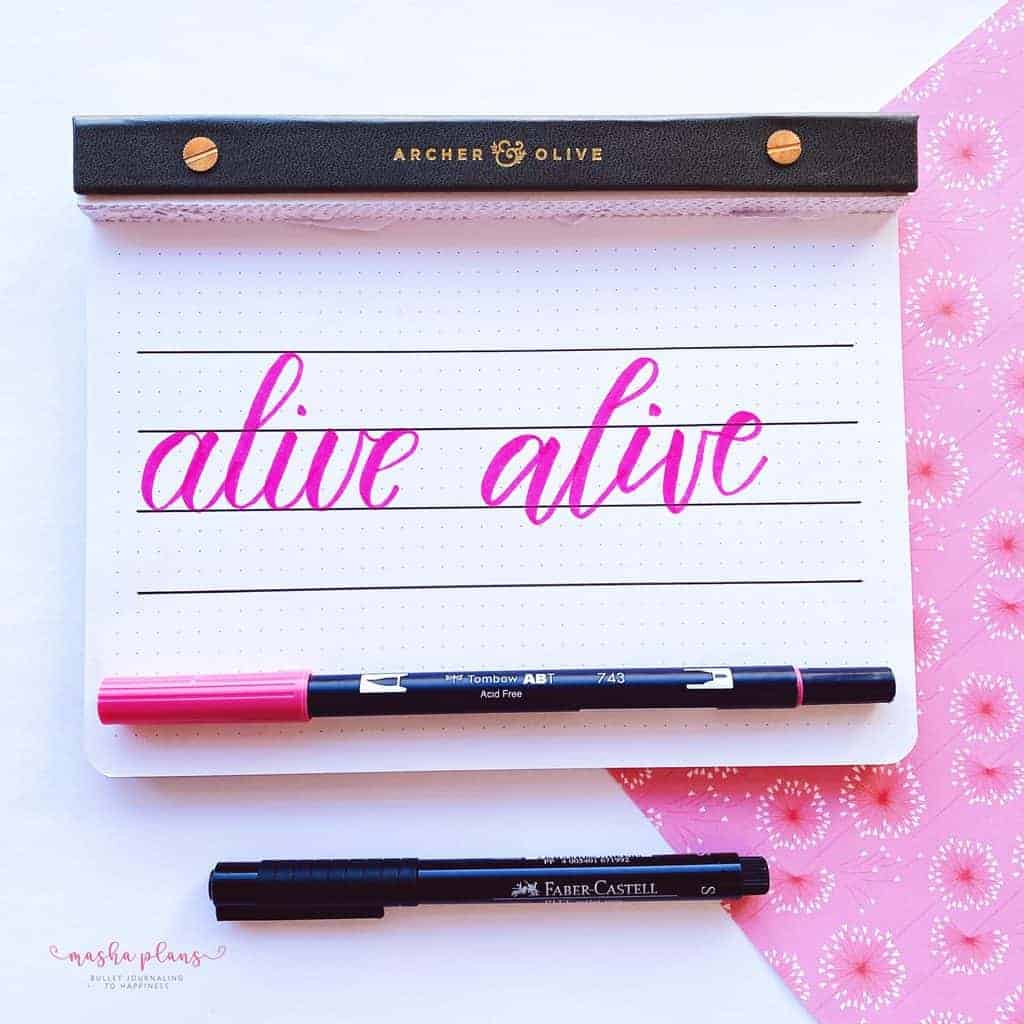
Some of the most popular brush pens on the market are Tombow Dual Brush Pens – they have a flexible tip that is easy to control and perfect for beginners. They also have a marker tip, which will allow you to fix some mistakes in your lettering when you are starting up.
They might be expensive, but it’s a great investment for your lettering and your Bullet Journal.
Another brush pen I recommend you to use is -again- a Tombow one: Tombow Fude. They are cheaper and come with two tips – hard and soft.
These pens are great for learning to write letters because they are much easier to control than your usual brush pen. Plus, the smaller tips allow for smaller letters, so these pens are perfect for daily headers and other small elements like this.
If you’re looking for a budget option, you can start with Crayola Super Tips. Even though they are not exactly brushing pens, they still have that special tip that makes brush calligraphy possible.
They come in various colors and have a very friendly price tag!


But truthfully, any brush pen you already have will work, starting with brush lettering. So even though these are some of the best supplies, and I believe that Tombow Fude and Crayola Supertips are affordable, you don’t have to spend money on them.
You really do need just one pen to practice, and something like this $1 calligraphy pen from Amazon will work just as well.
- Paper
When you print your worksheets, be careful what paper you use. If you use ordinary printing paper, it might damage your brush pens, and you really don’t want that! I recommend you use HP Premium Choice Laserjet Paper.
But you can also use a good notepad for your lettering; my choice would be an Archer and Olive notepad, which you can also get 10% off if you use my code MASHA10.
Another great choice would be a Rhodia notepad. Both these options will not damage your brush pen.
Alternatively, and this is actually my favorite way to practice brush lettering, is to print your worksheets on any paper you have and use marker paper for tracing. That way, you can reuse your worksheets over and over again.
Tracing paper is pretty affordable; it won’t damage your brush pens, and there are plenty of options out there, like this Crayola tracing paper.
Brush Lettering For Beginners
Now that we’ve covered all the supplies you need to start, let’s get into it and start lettering. And I know you might be itching to start writing words right away but trust me, these extra things you’ll learn will help you ultimately master brush lettering faster.
Mastering brush lettering is all about having a very good understanding of the basics and the fundamentals of lettering, so this is where we’re going to start.
Anatomy Of A Letter
Don’t be scared – we are not doing a scientific study here, and I won’t be boring you with tons of technical language.
But there are a few things you should know because, believe me – it will completely transform your lettering and make it look much better.
The only thing I want to talk about here is these basic lines – base line, X height, ascender, and descender.
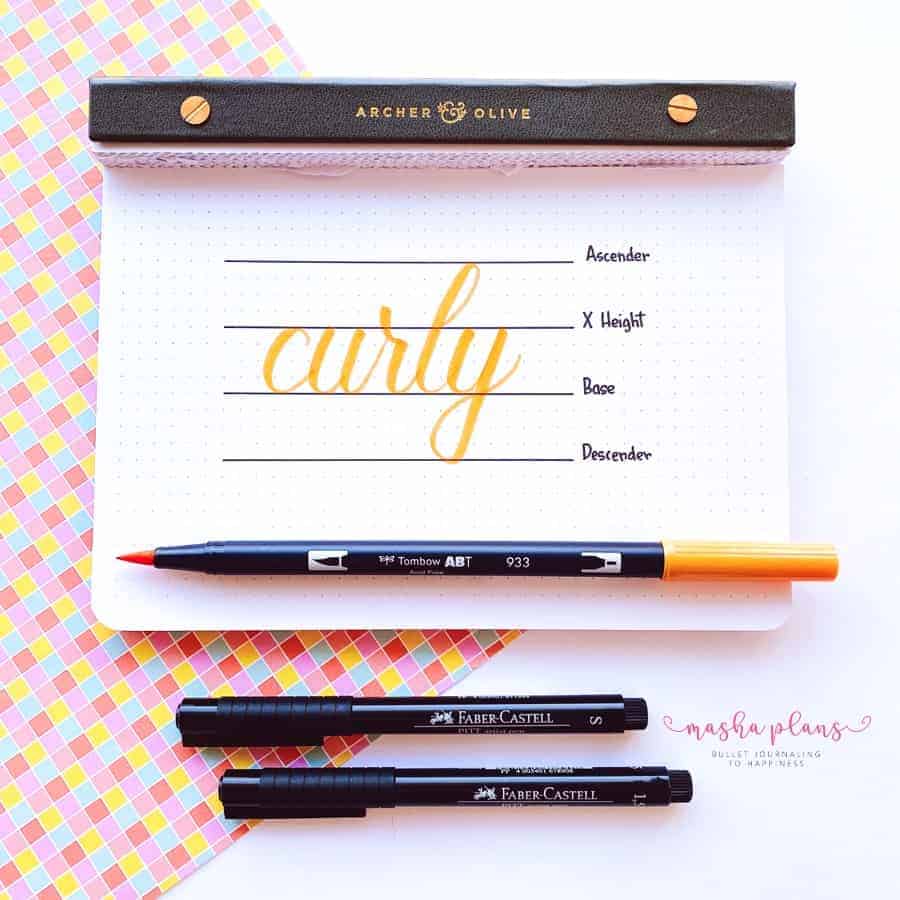
- Base Line
Baseline is basically where your letter sits.
The main body of each letter’s bottom should be on top of this line.
- X Height
This is where you can find the top of lowercase letters.
Lowercase letters like x, but also a, c, o, m, and so on set between base like and X height.
- Ascender Line
This line is for strokes that go above the usual x height. Think of letters like k, h, l, and so on.
Those letters have strokes higher than x-height, but they go only as high as the ascender line.
- Descender Line
This is pretty much like an ascender line, but this time it’s strokes that go beyond the baseline.
Think of letters like j, y, p, and so on.
Why Should You Know The Letter ANatomy
Ok anatomy of a letter is a pretty simple concept, but still – why should you spend time learning about it?
First of all, because the name of the game with lettering is consistent.
All your letters to look good must have similar sizes, shapes, spacing, and so on. So once you understand these baselines, you’ll be able to maintain your lettering consistent, and therefore make it look that much better.
Another reason is the fact that you can break the rules, play with the lines, and create different effects in your lettering.

For example here, my descender and ascender are spaced much further from the main body of the letter.
This can be a fun trick to use if you’re doing more of a decorative style full of flourishes.
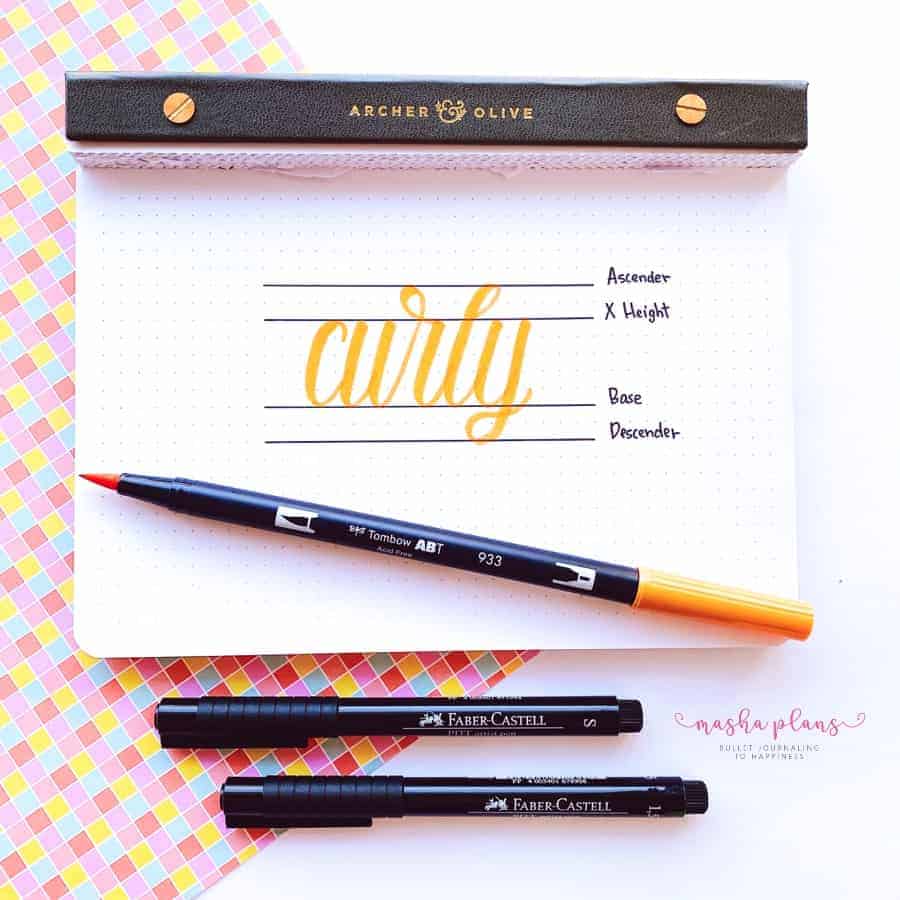
Here, the base and x-height lines are much further apart, which helps create a more prolonged style.
At the same time, since I still use the lines, all the letters are very consistent,
Adjusting The Grip
A lot of your lettering depends on the way you hold your brush pen. You should hold it at an angle to your paper.
That way, you’ll easily get thicker lines, and you won’t be feathering the brush tip. You should allow the tip to flex when you go down and unflex when you go up.
Do you grip your pen next to the tip or hold it somewhere in the middle? This depends on you. You know now how your tip should be; take time to figure out what’s the most convenient way for you to hold your brush.
Speaking of the grip, be careful with death grips! When you write, it’s not just your pen moving; it should be your hand and arm moving as well. Having a very strong grip on the pen might just add extra pressure to muscles and negatively influence the result.
Finally, be sure to check out how your paper is positioned. The best way is to position it at a 45% angle, you know, as they taught you at school when you were learning cursive. The teachers really knew their stuff!
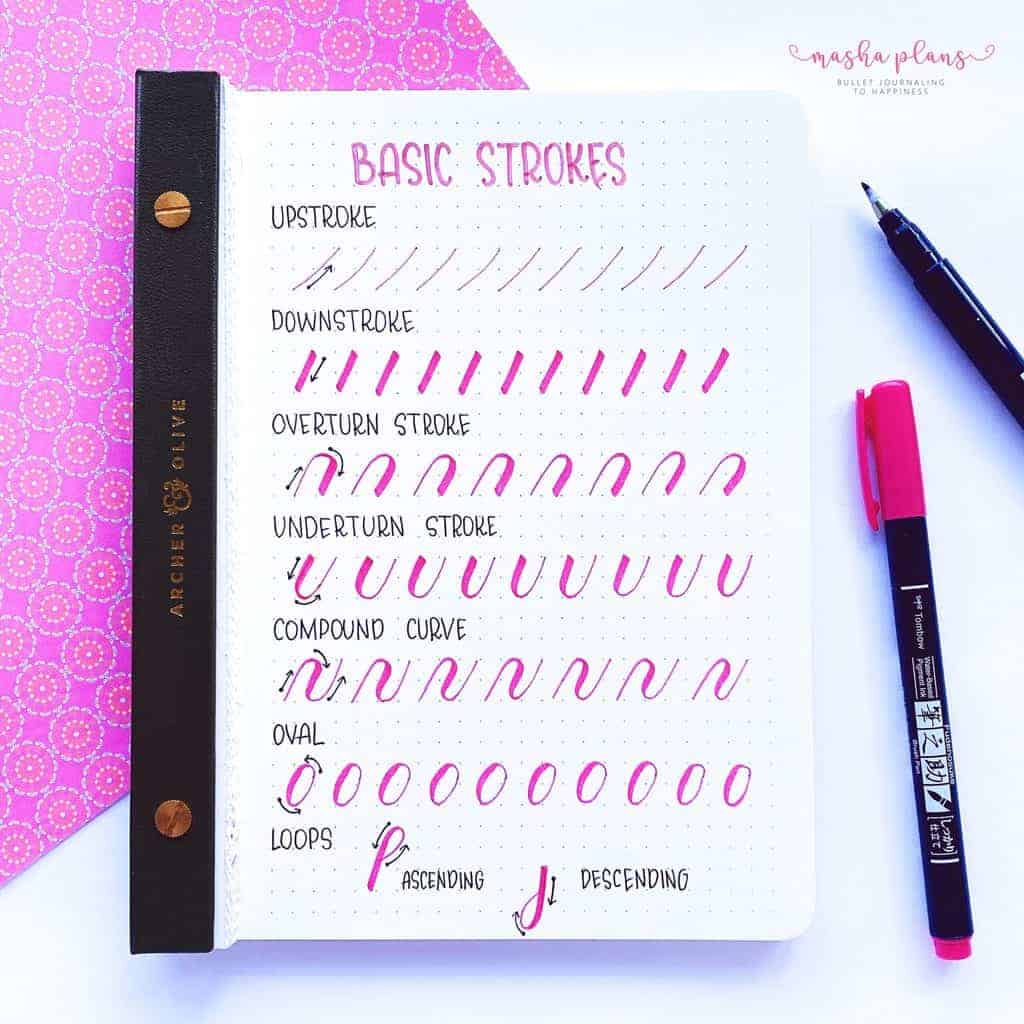
Brush Calligraphy Basic Strokes
Once I got my first brush pen, I went straight to lettering words. I saw how so many people lettered beautiful quotes so easily that I firmly believed I could do it on my first try as well!
When I failed miserably, it was a very disheartening and frustrating experience.
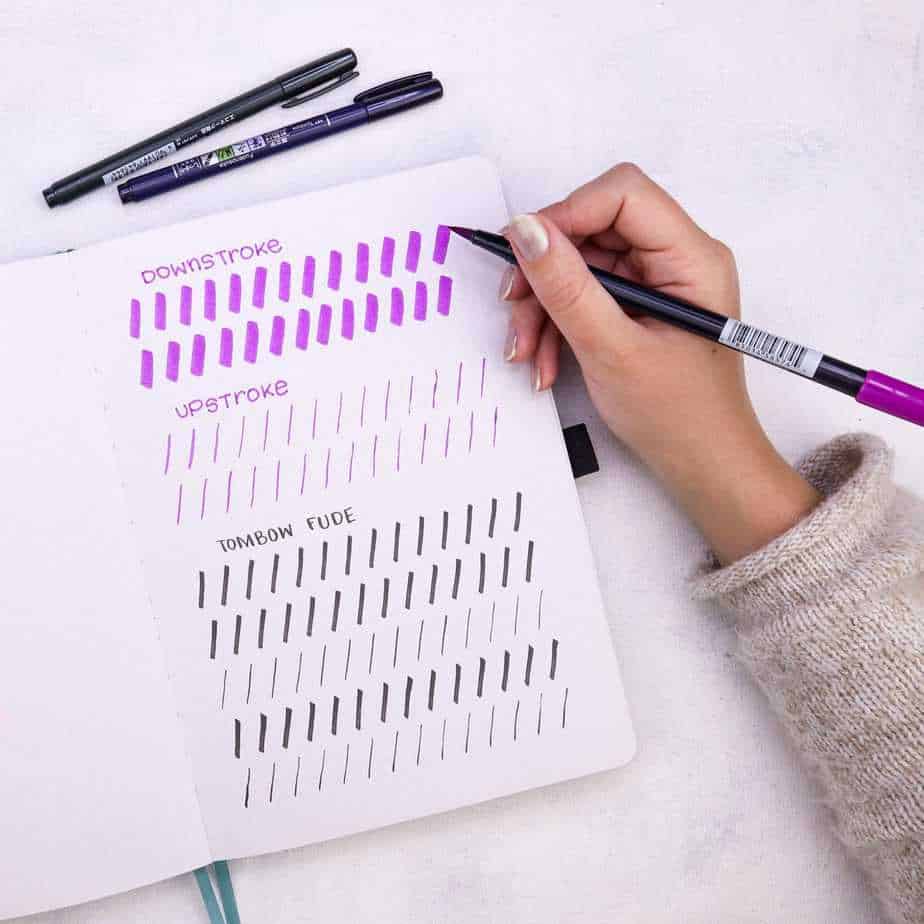
To avoid that – start by practicing not words or letters but basic strokes. All letters consist of these basic strokes and once you’ve mastered them, creating pretty letters will be that much easier.
The main concept for your basic strokes and the biggest trick to master calligraphy is – thick downstroke and thin upstroke.
Sounds pretty easy, right?

When you just start learning to letter, do tons and tons of these simple strokes. Doing the drills creates muscle memory that, in turn, will help you master more difficult elements.
Once you’re confident with your up and down strokes, try out these more complicated strokes.
I’m sure you can see how they are important elements for your future letters – loops for l’s, j’s, and g’s, and connections for m’s and n’s.
When you’re practicing, remember that lettering isn’t like writing. You’re free to take your hand off the paper when you’re done with a stroke.
For example, the m shaped strokes – as soon as you complete the downstroke, lift your hand up and move it a bit before you start off the upstroke.
In case you’d like to see the basic strokes in a video format, here is an amazing tutorial by one of my favorite calligraphy teachers – The Happy Ever Crafter.
I learned brush lettering with the help of her videos, so I thought it would be perfect for you as well!
With that, we’ve covered all the basics you need to know to start your brush calligraphy journey.
But this is just the tip of the iceberg, here are some more things that will help you to move forwards and improve your lettering skills.
Practice Lettering
Wanna know the secret to improving your lettering? Practice!
There’s no special technique or trick that will make you a master calligrapher in no time. Other than practicing, that is!
The best way to practice your lettering is by using worksheets. It can be just a grid paper to orient you on the placing of your letters, or it can be lighter-colored words and letters that you can trace over.
Tracing over already written letters and words is very useful because you can develop your muscle memory to learn a new font, and you also can take time with your curves to make sure you draw them correctly.
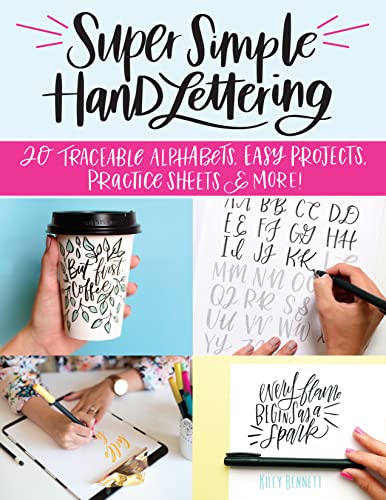
There are many amazing worksheets to help you practice lettering on Etsy, or you can get some of these fantastic Amazon books.


There are also some FREE printable worksheets that you can get at the end of the post, so just keep scrolling.
Tips To Make Practice Lettering A Habit
Practice is the secret, but between your job, chores, family, and friends’ obligations – how can you possibly find time for that?!
Believe me, I know! I struggle to find the time or even allow myself to do anything other than work these days.
However, there are little tricks you can apply to make sure you spend some time on your lettering.
- Just find 5 minutes. If you simply do one practice sheet a day, I guarantee you that soon you’ll see the progress. And doing that little won’t take more than just 5 minutes.
- Use a timer. Set the timer for 10-15 minutes (or be rebellious and do all 25 minutes!) and spend that time focused on just lettering. Put away your phone!
- Practice at the same time every day. This really helps you to establish lettering practice as a habit. You’re training yourself to be Pavlov’s dog – each day at the same time you’ll feel the urge to do and do your lettering routines.
- Create a habit tracker. A great way to keep yourself accountable is by using a habit tracker. Add lettering practice to your list of habits, and make sure you follow through with it every day.
- Add it to the existing routine. This is the easiest way to get the new habit stuck, not just lettering. If you already have your BuJo time, why not add to it 5 minutes to spend on lettering practice?
With practice worksheets and these tips on how to make practice a habit, you’re on the way to becoming a master calligrapher!
Now that you know all the rules, however, it’s time to know how to break them!
Leveling Up Your Brush Lettering
You now know all the basics of brush lettering and can do a classic calligraphy. But there is so much more about it!
True creativity is in playing around with the concepts and customizing the look of your letters based on your preferences.
So let’s look at a few techniques that can help you bring that unique and quirky look to your lettering pieces.
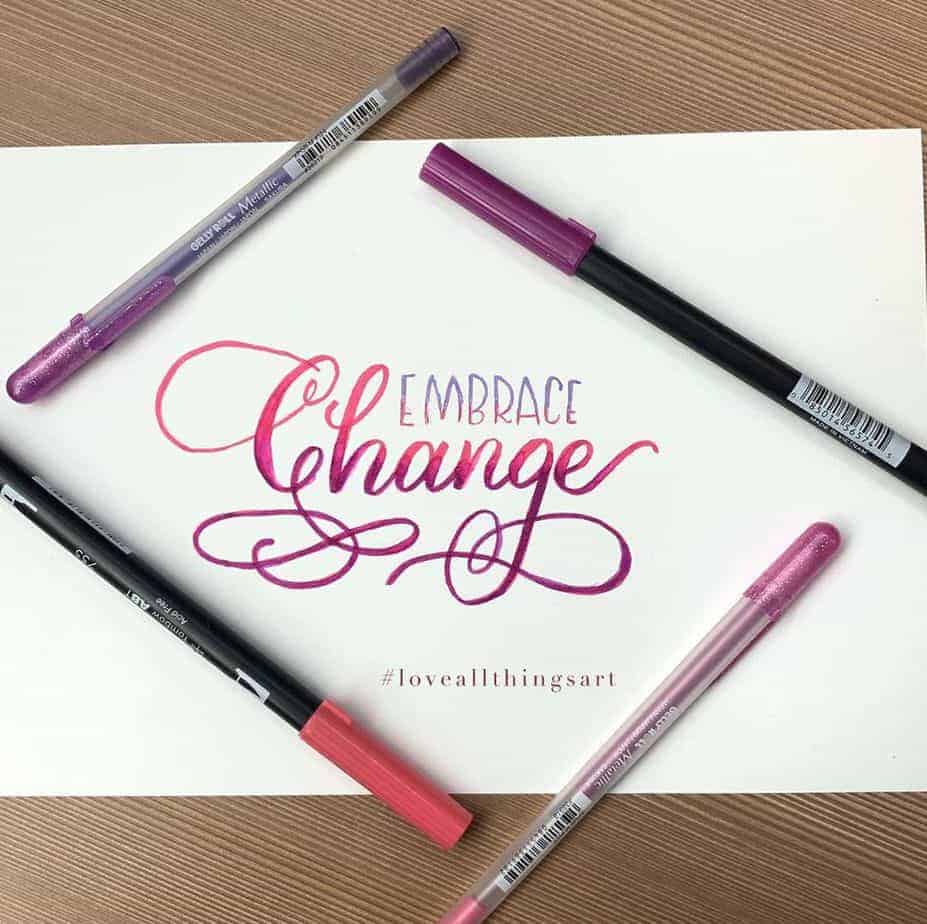
Brush Lettering Flourishes
Flourishes are decorative elements added to your letters. These are swirls you can find at the end of letters or curly lines under or over the word.
It’s a fun way to add a character to your letters or even fill out spaces in a lettering piece you’re creating.
Flourishes come in different forms and there are tons of ways you can add them to your letters. For a beginner, try adding flourishes to descenders (g, j, p, q, y) and ascenders (b, d, f, h, k, l), since these are the easiest ones.
But just like all the other styles, you need to practice and experiment until you find something that works best for you.
If you want to learn more about flourishing, check out this book, it will tell you all about the different types and techniques to flourish your letters.
You can also check out Skillshare class: How To Flourish. You can take it for FREE if you use this link and learn everything about flourishing your letters and lettering pieces. The class also includes a very helpful workbook.
Bounce Lettering
Another way to customize your lettering style is by trying bounce lettering.
Remember the rules on where to put your letters and to follow the grid when your letter?
Well, bounce lettering essentially breaks them all and pushes you to think outside the box or lines, in this case.
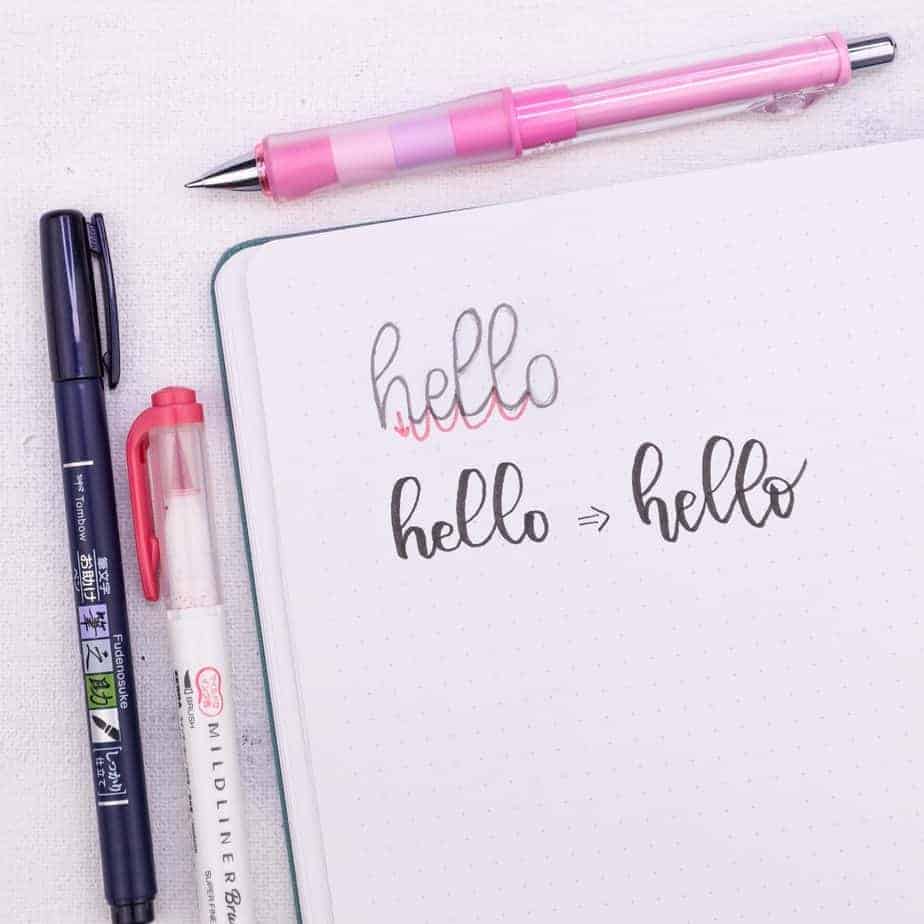
I’ll give you an example with a work hello. Here in pencil is how I would write it if I followed all the rules.
When you try to bounce lettering, you move all the liners, so your letters are suddenly on different levels. In the end, your letters look more fun and vivid.
Here is an example of the guidelines.
As you can see on the left it’s normal calligraphy, and on the right, it’s a bouncy style.
If you want to learn more about bounce lettering and how you can break the rules to create your own – check out this Skillshare course by Peggy Dean, who absolutely is a master of bounce lettering. Her class comes with free practice worksheets.
And remember, you can take all these classes for FREE if you use this link.
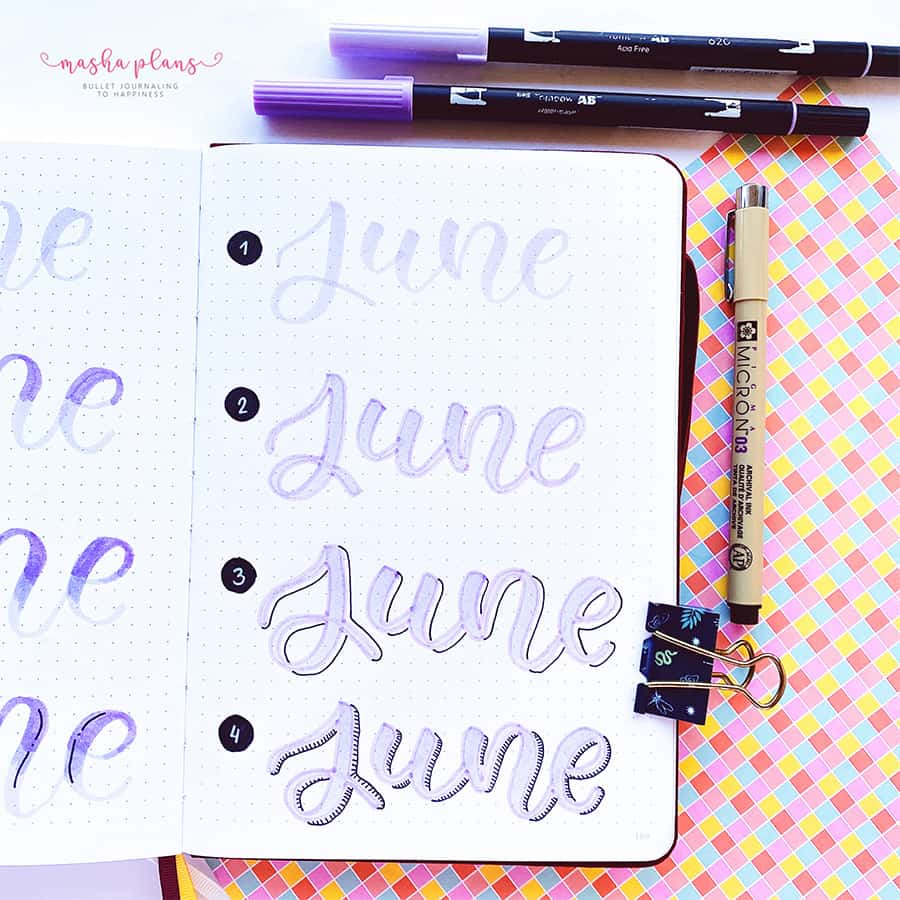
Other Ways To Enhance Brush Lettering
There are other ways to add more spice to your brush lettering, it’s not only about flourishes and bouncing.
One of my favorite and pretty simple ways to do it is by creating a shadow, and there are many creative and different ways to do that, each creating a slightly different effect.
Be sure to check the end of the post for more posts about that technique.
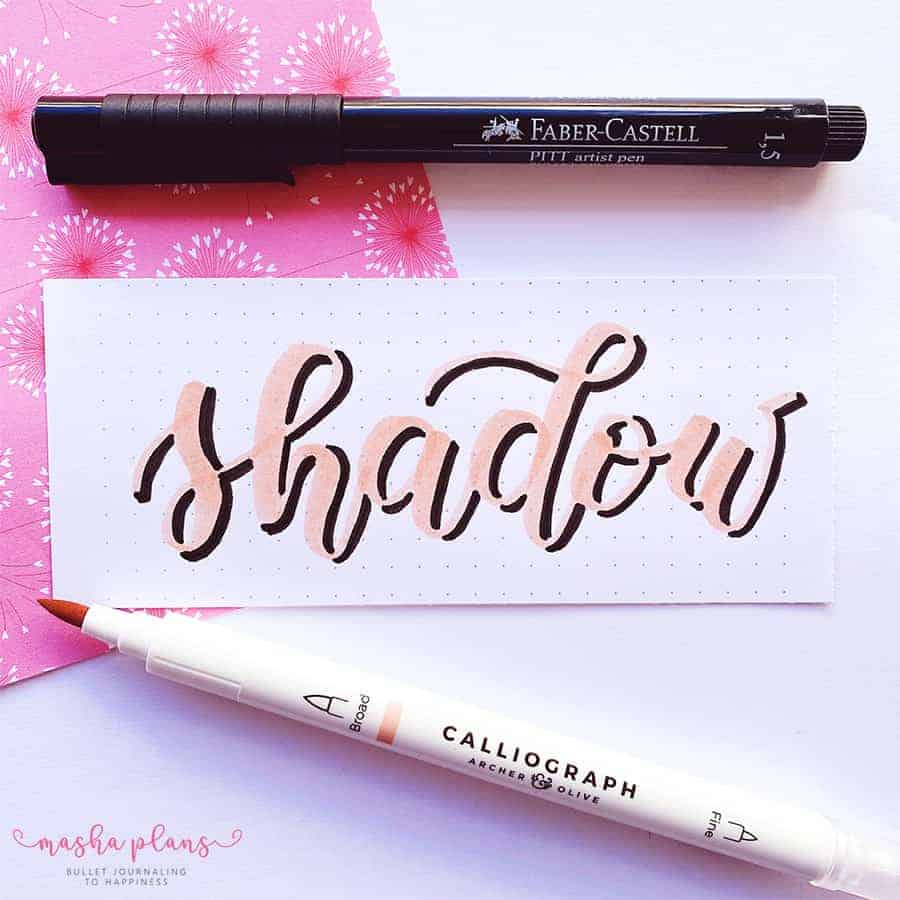
Adding a shadow is pretty much the easiest way to make your brush lettering stand out, and I love how different the effect is even if you just change the color of the pen you use for adding a shadow.
So, I always encourage you to play around with each technique and see what kind of shadow effect fits your style the best.
Apart from playing with ways to ad shadow, there are other tiny things you can do.
It doesn’t have to be that complicated, either. Just play around with lines and colors, and you can come up with some pretty fun effects.
This exact shadow is something I used the most myself, but there are a few more fun ideas you can try.
Again, at the end of the post, I have a post with details on how to create different effects for your lettering.
Tips On Finding Your Hand Lettering Style
Finding your style might take some time and can be a bit frustrating, but it’s all about the journey, so try to enjoy your lettering adventures.
Here are a few tips for building your style:
- Practice. It’s all about practice – the more you do, the more you’ll start seeing some things you like and which ones you don’t really want to see in your lettering.
- Create a vision board. Physical or not, but start creating images of lettering styles you like and that inspire you. It will help you figure out in which direction you’d like to move with your style.
- Study the work of others. Look for inspiration everywhere and each time you find something you like – study it. Look at the style, and the elements they used, and think of what exactly you like about it and what parts you don’t like that much.
- Break the rules. Finally, don’t create a cage around your lettering; bend or break the rules, try different styles and scripts. Even if it doesn’t work, it’ll be a great experience and a lesson for the future.
And there you go, just like that you have all you need to know to become a master calligrapher and develop your own unique style.
Now, just be sure to grab your free worksheets and get started.
Free Brush Lettering Worksheets
Lettering is a fun way to add more creativity not only in your Bullet Journal but in many other crafts and daily situations.
To help you with that, I created some free worksheets and some more resources to make sure you can enjoy this new hobby and master the skill.
More Resources
There is, of course, so much more to learn about brush lettering, and I promised you’ll find more resources at the end of the post, and here we are.
Be sure to check out these blog posts next:
- 31+ Free Printable Lettering And Calligraphy Worksheets
- 7 Easy Ways To Enhance Your Brush Lettering
- 11 Simple Ways To Add Shadow To Your Brush Lettering
>>> Where are you on your lettering journey? What troubles are you having? Let us know in the comments!
Hope this post was interesting. If you find it so, please share! If you enjoy my content and want to show your appreciation, please consider supporting me with a cup of coffee.
And remember: Keep Journaling, and Don’t Be A Blob!


That was dead useful 🤩🤩
Can you please make a lettering course too? I’m just about to finish the doodling one…. It’s awesome!
Glad this was useful!! I might have something for the lettering at some point ;)
Lots of ideas and a refresher course for me. I was an Elementary Art teacher and often helped students with their poster lettering. Guide lines was a major help suggestion but hard for that age to implement.
Glad this was useful!