
Planner Ideas Layout: Daily, Weekly & Monthly Styles + How To Set Each One Up

Every planner ideas layout comes down to one thing: how you divide the page. Since 2018, I have set up more daily, weekly, and monthly pages than I can count, and I can tell you the layout matters more than the decorations.
A good one makes you open your planner every day. A bad one just collects dust.
Below, I break down the main planner layouts by time frame, show how each one works, and walk you through creating it step by step. Then I show you how to make any layout yours. Pick one and try it this week.

Ok, grab your planner and a ruler. You do not need anything fancy for this, just a pen and a page you are happy to experiment on. Before we look at the layouts one by one, I want to show you what is going on behind every planner page.
Once you understand it, you will stop copying layouts and start choosing them. And if a page has ever felt wrong to you, this is where you will find out why. Let’s start there.
Oh, and be sure to scroll to the end to get the FREE printable pages you can use right away and try out different layouts.
This post may contain affiliate links. They will be of no extra expense for you, but I receive a small credit. Please see my Disclosure for more details. Thank you for supporting Masha Plans!
How A Planner Layout Works
No matter how fancy a layout looks, it is built from the same three things.
- Time frame. What the page covers: a day, a week, or a month.
- Structure. How you divide the space: tall columns, wide rows, a grid, a timeline, or boxes.
- Extras. Everything that is not a task: trackers, notes, goals, and decorations.
Once you see these three parts, you can fix any page yourself. When a layout does not work for you, it is almost always the structure, not you. Change how the page is divided, and the same week suddenly feels easier to plan.
That is how I have organized the layouts below: by time frame first, then by how the page is divided.
Daily Planner Layout
A daily layout gives a single day its own full page. It offers the most room for detail, making it the layout to reach for on busy days, even if the rest of your week lives in something lighter. You can set it up in two ways.
The Standard Daily Page
This is the classic: a focus line, a short priority list, and a task list on one page. It is simple, quick to create, and easy to repeat every day.
Best for: Packed days, deadline weeks, and anyone who likes to plan and reflect on the same page.
How to create it:
- Write the date and one line for the day’s main focus at the top.
- Add a “top 3” box for the tasks that must happen today.
- Create a schedule column for appointments, or skip it if your day is flexible.
- Add a task list for everything else, using your usual Bullet Journal symbols.
- Finish with a small notes or reflection box at the bottom.
The Time-Axis Daily Page
You may know this one from Hobonichi-style planners. A vertical timeline runs down the page with the hours marked on the side, and everything sits in the slot where it actually happens. It quickly shows you how much of the day is really free.
If you don’t want to schedule your tasks right away, you can use half a page to just write your to-do list.
Best for: People who like time blocking, have a meeting-heavy schedule, or tend to overestimate what fits in a day.
How to create it:
- Draw a narrow vertical line down the left side of the page.
- Mark the hours you actually use, for example, 7 am to 9 pm.
- Space the marks evenly, so each hour has the same height.
- Block in appointments first, then slot tasks into the free gaps.
- Keep a small box on the right for tasks that do not need a specific time.
Try this twist: use a daily layout only for your busiest days and keep the rest of the week lighter. You do not have to commit to one format.
Weekly Planner Layout
A weekly layout is an overview of your entire week, with daily boxes to plan each day. There are mainly two ways to divide the page, and I have collected plenty of examples in other posts (check the links at the end).
The Vertical Weekly Layout
Each day gets its own tall column, side by side across a two-page spread. This is the layout most people picture when they think of a weekly planner, and it keeps the whole week visible at a glance.
Best for: People with a mix of appointments and tasks, and anyone who likes to see the week as a whole.

How to create it:
- Decide how many days you need: five working days or all seven. Or use 5 days for the workweek and one section for the weekend.
- Use a ruler to divide the two-page spread into equal columns, one per day.
- Write the day and date at the top of each column.
There are many ways to go with a vertical format. The main idea is to use vertical boxes for daily planning. Here is an easier way to set it up.

How to create it:
- Divide each of your pages into equal parts vertically and horizontally.
- Write the day of the week and the date on top of each section for seven days of the week.
- Choose what to do with an extra section (mini calendar, a to-do list, meal plan, habit tracker).
The Horizontal Weekly Layout
Each day is a wide row stretching across the page. Because the lines run left to right, it feels natural for writing longer tasks and notes.
Best for: People who write a lot per day, love to-do lists, or find narrow columns too cramped.
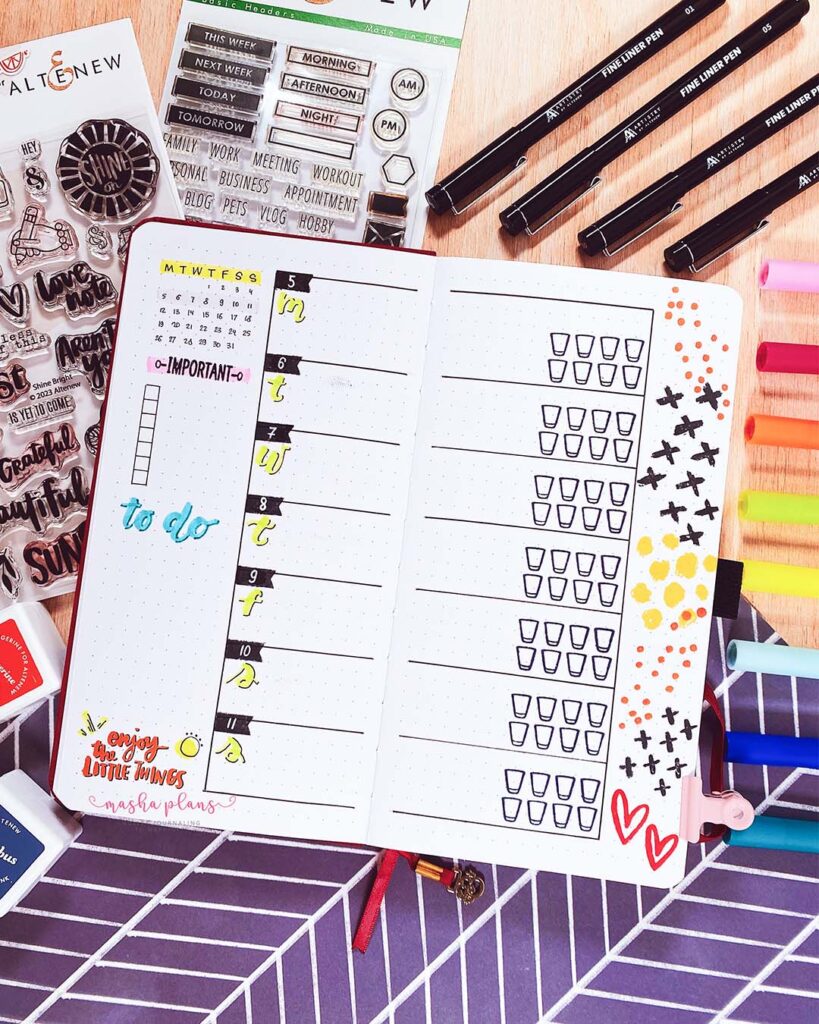
How to create it:
- Divide one page into five to seven horizontal bands of equal height.
- Draw a small box on the left of each band for the day and date.
- Use the rest of each band for tasks, events, and notes.
You can also set up a horizontal weekly layout. After all, as the name implies, the main idea here is to have your daily boxes horizontally
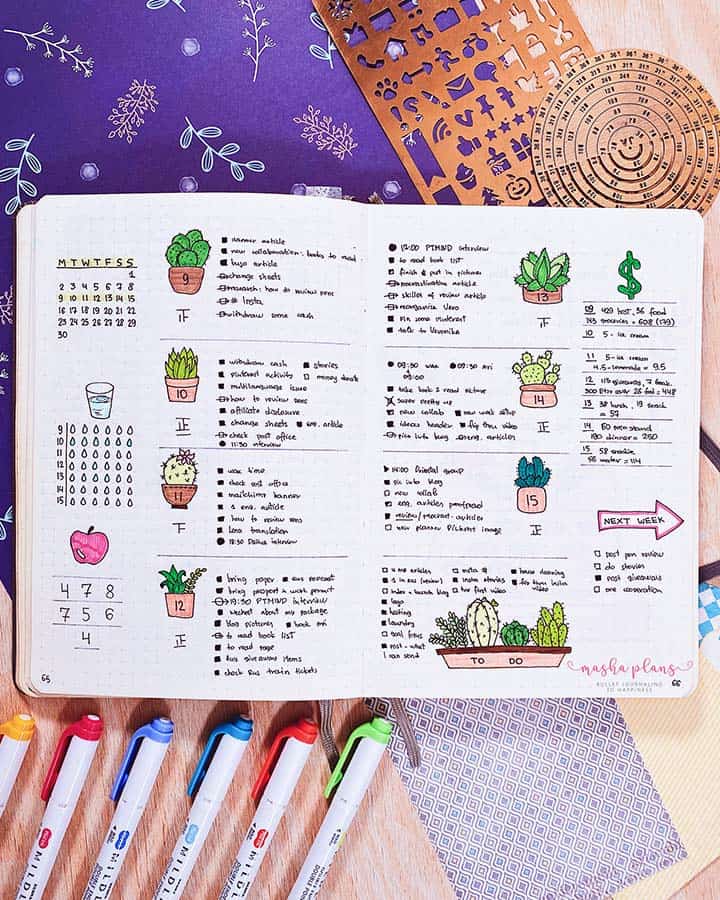
How to create it:
- Divide each page into four horizontal parts (if you want 7 days of the week + a special section for a to-do list) or into three parts (if you want 5 days of the week + one section for the weekend).
- Add dates to each section (or add both dates and the days of the week).
- Use the space on the sides of the page for anything extra you need, decorations, or make your daily sections full-page.
Monthly Planner Layout
The monthly layout is your bird’s-eye view. It is where you plan ahead instead of day by day, so it needs space for dates, deadlines, and the few things you actually want to get done that month.
The Calendar Grid
The traditional calendar: seven columns for the days of the week and five or six rows for the weeks.
Best for: Anyone juggling deadlines, events, birthdays, or long-term goals.

How to create it:
- Draw a grid with seven columns and five or six rows.
- Number the dates, and mark weekends so they stand out (in this example, I used a different color for the weekend boxes).
- Add a side panel for monthly goals and top priorities or a to-do list.
- Write recurring events, deadlines, and birthdays in the boxes right away.
The Vertical Date List
Instead of a grid, you write the dates in a single column down the page and add events next to them. It is quicker to set up, easy to scan, and leaves room for longer notes.
Best for: Minimalists, beginners, and anyone who finds a grid too cramped.

How to create it:
- List the dates of the month down the middle of the page, with the first letter of each weekday.
- Mark the weekend in light grey so it stands out more.
- Use the top of the page for your monthly to-do list, or create it on the next page.
How To Customize Any Planner Layout
Once you pick a base layout, these small changes make it yours. You can combine them with any layout above.
Add A Color System
Pick three or four colors and give each one a meaning: work, home, health, social. Use the same colors in every layout, and your eyes will learn to read the page in seconds.
Build In Trackers And Small Widgets
A narrow strip is enough for a habit tracker, a water tracker, a mood log, or a gratitude line. Place it along the bottom or side of any layout, so it never steals space from your tasks.
You can add lots of small elements to your planning; think about what you might need help with and add it to your planner pages.

Choose Header And Date Styles
Headers are the fastest way to change a layout’s personality without touching the structure. Try banner headers, a white-on-dark date box, simple lettering, or a tiny doodle next to each day.
For example, see below an entire page with different header styles. Pick the one you enjoy and see how they can transform your planning layouts.

Which Planner Layout Should You Pick?
Now that you’ve seen how the layouts work, the next question is the hard one: which should you use? There is no single right answer. The best layout matches how your days actually look, not what looks best in a photo.
So before you pick, think about your usual week. Do you have a lot of appointments, or mostly tasks? Do you write a few words per task, or full sentences? Do you plan day by day, or do you like to see the big picture first? Your answers point you to a layout.
Here is a quick way to match them:
- Your days are packed: daily, or the time-axis version. Both give each day enough room for appointments, tasks, and notes.
- You want the whole week at a glance: weekly vertical. You see every day side by side, so it is easy to spot a crowded Thursday before it happens.
- You write long tasks and notes: weekly horizontal. The wide rows give your handwriting room to breathe.
- You plan ahead and track deadlines: monthly. It shows you what is coming, so nothing sneaks up on you.
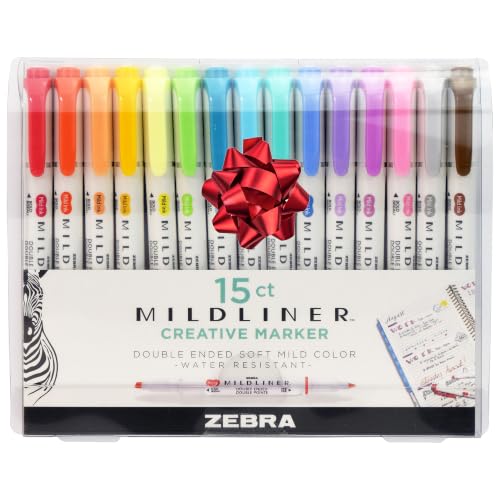


And remember, you do not have to pick just one. Many people use a monthly layout to plan ahead and a weekly layout for the day-to-day, and you can add a daily page only when a week gets busy.
If you cannot decide, try a layout for one week. If you skip it three days in, change the structure, not your habits. It is almost never you; it is the page. A layout should make planning easier, so if it feels like a chore, change it and move on. That is the beauty of planning on paper.
Get The Free Planner Pages
Want ready-made pages for these layouts? Grab the free printables in my Resources Vault, with 50+ printables you can print and use right away.
If you don’t have access yet, you can always sign up in the form below.
Once you confirm your subscription, you’ll get the password to get 50+ free Bullet Journal printables, stickers, and worksheets to use right away.
More Resources
Want to go deeper on a specific page? Check out these posts next:
>>> Which planner layout will you try first? Let me know in the comments!
Hope this post was interesting. If you find it so, please share! If you enjoy my content and want to show your appreciation, please consider supporting me with a cup of coffee.
And remember: Keep Journaling, and Don’t Be A Blob!