
Bujo Weekly Spread Layout Ideas: 7 Layouts And How To Create Each One

A Bullet Journal weekly spread is the page I open more than any other, and the one I have redrawn the most since I started journaling in 2018.
The good news is you don’t need to invent a new design every week. Every weekly is built from the same few structures: columns, rows, one page, a cut-out Dutch door, and a few more.
Once you know how to put together a BuJo weekly spread layout, you can draw it in minutes and then make it look completely different with doodles, washi tape, or color.
In this post, I will show you seven layouts, how to create each one, and how I and other creators customize them. Grab a pencil, and scroll to the end for free printables.

Here’s how this post works. For each layout, I’ll explain what it is, give you the steps to create it, and show you a few ways to customize it, some from my own journals and some from other creators.
Same bones, completely different looks. For more weekly inspiration, check the end of the post for links to several gallery posts with plenty of weekly layouts to inspire you.
The Dot Math Behind Every Weekly Layout
Every layout below comes down to the same trick: counting dots. Count the dots across your page, count the dots down, and divide. That is the whole secret to straight lines and (mostly) equal boxes.
Say your page is 24 dots wide. Four equal columns means six dots each. Say it is 36 dots tall. Four equal rows means nine dots each. Count your own journal, though, because every notebook is a little different.
A few habits that save me every single time:
- Pencil first. I do everything in pencil, and I still sometimes end up with 8 days a week or two Tuesdays. Without the pencil, it would be a lot more.
- Choose what you need from your weekly. Think through any extra elements you want included – a mini calendar, a habit tracker, a meal plan, a to-do list. There are many options; think about everything you need in your weekly layout.
- Decide your weekend before you draw. I often don’t use my Bullet Journal much on weekends, so some weeks I skip the Saturday and Sunday boxes and give the weekdays more space.
Plenty of useful stationery items can speed up the process (and even skip some of the math), so I’ll mention those. I definitely used extra tools the most, especially since math isn’t my strongest suit.
This post may contain affiliate links. They will be of no extra expense for you, but I receive a small credit. Please see my Disclosure for more details. Thank you for supporting Masha Plans!
Stationery Recommendations
You can create every one of these layouts with a pencil and whatever pen you already own. But a few supplies make the setup faster and more fun:
- Pencil, eraser, and ruler. The basics for every weekly and really any page in your Bullet Journal.
- Fineliners. These are the basics for every Bullet Journal page, perfect for drawing and doodling. I recommend Sakura Pigma Micron, which also come in different nib sizes for a variety of line thicknesses.
- Markers. If you want to add color, I always recommend Crayola Super Tips; they come in 100 colors, are affordable, and work for brush lettering, so it’s a win-win-win!
- A light grey marker. You will see why in the boxless layout at the end.
A few layouts need special tools, like a circle maker or a craft knife. I’ll mention those right where you need them.
Now I did mention that there are other tools that can help make the setup process easier, so here are some of my favorites:
- Grid Guide stencil – a guide with measurements to evenly divide your layout into as many parts as you need. This is really the best Bullet Journal tool for your weekly spreads and any other layout.
- Weekly stencil for vertical setup and for horizontal setup. These let you set up your weekly layouts in seconds, no math required.
- Weekly spread decor stencil – stencil with banners and other decorative and functional elements to help you customize your weekly layout.
Ok, now you’re fully equipped; let’s make sure you are fully informed so you can choose the right weekly layout for you.
Which Weekly Layout Should You Choose?
Before you sit down with your journal, think of what the upcoming week looks like. A week with a big deadline needs a layout with lots of room for tasks. A quiet week can get away with one page. Here is a quick cheat sheet:
| Layout | Pages | Best when |
| Vertical columns | 2 pages | Busy days and long task lists |
| Horizontal rows | 2 pages | You write longer daily entries |
| One page | 1 page | Short on time or using a bigger journal |
| Dutch door | 2 pages + cutting | You want extra space without extra pages |
| Running list | 1 to 2 pages | Tasks you must do this week but not on a set day |
| Circle | 1 to 2 pages | You feel like getting creative |
| Boxless | 1 page | Low time, low energy weeks |
Ultimately, these are my opinions based on how weekly spreads work for me. You might find that one format or the other one works for you for different reasons.
So I’ll share my words as suggestions, but ultimately you’ll only know what works after you try it.
But don’t worry, this post gives you everything you need to make trying new layout ideas easy as pie. Let’s dive in!
Vertical Columns Weekly Spread Layout
When I think of a weekly, this layout comes to mind first, and looking back, most of my layouts are vertical. Every day gets its own tall column, so you have plenty of room for a long task list. It is perfect for busy days.
How to create it in the easiest way:
- Count the dots across one page and divide by four. That gives you four columns per page, so eight across the full spread.
- Lightly mark the column lines in pencil, leaving a dot or so between columns so your writing doesn’t touch the lines.
- Add a header for each daily box so you can mark the day of the week and/or the date.
- Use seven columns for the days and the eighth for your weekly to-do list or notes.
- Trace the lines with a fineliner, erase the pencil, and use the space at the bottom of each column for a tiny extra like a water tracker, the weather, or a section for your daily gratitudes.

Of course, this is the easiest layout; you can play around with this format a lot.
For example, you can create vertical daily boxes stacked next to each other, which makes your daily sections longer but narrower.
This approach works well if you don’t mind a one-weekend section instead of separate Saturday and Sunday sections; that way, each page needs only three boxes.
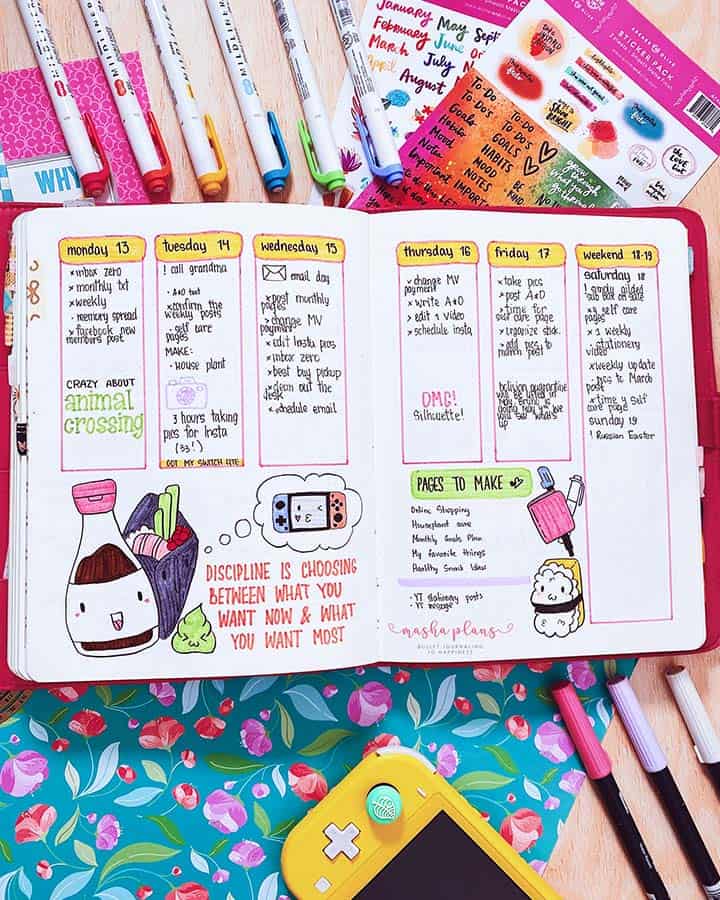
Ok, let me show you a few more weekly spreads from my own journal and from other creators, so you have more inspiration to customize this format and make it your own.
Stationery Themed Weekly

There are plenty of ways to customize your weekly spreads, and one of the easiest is to play with your daily boxes’ design.
In this layout, sicne I was doing a stationery theme, I changed each daily box into a different stationery pattern.
Depending on the theme, you can use a different color for each box or add a different doodle to each section. The sky is your limit!
Floral Long Vertical Weekly
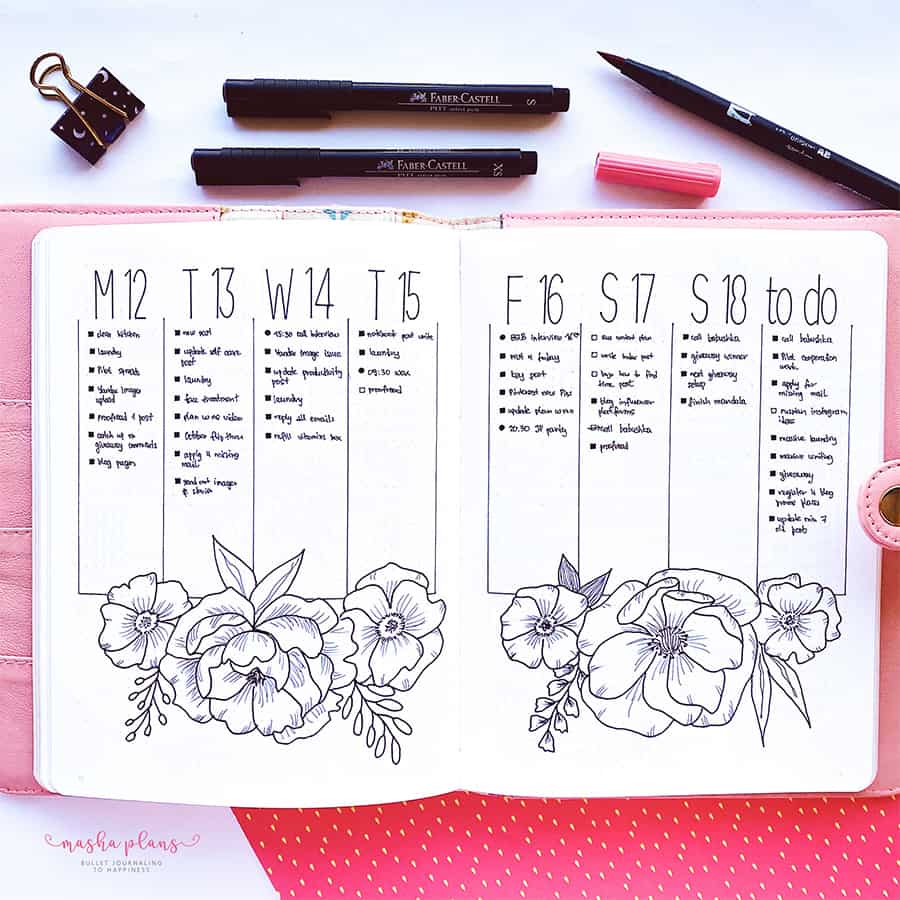
I kept the columns minimal and spent most of my time on the flowers along the bottom. I drew them following a tutorial from this book. Remove the flowers, and you’ll have plenty of space for a meal plan, a habit tracker, or a weekly review.
Coffee Vertical Weekly

I did a coffee theme for November, with a coffee doodle and a quote on each page. I kept the weekly boxes simple and played with the empty space around them. If you use other elements in your weeklies, that space works for those too.
Note that this weekly spread was created in my Nuuna journal, which has a smaller dot grid and a larger size than a usual dot grid journal. So it might look very different in your own BuJo.
Aesthetic Vertical Weekly
Same column structure, completely different mood. The creator framed the weekly with little metallic botanical doodles and other elements to create a very aesthetic look, while still leaving plenty of space for the extra sections they need in their weekly post.
Like this creator, I’d definitely recommend using a Sakura Gelly Roll metallic pen for any shiny elements you want to add to your journal page.
Cute Vertical Weekly
The format here is very easy, and the creator made it stand out with colorful decorations and neat headers. Proof that headers alone can change the whole feel of a page.
Horizontal Rows Weekly Spread Layout
A horizontal weekly spread feels closest to the original Bullet Journal approach, just framed into two pages. Each day gets a wide strip, which is great if you focus more on your days and need space for longer daily entries.
How to create it:
- Count the dots down your page and divide by four. That gives you four horizontal bands per page, so eight rows across the spread.
- Pencil in the row dividers. Seven rows are for your days, and the eighth is for your weekly review and to-do list.
- You do not even need to draw all the lines. On horizontal pages, a header for each row is enough to divide the week into sections.
- Write the day headers, trace everything in fineliner, and erase the pencil.

That is the main concept, but of course there are plenty more ways to play around with this format, so let’s look at a few different layouts.
Halloween Horizontal Weekly With Daily Trackers
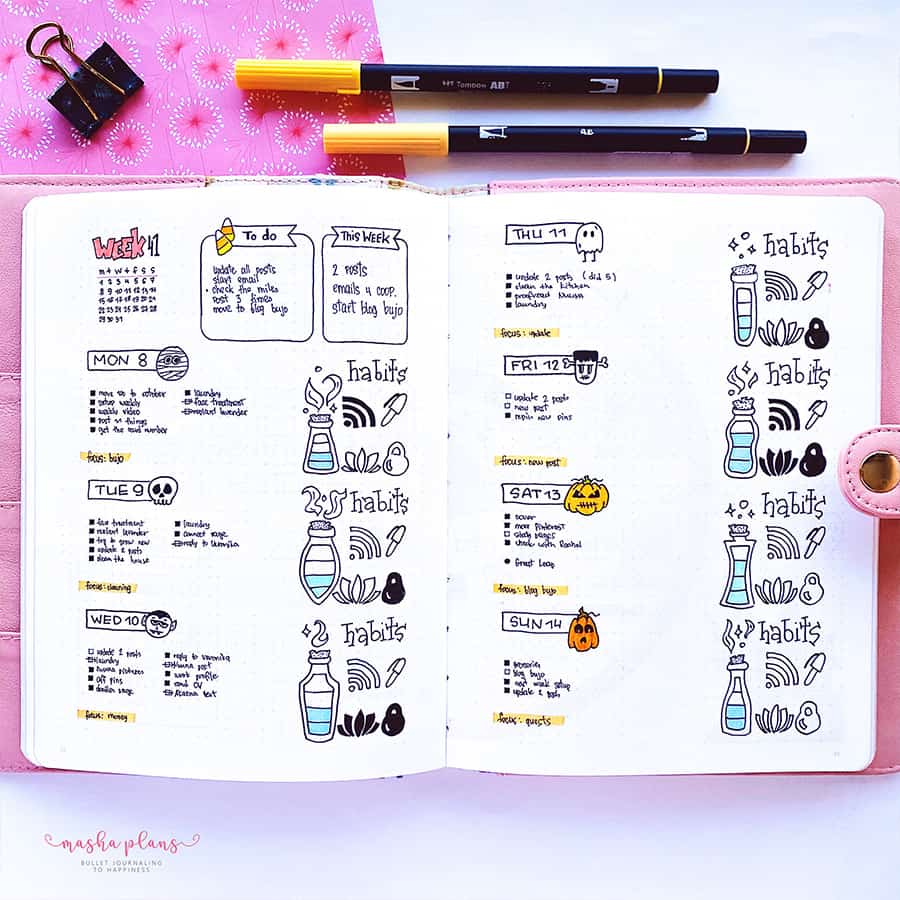
I was experimenting with habit trackers that October, so every day got its own big doodly tracker: bottles for water intake, and little doodles for writing, yoga, and cardio.
Honestly, I did not find the daily trackers that useful. But adding a focus item for each day worked really well, so I always knew my priority no matter what else was on the list.
Simple Horizontal Weekly Layout
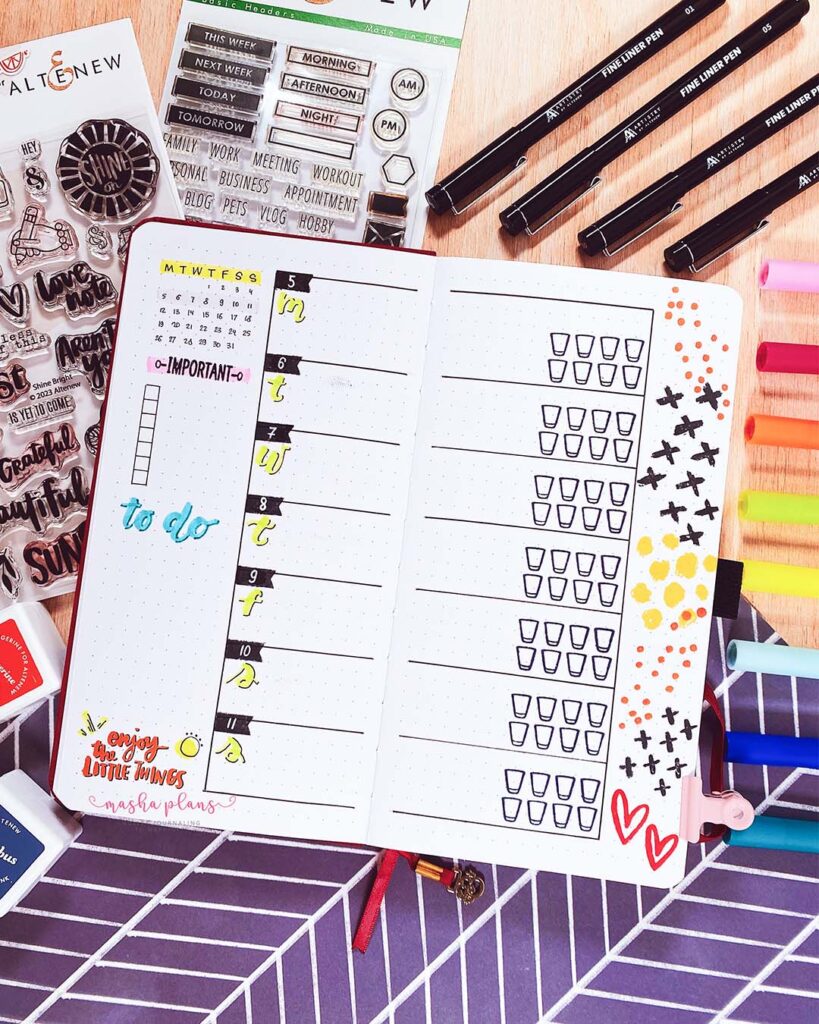
Here is a different approach for a horizontal weekly spread: instead of drawing four horizontal sections on each page, use both pages to create several horizontal sections in a row.
I decorated this weekly layout mostly with stamps. Stamps are a great way to speed up your setup, and there are so many different ones, from purely decorative to functional.
Here I used these Amy Tangerine stamps for decorations and these stamps for the headers and little water trackers.
Horizontal Productivity Weekly
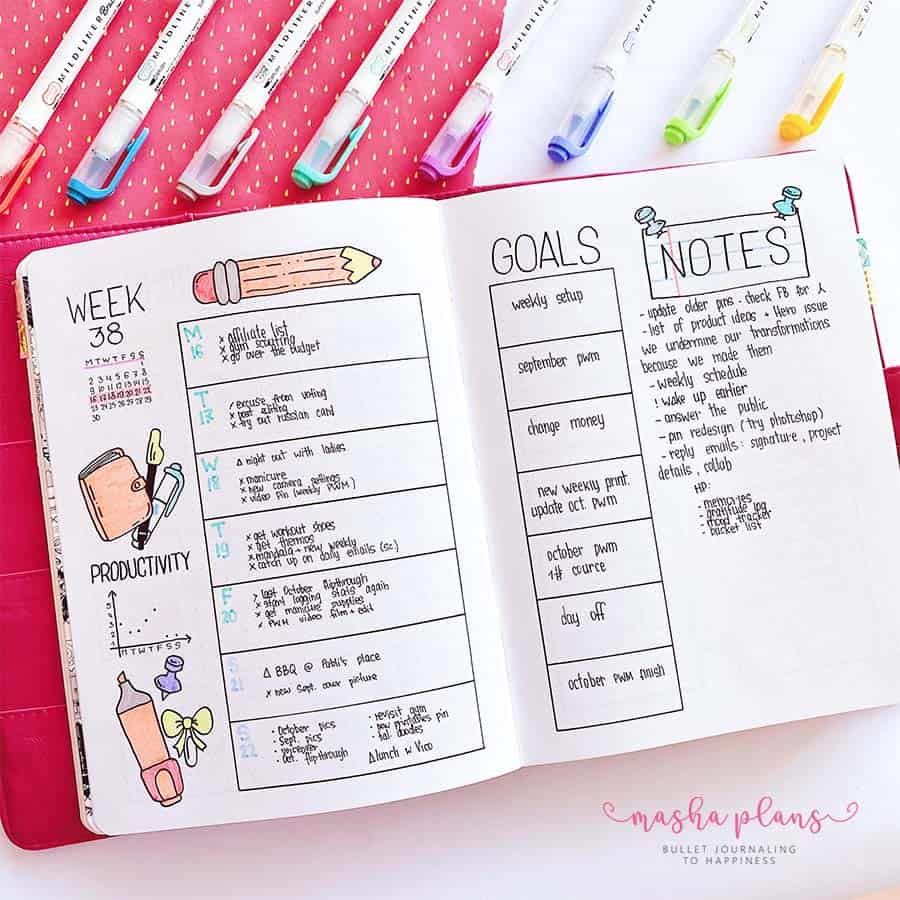
This stationery-themed weekly is probably my favorite weekly spread of all time. It has a special area for my daily focus and still leaves room on the side for doodles and trackers. That week was so well organized and productive that I really should go back to this format.
One Page Weekly Spread Layout
A one-page weekly is my absolute savior when I am short on time. It works especially well in a larger journal.
My Nuuna journal is bigger than a traditional A5 and has a smaller dot grid, so each page has plenty of room. It also lasted me a year and a half the first time, and with one-page weeklies, I think my second one could last two years or longer.
How to create it:
- Divide the page in two. Use the left side for a big weekly to-do list and anything else you need, like a small habit tracker or weekly review. Use the right side for your daily boxes.
- Count the dots down the right side and divide them among your days. If you skip the weekend, five boxes will feel much less crowded than seven.
- Add any other elements you need, like a mini calendar.
- Add your header, trace in fineliner, and erase the pencil.

But honestly, this is just one way to do a one-page weekly spread. There are so many styles and layouts you can create!
Below are some of my approaches, along with pages from other creators, sicne they might have different needs and include different elements.
One Page Weekly With Washi Tape And Stickers

This was the week I tried to strongly bring stickers and washi tape into my planning routine. The combination created a gentle, aesthetic look, and it came together quickly.
A cool trick I used here, and definitely recommend, is to use washi tape as a banner and stick a sticker with the days of the week on top.
Stationery Themed One Page Weekly

So far, I’ve shown one-page weekly spreads without well-defined boxes, but here is an example where I drew boxes for each daily section.
This is also a pretty simple setup – you just divide a page into four parts horizontally and in half vertically.
Weekly Page Plus Decoration Page

A different approach to the one-page weekly: one page for the planning and the facing page just for decoration. Love the font here, too.
In this layout, the creator combined the weekend into one section, so each workday gets a larger section.
Geometric One Page Weekly
Geometric shapes add so much interest to a one-page weekly. Geometric shapes are a great way to add interest to your layouts – the neat lines look very clean and organized, plus they are pretty simple to draw, especially if you use rulers or stencils
A circle ruler, like this Helix one, would work beautifully here.
Dutch Door Weekly Spread Layout
I know cutting into your Bullet Journal sounds scary. I was terrified the first time I tried it. But a Dutch door gives you extra planning space without extra pages.
Like a house door that opens at the top while the bottom stays closed, you cut parts of the page so some sections stay visible and others you can flip through.
How to create it:
- Plan your weekly first. Decide which sections should always be visible and which ones will live on the part you cut.
- Choose vertical or horizontal. I recommend starting with vertical, because horizontal cutting gets you close to the binding, which is tricky.
- Mark everything in pencil: where you will cut and which elements go on which side. Do the calculations before you take out the craft knife.
- Cut, then set up your weekly spread. A craft knife, a paper cutter for straight vertical cuts, and a corner rounder to match your other corners all help.
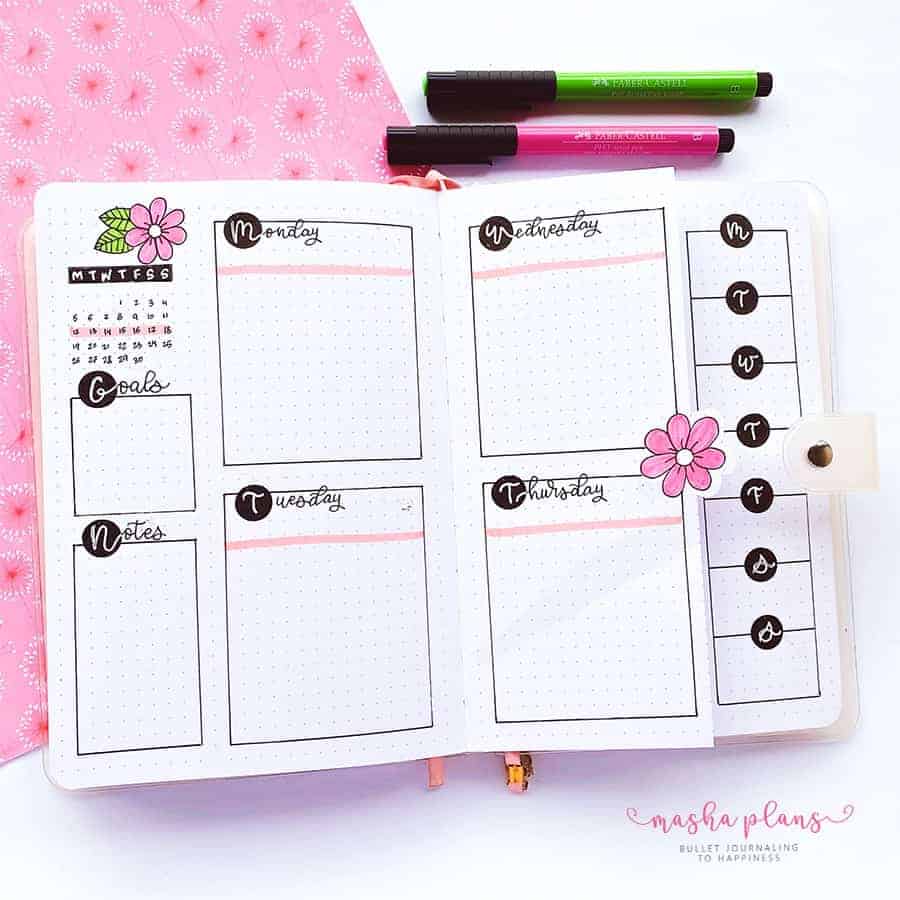
One more thing: cutting can unbalance your journal a bit. If you want to use several Dutch door weeklies, cut them all differently and don’t use them every week.
Personally, I don’t use Dutch door weekly layouts, so below I’m adding inspiration from other creators who absolutely crushed this format.
Black And White Dutch Door Weekly
People often use a Dutch door for more day-to-day planning space, and this is a great example. The creator still added a weekly overview at the top, so you can see the whole week no matter which day you’re planning.
It seems like they plan the sections at the top and use those cut-around Dutch door sections for daily journaling. This can be very beneficial; you can see what you journaled about and how it coincided with what was happening in your life at the time.
Cut A Custom Shape
Your cut does not have to be a straight line. Here, the creator cut a shape to fit the daily boxes, and the colors and small illustration on the flap make it feel like a complete piece of art.
Rounded Corners
Notice how the creator rounded the corners of the cut-out parts so they blend with the rest of the journal. This tiny detail makes the whole spread look polished.
You can absolutely do it with scissors, but you can also use a corner rounder for a clean and even look.
Running List Weekly Spread Layout
This layout is for weeks when you know certain things must get done, but you can’t assign each task to a specific day yet. On one side, you have a to-do list; on the other, seven columns for the days. When a task is completed, you mark it in the column of the day you did it.
How to create it:
- Use one side of the spread for your to-do list. Write each task once, on its own line.
- On the other side, draw seven columns, one for each day of the week.
- When you complete a task, mark it in that day’s column on the same line. At the end of the week, you can see exactly what happened and when.
- Use any leftover space for a water tracker or other small trackers. If you need more room, move your trackers to their own page.

Two-Column List With Events

You can customize each weekly layout idea to your personal planning needs.
When I used this layout, I modified it a bit. Each day column was two squares wide, and my list had two columns: one for tasks and one for events. That way, if a task and an event landed on the same line, I could mark both on the same day.
As you can see, I’m using a little square for a task and a little circle for an event.
Running To-Do List
A big task list on one side, then each day you mark which of the tasks you completed. Perfect for quick and easy weekly planning.
Circle Weekly Spread Layout
I made my circle weekly just because I wanted to play around with something different, and it was super fun. For me, a circle weekly means the setup includes large circular elements. It gives you plenty of space for tasks, plus lots of room around the circle for whatever else you need.
How to create it:
- Get a circle tool: a Helix circle maker, a circle stencil, or a compass.
- Choose your style: one big circle with extras outside, a big circle in the middle with daily sections coming out of it, or seven small circles for the days.
- For the big-circle style, divide the circle into eight wedges instead of seven. Each wedge is 45 degrees, which is much easier to measure than a seven-way split, and the extra wedge becomes your weekly to-do list.
- Put your monthly calendar, weekly habit tracker, or weekly overview in the space around the circle.
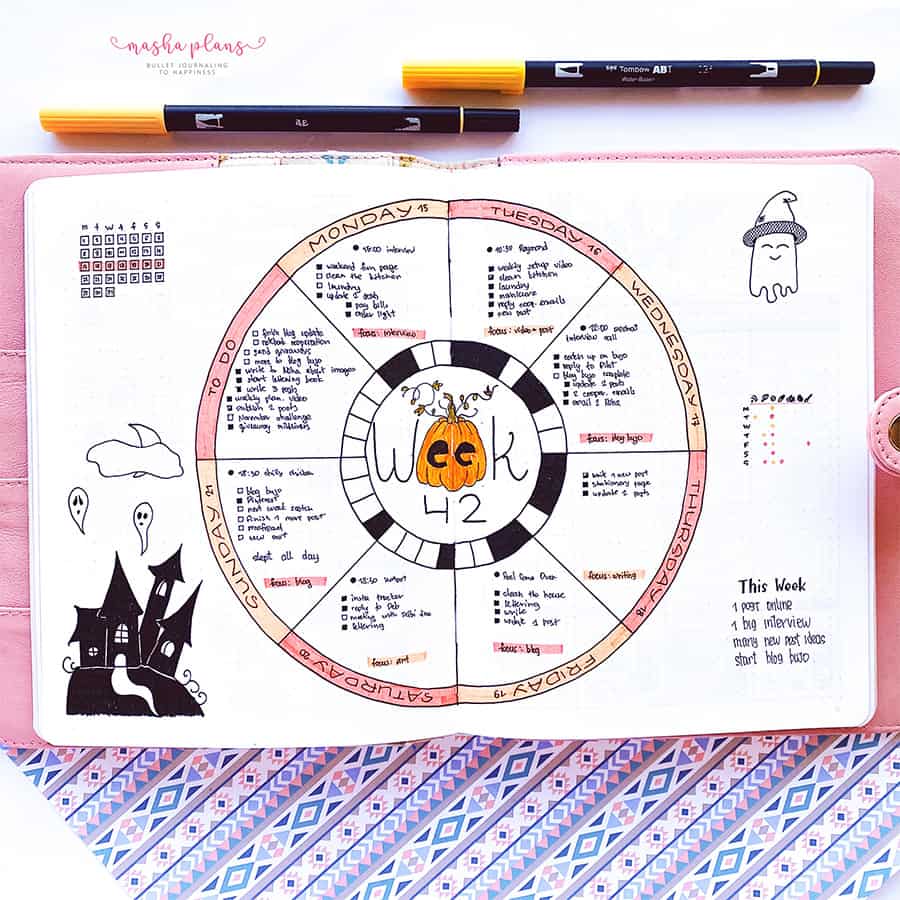
Personally, I found it a fun format to play with, but not really something that worked for me, so the inspirations below are mainly from other creators.
Pink Floral Circular Weekly
The whole week sits inside the circle, and the outside is used for any extra elements you need. It is probably the first thing I picture when I think of a circle weekly.
There is, of course, a lot of space left still, and this is where you can get creative. This artist used half the space for the important sections they need and added a quote to the other half.
Mandala Circle Weekly
If you want a big circle in the middle of your weekly, a mandala is the perfect choice. Drawing one is also a very mindful, calming way to spend your time.
That way, you also don’t have too much space to ponder how to fill it out.
Sticker Circle Weekly
This page looks absolutely stunning, and the creator got the effect with stickers. A few stickers can make a circle weekly look far more elaborate than it really is.
Plan As You Go Weekly
Last but not least is the traditional Bullet Journal weekly spread layout, or rather, the original system planning method.
It’s not really a full-on weekly spread. Surprisingly, weekly planning wasn’t really part of the original method. But thankfully, we can all play around and customize the main concepts to what works for you.
However, I wanted to introduce this concept here as well, sicne it is also a legitimate way to plan your week, and maybe it will work for you.
The concept is simple: you create the header for your day and start planning. After the day is done, on the next empty line, write the next day’s header and start planning there. That way, each day gets enough space for everything they need.
You could fit the entire week on two pages, or maybe not if you’re having an extra-busy week.
I use this format only occasionally, usually when I can’t find time to set up a proper weekly layout. But for me, this isn’t the most productive format, so it’s more of a last-minute resort.

Add-Ons You Can Bolt Onto Any Layout
Your weeklies are like a set of Legos. You can mix and match pieces and add only what you want.
I can’t tell you exactly what to add to your weekly spread; it depends on your planning needs. So I can give you some ideas to get you started and thinking in the right direction, but you get to try what might work and see if it helps.
Here are a few add-ons that work with any of the layouts above:
- A daily focus. One line per day for your top priority. It worked so well for me that I always knew what mattered most, no matter what else was on the list.
- A meal plan. A small area for each day so you plan that part of your day and know you’re getting proper meals, not last-minute takeout.
- Time blocks. Perfect when you need an hour-by-hour plan for your days.
- A weekly review. A few lines at the end of the week to look back at what happened.
- A done list. A list of what you accomplished each day. It takes just a few minutes and helps you feel more accomplished and less overwhelmed.
Not sure which layout is for you? Just try them all and see what works right now. I change mine all the time, and finding your perfect weekly takes a while.
Free Bullet Journal Weekly Spread Printables
Before you go, do not forget to grab your free printable weekly pages! Simply go to the Resources Vault and download them. They are a great way to test a layout before you commit to drawing it.

If you don’t have access yet, you can always sign up in the form below.
Once you confirm your subscription, you’ll get the password to get 50+ free Bullet Journal printables, stickers, and worksheets to use right away.
If you’ve never used printables before, be sure to check my post How To Use Printables In Your Bullet Journal.
It’s pretty basic, and you can find all the supplies you need in my post Supplies For Using Bullet Journal Printables.
More Resources
Want more weekly ideas? I have got you covered. Check out these blog posts next:
- 19 Weekly Layout Bullet Journal Ideas
- 9 Types Of Bullet Journal Weekly Spreads You Need To Try
- 19 Bullet Journal Dutch Door Weekly Spread Inspirations
>>> Which weekly layout are you going to try first? Share with us in the comments!
Hope this post was interesting. If you find it so, please share! If you enjoy my content and want to show your appreciation, please consider supporting me with a cup of coffee.
And remember: Keep Journaling, and Don’t Be A Blob!