How To Dot Journal: Step By Step Guide For Beginners

Bullet Journaling for beginners (or dot journaling as we will talk about it here) can feel like a lot to take in at first — and one of the most common stumbling blocks is simply not knowing where to start. That’s exactly why I’m writing this guide.
If you’ve been curious about dot journaling for beginners and just need someone to walk you through the whole thing from page one, you’re in the right place.
I’ve been using a dot grid journal since 2018, and I still remember how exciting — and slightly overwhelming — it felt to crack open that first notebook. The dots staring back at you, all that beautiful blank potential, and absolutely no idea what to do with it.
Sound familiar? This post will change that. We’re going to go through every essential page of a dot journal setup, step by step, so by the time you finish reading, you’ll have a fully functional journal ready to go.
And the best part? It doesn’t have to take hours or look like something out of a Pinterest dream board. Your dot journal works for you — not the other way around.

Dot journaling is a fantastic way to get your life organized, work on your goals, and generally build a more meaningful and balanced life.
It’s basically a blank slate that lets you create something that works for you and the need you have at the current stage of your life.
It sounds overwhelming for sure, but it is also exciting – you get to create your custom companion! And this guide will help you get started easily, so let’s dive in.
Oh, and if you want more, be sure you check the end of the post for the FREE course on how to start a Bullet Journal, where I share the setup step-by-step and share even more resources.
Ok, let’s dive in!
This post may contain affiliate links. They will be of no extra expense for you, but I receive a small credit. Please see my Disclosure for more details. Thank you for supporting Masha Plans!
What You Need To Start Your Dot Journal
Here’s the thing about dot journal supplies: technically, all you need is a notebook and a pen. Seriously, that’s it. No fancy brush pens, no pastel markers, no washi tape collection. If you have a dotted notebook and something to write with, you are ready to go.
That said, having a few good tools makes the whole experience more enjoyable. Here’s what I actually recommend:
• A dotted notebook. The dot grid is what makes this system so versatile — those subtle dots guide your lines without boxing you in like a traditional ruled page. My absolute favorite notebooks right now are by Archer & Olive — the paper quality is incredible, markers barely ghost, and they just feel wonderful to write in. Use my code MASHA10 for 10% off.
• A black fineliner. This is your workhorse pen. I love the Sakura Pigma Micron range because they come in different nib sizes, and the ink is waterproof and fade-resistant.
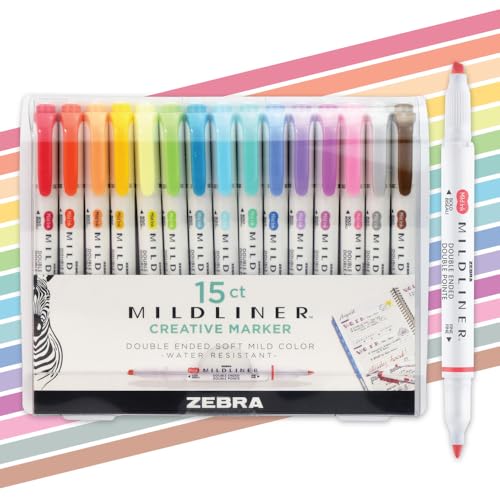
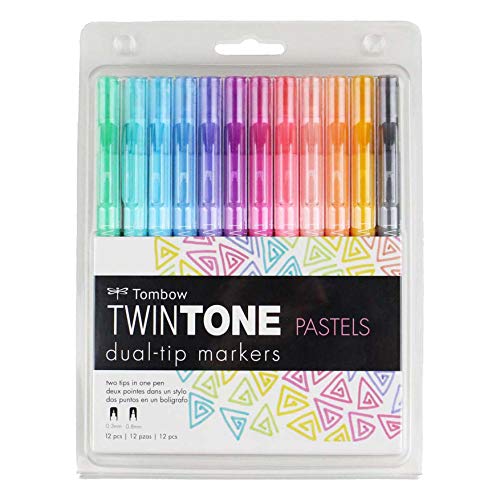
• Color pens or markers (because I love using colors so much!). Totally optional, but Crayola Super Tips are a beloved budget favorite, and Tombow Dual Brush Pens are the gold standard if you want to try your hand at lettering.
• Small extras. A mechanical pencil for sketching layouts before you ink, a good eraser, and a small ruler will cover all your bases.
One more tip before we move on: do a pen test page at the back of your new notebook before you commit to anything on the main pages. You’ll immediately see which pens bleed through or ghost on your specific paper, which saves a lot of heartbreak later.
A Few Things To Keep In Mind Before You Begin
Before we get into the actual pages, I want to share a few principles that will save you a lot of frustration:
• You do not need every page. The pages I’m sharing today are widely used because they work, but none of them are mandatory. Skip anything that doesn’t feel right for you.
• Add everything to your index as you go. It’s a habit that takes a few weeks to stick, but once it does, finding any page in your journal becomes effortless.
• Don’t let perfectionism block your start. Your first pages will not be your best pages, and that is completely fine. Simple and functional beats beautiful and unfinished every single time.
Keep this in mind as you embark on your journaling adventures, and you’ll be able to create and customize a wonderful tool that will change your life!
How To Set Up Your Dot Journal: Step-by-Step
In this guide, we will not overwhelm you – we will get through the basic pages.
These are the core pages I recommend for any new dot journal. Think of them as the skeleton of your system — once they’re in place, you can layer on whatever extra collections and spreads you want.
And just so we’re clear: there’s no dot journal police. None of these pages is compulsory. They’re popular because they’re genuinely useful — but this is your journal, and it should serve your life.
(If you want some more pages and to dive deeper into all the things you can do with your dot journla, check out the end of the post for more links. There is no way I can fit it all in one post ;)
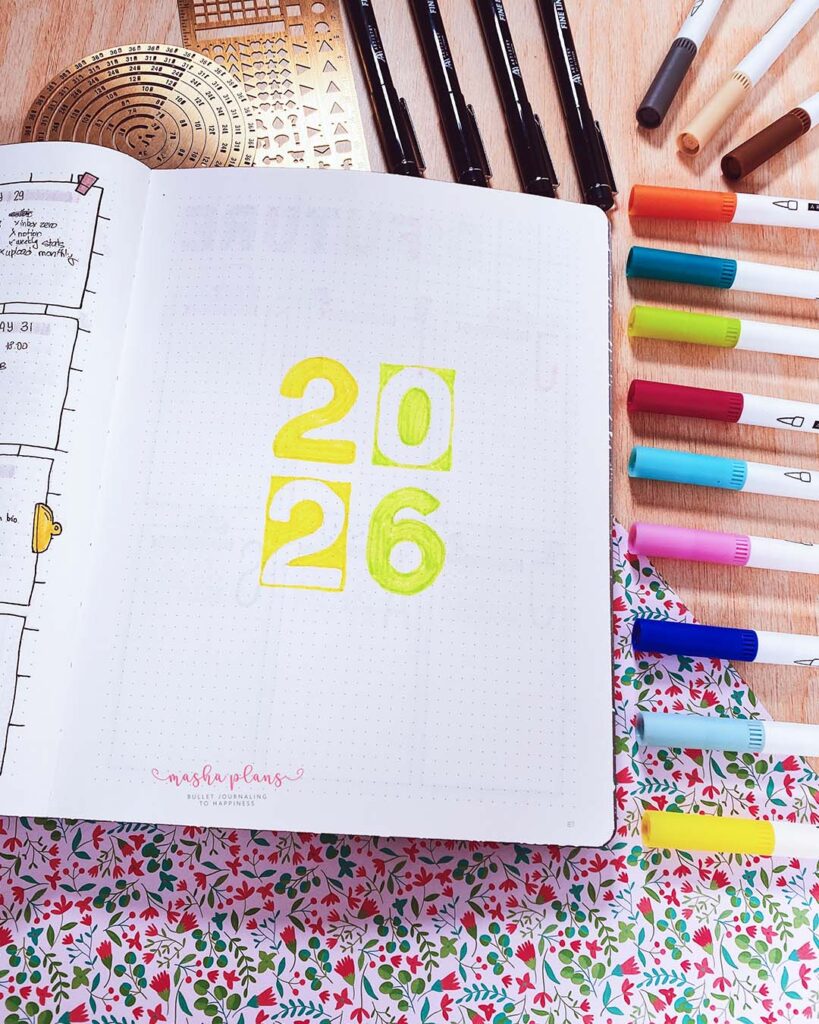
Step 1: Cover Page
I know some people skip this one, but I always include a cover page, and here’s why: it marks the beginning of something intentional. There’s something about personalizing that first page that shifts your mindset from “this is just a notebook” to “this is my journal.”
At a minimum, jot down the year (and the date you finish the notebook when you get there). This turns each dot grid journal into a personal archive you can actually reference later.
Here are a few more ideas:
- Your name and the year
- A word or intention for the year (like “growth” or “presence”)
- Simple botanical doodles or a zentangle pattern
- A few words on what your goals are with this journal and why you’re starting it
If a blank cover page fills you with dread (I see you, perfectionists!), just skip it for now. Come back once you’ve loosened up in the journal, and you’ll find it much easier to tackle.
Step 2: Key Page
Your symbol key is the decoder ring for your dot journal. The Bullet Journal method uses what’s called rapid logging — a shorthand system for capturing tasks, events, and notes quickly.
It basically means that you add a symbol to different types of entries so you can easily isually understand the information.
The key is where you write down what each symbol means, so you can refer back to it.
The classic symbols look like this:
- • for a task
- – for a note
- O for an event
But feel free to make these your own completely. Want to use a heart for gratitude notes and a star for priorities? Go for it. The key is yours to design.
Keep this spread near the front and left-hand side of your notebook so it’s easy to find while you’re still getting familiar with your symbols. As a beginner, you’ll probably flip back to it more than you expect!

A tip here – do not overcomplicate things. If you create 15 different symbols for all kinds of entries, chances are you will end up confused, not really using them, and maybe a bit overwhelmed. Try two or three main ones, and then as you plan, see what other symbols and categories you might need.
Step 3: Index
The main idea with a dot journal is that you can create a new page with something you need at any place in your journal, and so you need a way to easily find information among all these layouts.
The index is the navigation system of your dot journal. Think of it as a living table of contents that you fill in as you go, noting down every spread and collection you create along with its page number.
My biggest tip here: leave more space than you think you need. You will fill it up faster than you expect, and running out of index room mid-journal is genuinely painful.
If your notebook comes with pre-numbered pages, you’re already ahead of the game. For un-numbered notebooks like my go-to Archer & Olive, just number the pages yourself as you go — it takes barely any extra time and makes a huge difference.
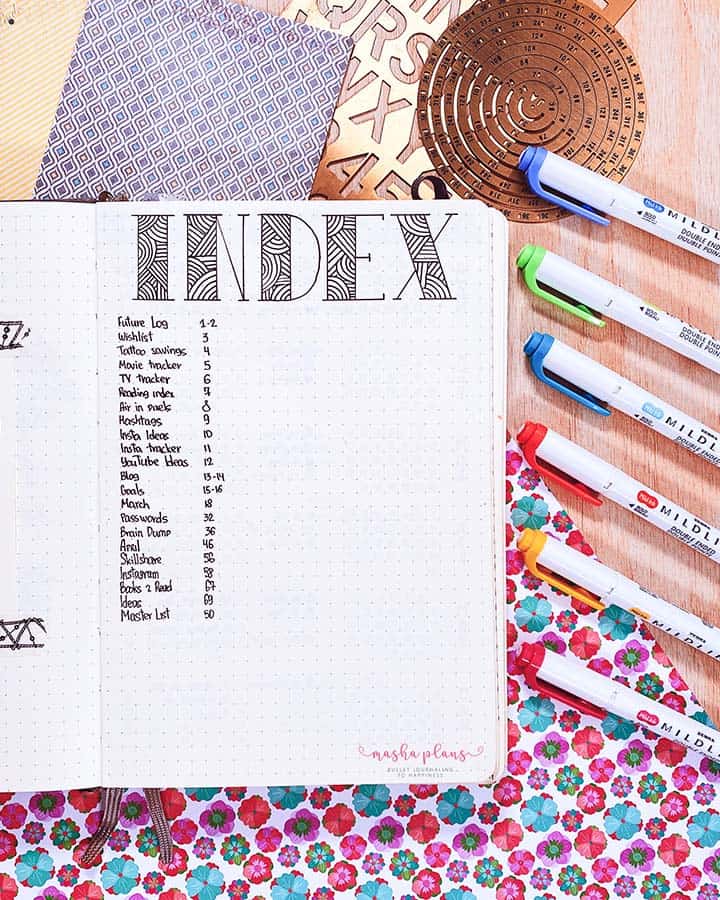
A small but important note: I actually don’t use an index in my own dot journal these days. If you run a very streamlined setup focused on daily planning with minimal collections, you might find you don’t need one either. But for most setups, especially if you include lots of extra collections and reference pages, the index is a game-changer.
Step 4: Year-At-A-Glance (Future Log)
This is where you park all the dates, events, and reminders that live in the future. It’s basically a bird’s-eye view of the year ahead, so nothing slips through the cracks.
Useful things to log here:
- Birthdays and anniversaries
- Holidays and time off
- Planned trips and vacations
- Upcoming appointments or deadlines that are already on your radar
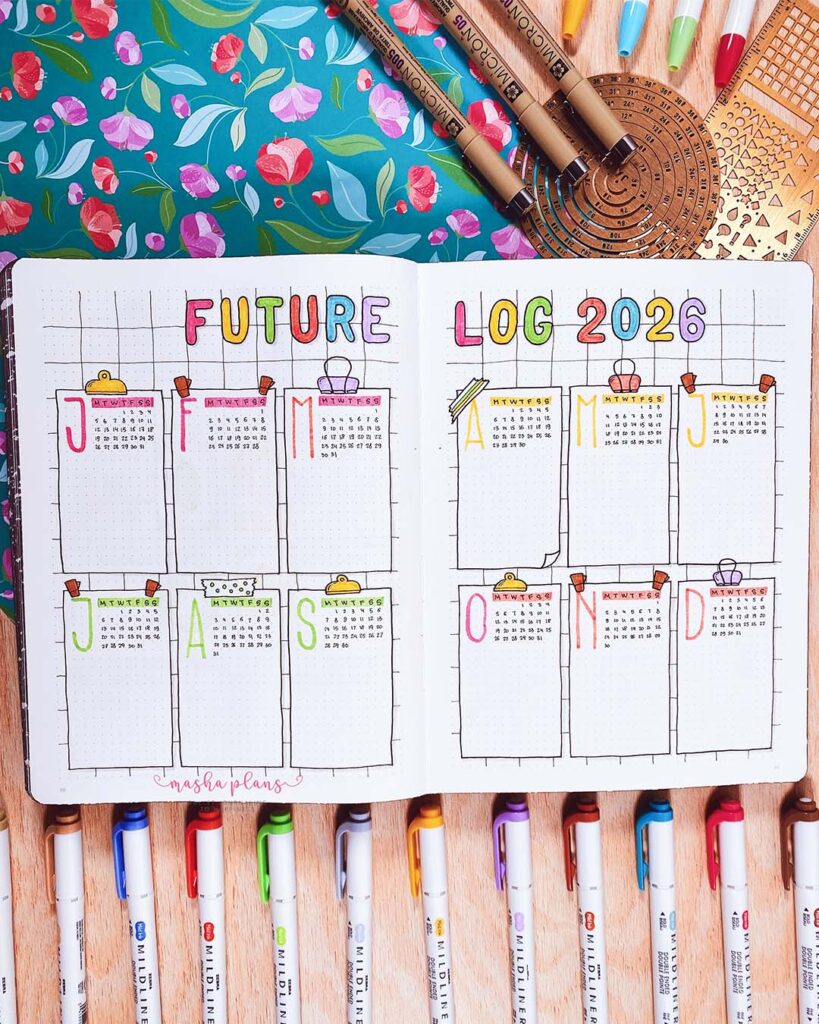
You don’t have to map out the full twelve months if that feels like too much. When I started a midyear dot journal in August, I only set up the remaining months and added more when needed. Work with your actual situation, not an imaginary ideal one.
For layout, you can go as simple or as visually appealing as you want. A mini monthly calendar per spread looks gorgeous and is satisfying to fill in. Or you can just write the month name as a header and list dates below it. Both work perfectly.
Step 5: Monthly Spread
The monthly spread is where the big picture meets the details. It’s your overview of the coming month — a calendar or date list on one side, paired with a master to-do list or monthly task dump on the other.
Every dot grid journal user seems to develop their own take on the monthly layout over time. Some people love a traditional grid calendar. Others prefer a vertical list of dates with space for notes beside each one. I’ve tried both at different seasons of my life, and both have their merits.

Alongside the calendar, your monthly to-do list is where you brain-dump everything you need or want to get done that month. Having it all in one place — rather than scattered across daily pages — gives you a really satisfying overview and makes it much easier to prioritize.
If you’re someone who loves themes and aesthetics (no judgment, same!), a monthly cover page is a wonderful addition. It signals the start of a fresh chapter and gives you a creative outlet before diving into planning mode.
Step 6: Weekly Spreads and Daily Pages
Now we get to the heart of your day-to-day planning. This is where your dot journal lives and breathes.
Weekly spreads give you a seven-day overview, with each day getting its own section for tasks and notes. The layout is entirely up to you — some people prefer a traditional horizontal grid, others like a vertical column for each day.
If your weekends are low-key, merge Saturday and Sunday into a shared section to free up space elsewhere on the page.

Daily logs take a different approach: instead of a week-at-a-glance, each day gets its own full page (or portion of a page).
If you have a really busy schedule with lots of details to capture, this format gives you much more breathing room. Just write the date at the top and start logging — tasks, events, notes, thoughts, whatever the day brings.
Not sure which one suits you? Try both for a couple of weeks and let your actual habits tell you the answer. There’s no right choice, only what works for how you live.
And remember: if a layout isn’t clicking, you can change it at any time. Your dot journal is a living document that should evolve with you.
When You Fill Up Your Dot Journal: Moving On To A New One
The moment you finish a notebook is such a good one! It feels very satisfying that you’ve stuck to your journla for all this time, and there is so much excitement for a new, beautiful journal.
Before you crack open the next, take a few minutes to do a proper review of your outgoing journal.
Look through your spreads and ask yourself:
- Which pages did I actually use consistently?
- Which pages did I set up and then ignore?
- Are there any collections I need to migrate forward?
- What would I do differently this time?
Migrate any active collections to your new journal. Leave anything that’s complete or no longer relevant in the old one — it doesn’t need to come with you. Your new journal is a chance to iterate and improve, not just copy everything over wholesale.
And before you start filling pages, don’t forget that pen test at the back! New journal, new paper, and what worked in your last notebook might behave differently here.
And there you go, here is all you need to know to get started with dot journaling TODAY! No matter what month or day of the week it is, just open your journal and start planning.
Free Course: Dot Journaling For Beginners
As I mentioned before, I actually have a FREE course to help you get started on dot journaling.
It walks you step by step through each page and shares more resources and details on all the things you can do with your journal.
Simply sign up in the form below and get started crafting a perfect companion for your life journey.
More Dot Journal Resources
Setting up your dot grid journal is just the beginning. There are so many directions you can take your practice from here — habit trackers, mood logs, gratitude pages, goal-setting spreads, creative collections.
The possibilities genuinely never run out.
Here are a few posts to dig into next:
- Dot Journaling Ideas For Beginners
- First Page Bullet Journal Ideas For Beginners
- 9 Bullet Journal Tips For Beginners That Make A Difference
>>> Where are you in your dot journaling journey? Are you setting up your very first one, or starting fresh with a new notebook?
Share in the comments — I’d love to hear what spreads you’re most excited to try!
Hope this post was interesting. If you find it so, please share! If you enjoy my content and want to show your appreciation, please consider supporting me with a cup of coffee.
And remember: Keep Journaling, and Don’t Be A Blob!


